
THE LANDROVARDO PROJECT
The basis of this project is a Rapier 127 purchased in 2004 for £6,500. The vehicle was built in 1990
and had 11,000 Km. on the clock from new; the Royal Air Force chaps had obviously serviced
it reguarly, wether it needed it or not and done an average of 800 miles per year; it does more these days!
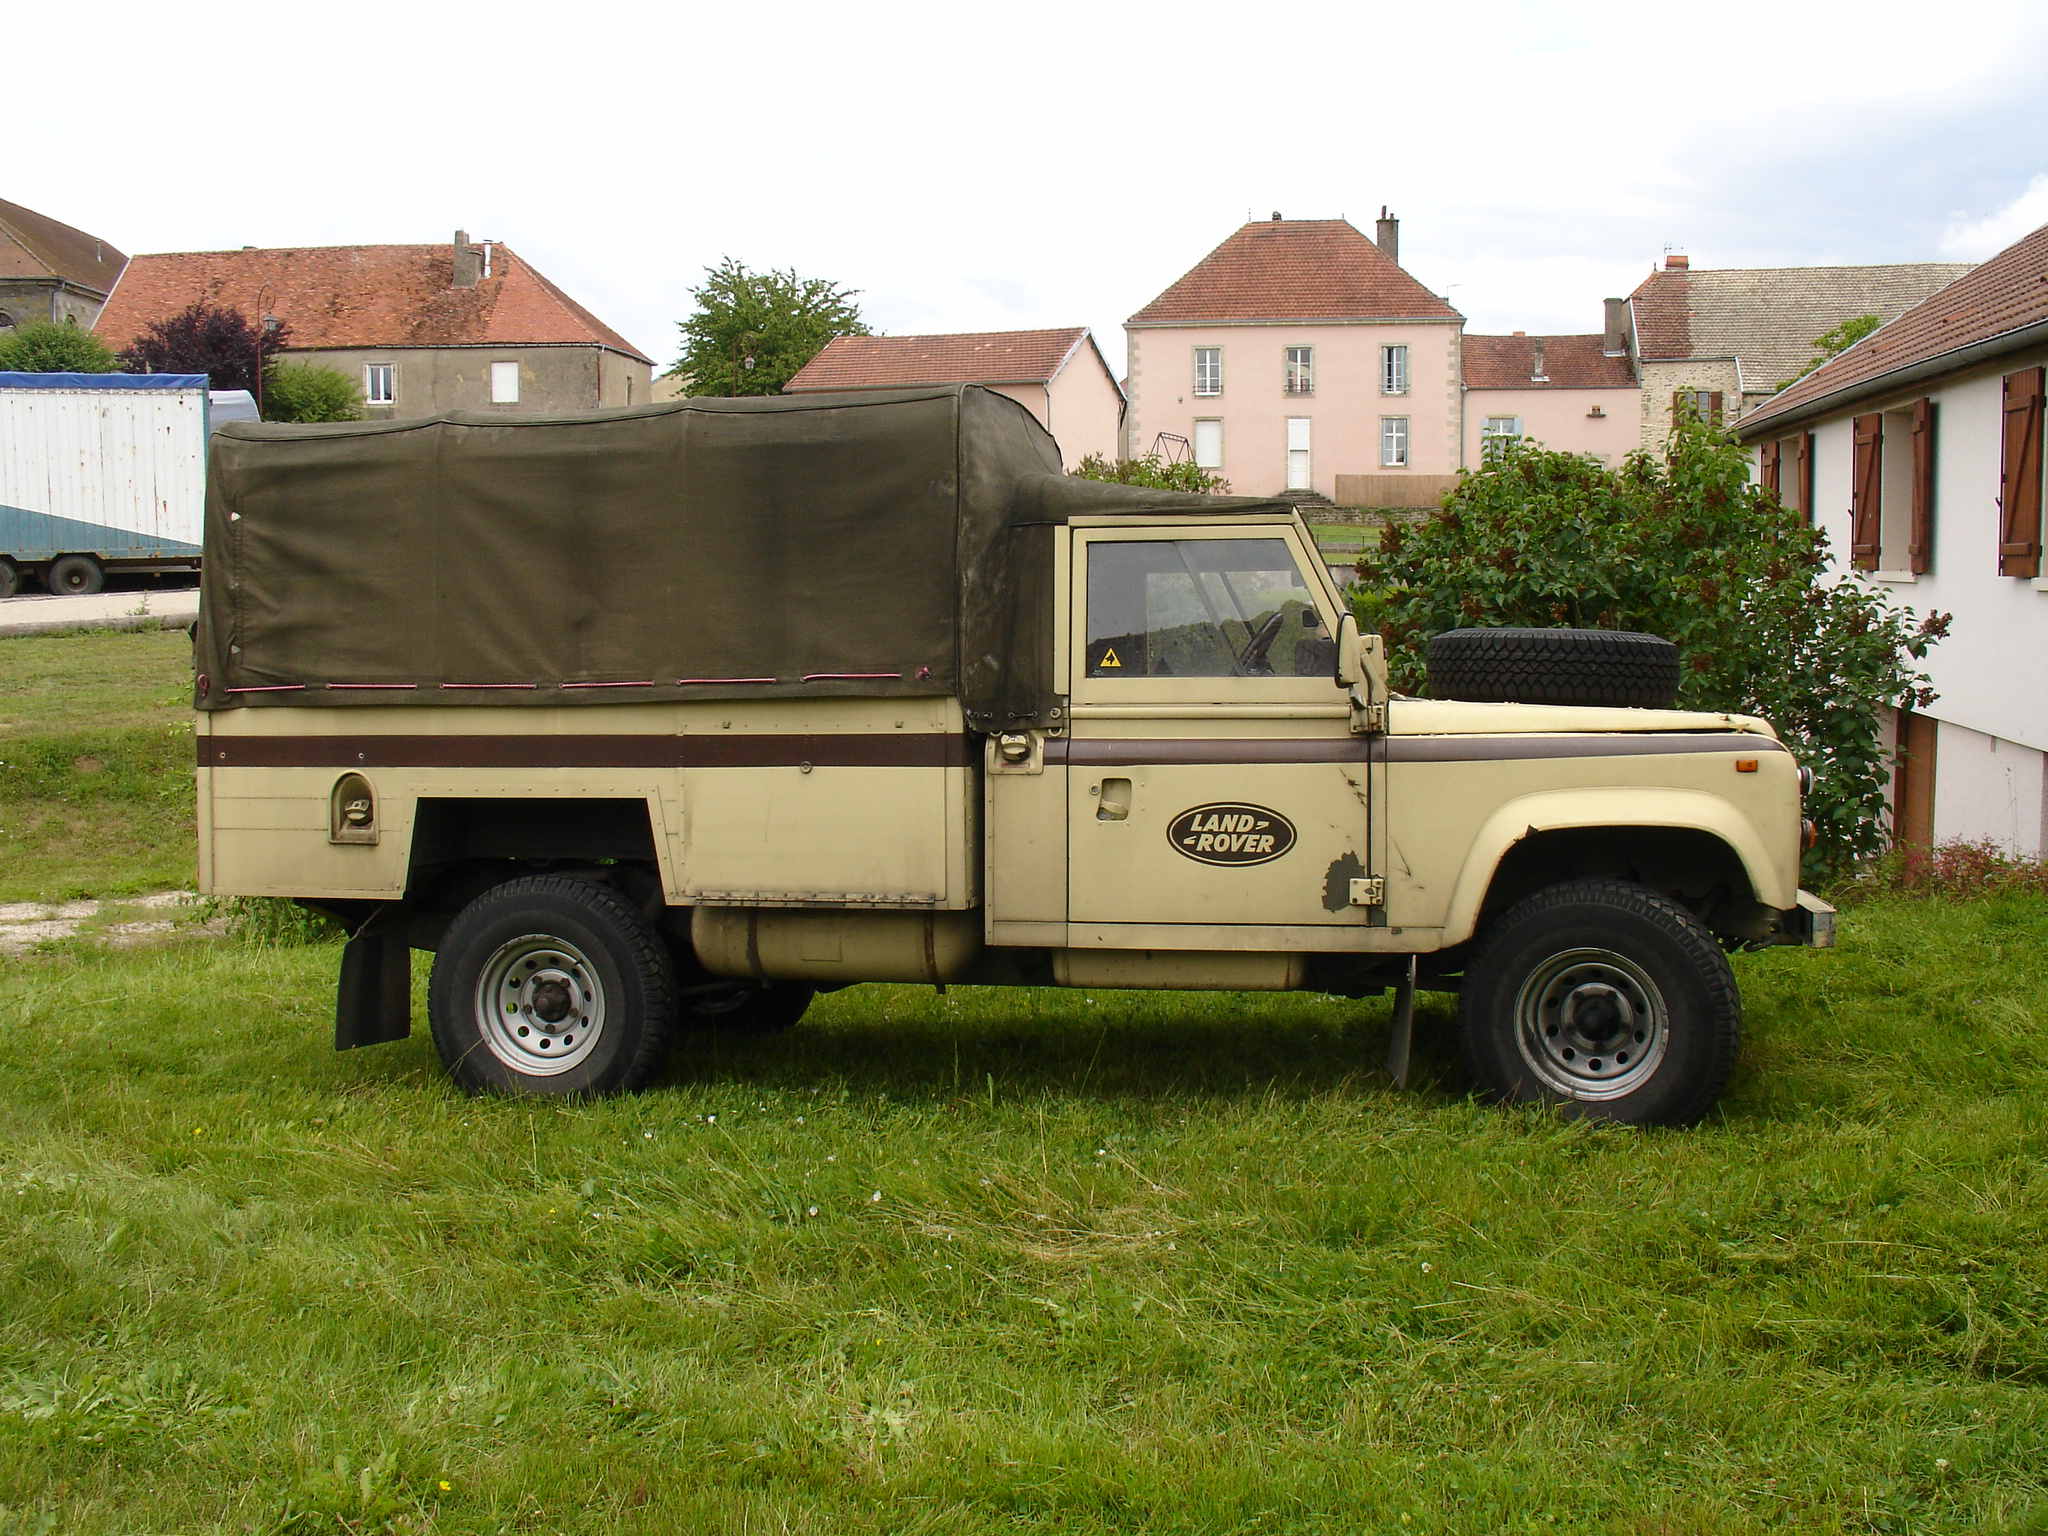
My late wife, Cathie said she would not be seen driving it around in it's original black and olive drab so
I got hold of some NATO. sand coloured paint and a bit of brown Dulux which, combined with some stickers
gave the vehicle the colour scheme you see above. We fitted a bed and some kitchen cupboards with a gas cooker,
a portable bog and off we went campervanning around Europe. The vehicle was and still is, very handy for accommodation
while at festivals and has probably paid for itself on saved B&Bs and hotel bills alone.
The 3.5 litre V8 gives little more than 12 to the gallon
( 1 litre for 5 Km. ) so my first concern was to fit it up with an LPG. conversion including two 50Litre tanks, one
slung on each side under the body ( this fits well on the 130 inch chassis [they call it 130 on the civilian
models but it is actually only 127 inches between the axles, hence the MOD name] ) which makes it about the same cost to run per
mile as an equivalent diesel. For those of you interested in the details, I bought a gas conversion kit for an old Volvo estate which we used to
run and when we replaced it with the Land Rover I just
swapped the conversion over, everything fitted perfectly; all we had to add to it was an extra tank to get the range up. The Land Rover will do
about 500 Kms. between refills; filling stations are abundant in the UK, France and Italy to the point that I have them showing up on the sat nav
as we go. Starting is no problem on gas, there is no need to start on petrol, no backfires, no choke required, just turn the key and go.
The system is not computer controlled and tuning is done manually which may not be the perfect answer
but very nearly and the extra £1000 or thereabouts, of a modern
computer controlled system, would take forever to pay back with the little improvement it gives
Performance is about 90% of that achieved on petrol and quite adequate; now that the streamlining is improved, cruising at 70 is very comfortable.
Minimal pollution, the inside of the exhaust pipe is as clean as if it were new!
The old canvas top, as can be seen from the original photo had a vertical section behind the cab which acted as a sort of air dam and by removing
this we have reduced the frontal area of the vehicle by about one third of a square metre. This makes the finished article much more economical
to run and one can have a conversation while driving and be heard!
The load box on the 127 Rapier is about 250mm. longer than the chassis and a good 100 mm. wider than the normal Landrover item so the bed will
fit sideways across the vehicle ( if you are a 6 footer or more this is a bit tight ) which is the key to sucess as it leaves you with a sensible
working area for the kitchen but, sadly, not quite standing headroom.
We had been cosidering a new top for the vehicle and I thought that a wooden one would give us a pleasant atmosphere inside
- I hate sleeping in tin boxes, however deluxe they might be - and make it a bit slipperier. Last april we were visiting Claire's
sister and spotted some Gipsy bow top vardos going up to the appleby horse fair and were instantly captivated. Two months of waking
up in the night to make notes of ideas hatched and a good deal of time on the CAD program in the laptop got us to the design you are about
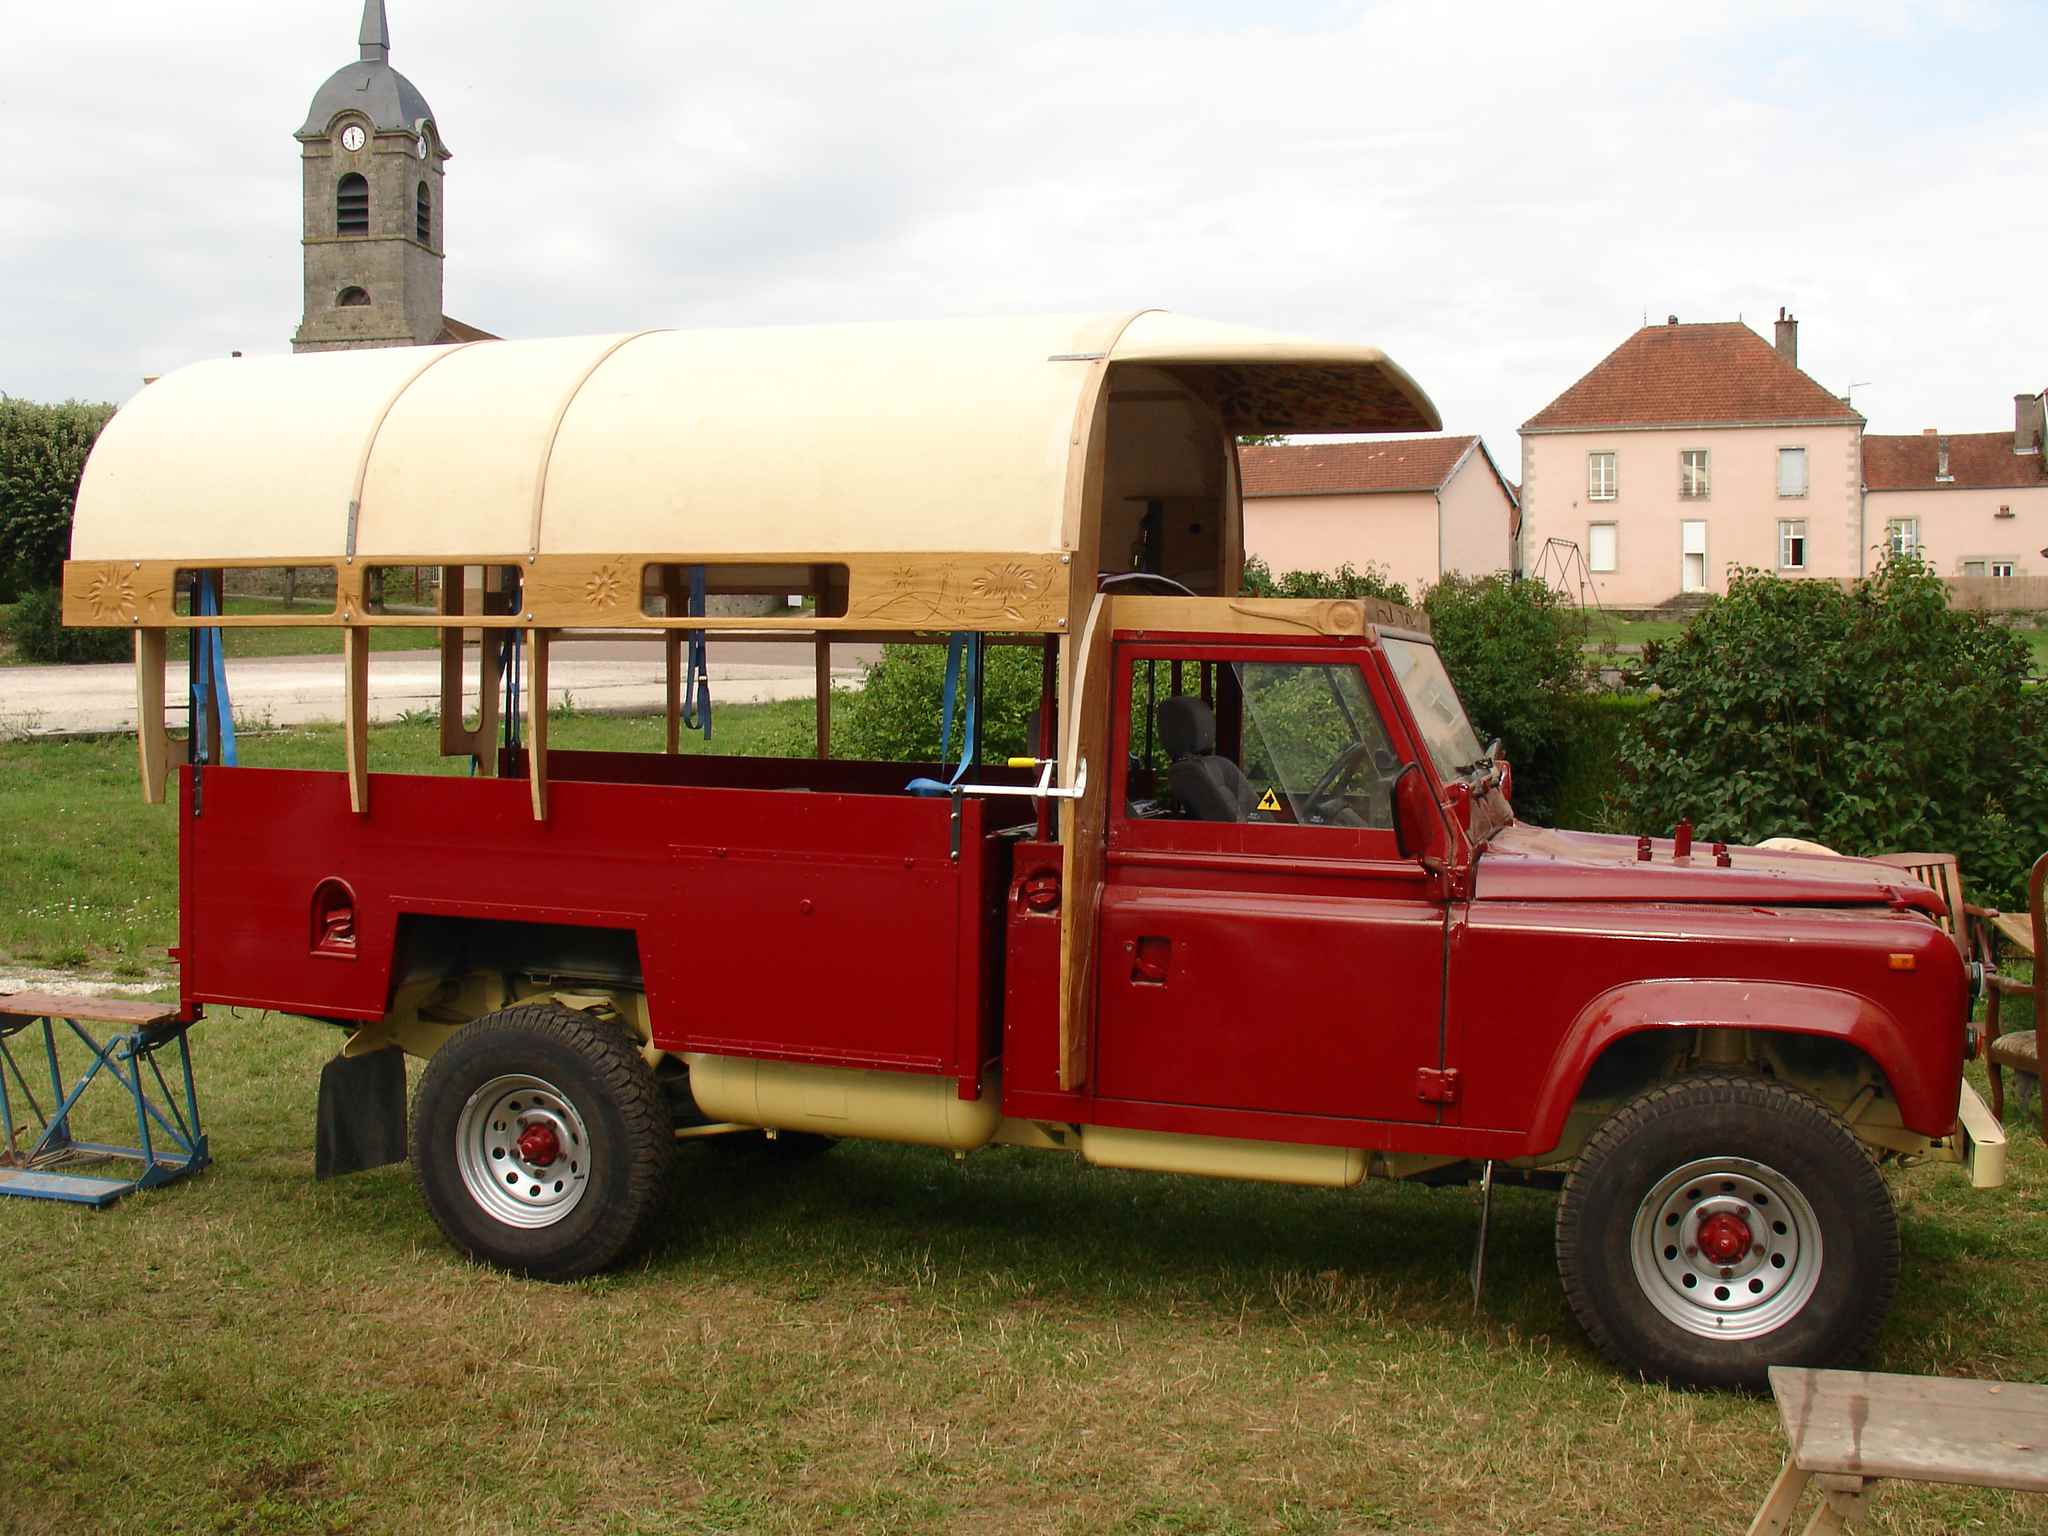
to see unfold. The biggest headache was the business of the lifting roof; we wanted streamlining for the motorway and standing headroom when camping.
Early in 2011 my wife Claire and I
were at a dance festival in Herefordshire when it fell to us to cover for some absent friends who were on breakfast duty
. This meant an early start to set out some 70 or so breakfasts and as a result, Meisje the dog missed her early morning walk.
When we later returned to the rover to take her walking we saw that she had bitten a big hole in the canvas and stuck her head
through to see where we had got to! Dogs being more important than cars, she went un punished and I spent the rest of the morning
patching up the canvas, ( the wise man who sleeps in a rag top rover keeps a BIG sewing kit on board).
Canvas, for the sceptical among you, if it is good quality, heavy duty, cotton makes for a very warm, airy and cosy feeling
accommodation; it is, however, energy consuming and mightily noisy on the motorway!
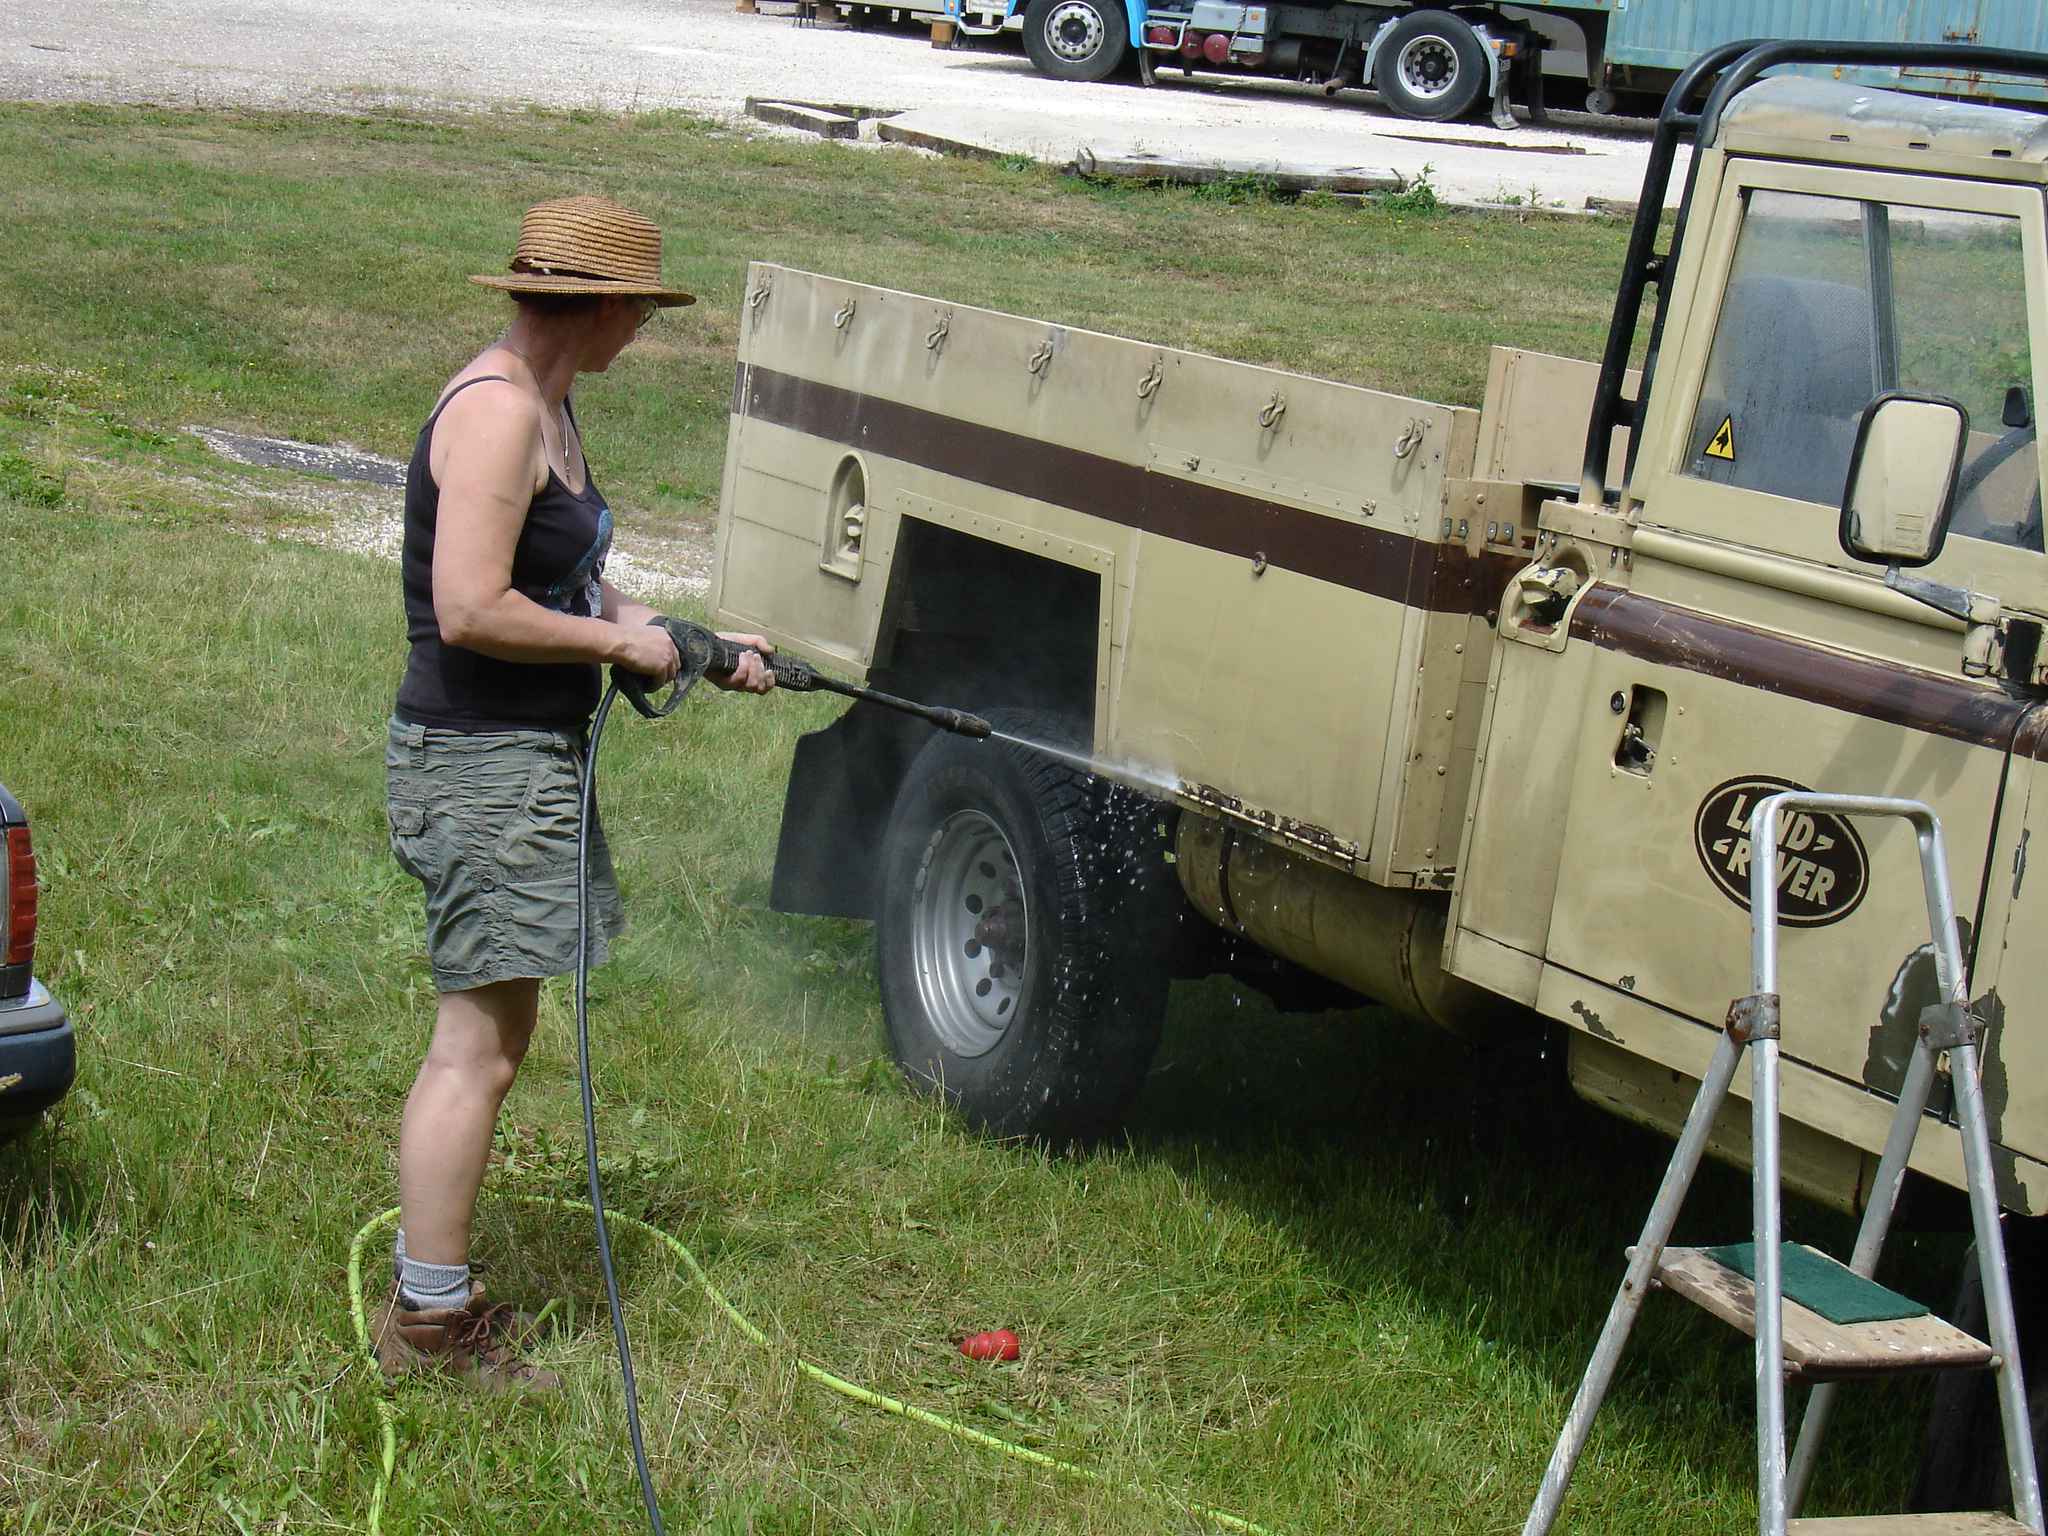
We took the Land Rover to France where we have a big old farmhouse with sufficient room to work inside if the weather turned out to be inclement
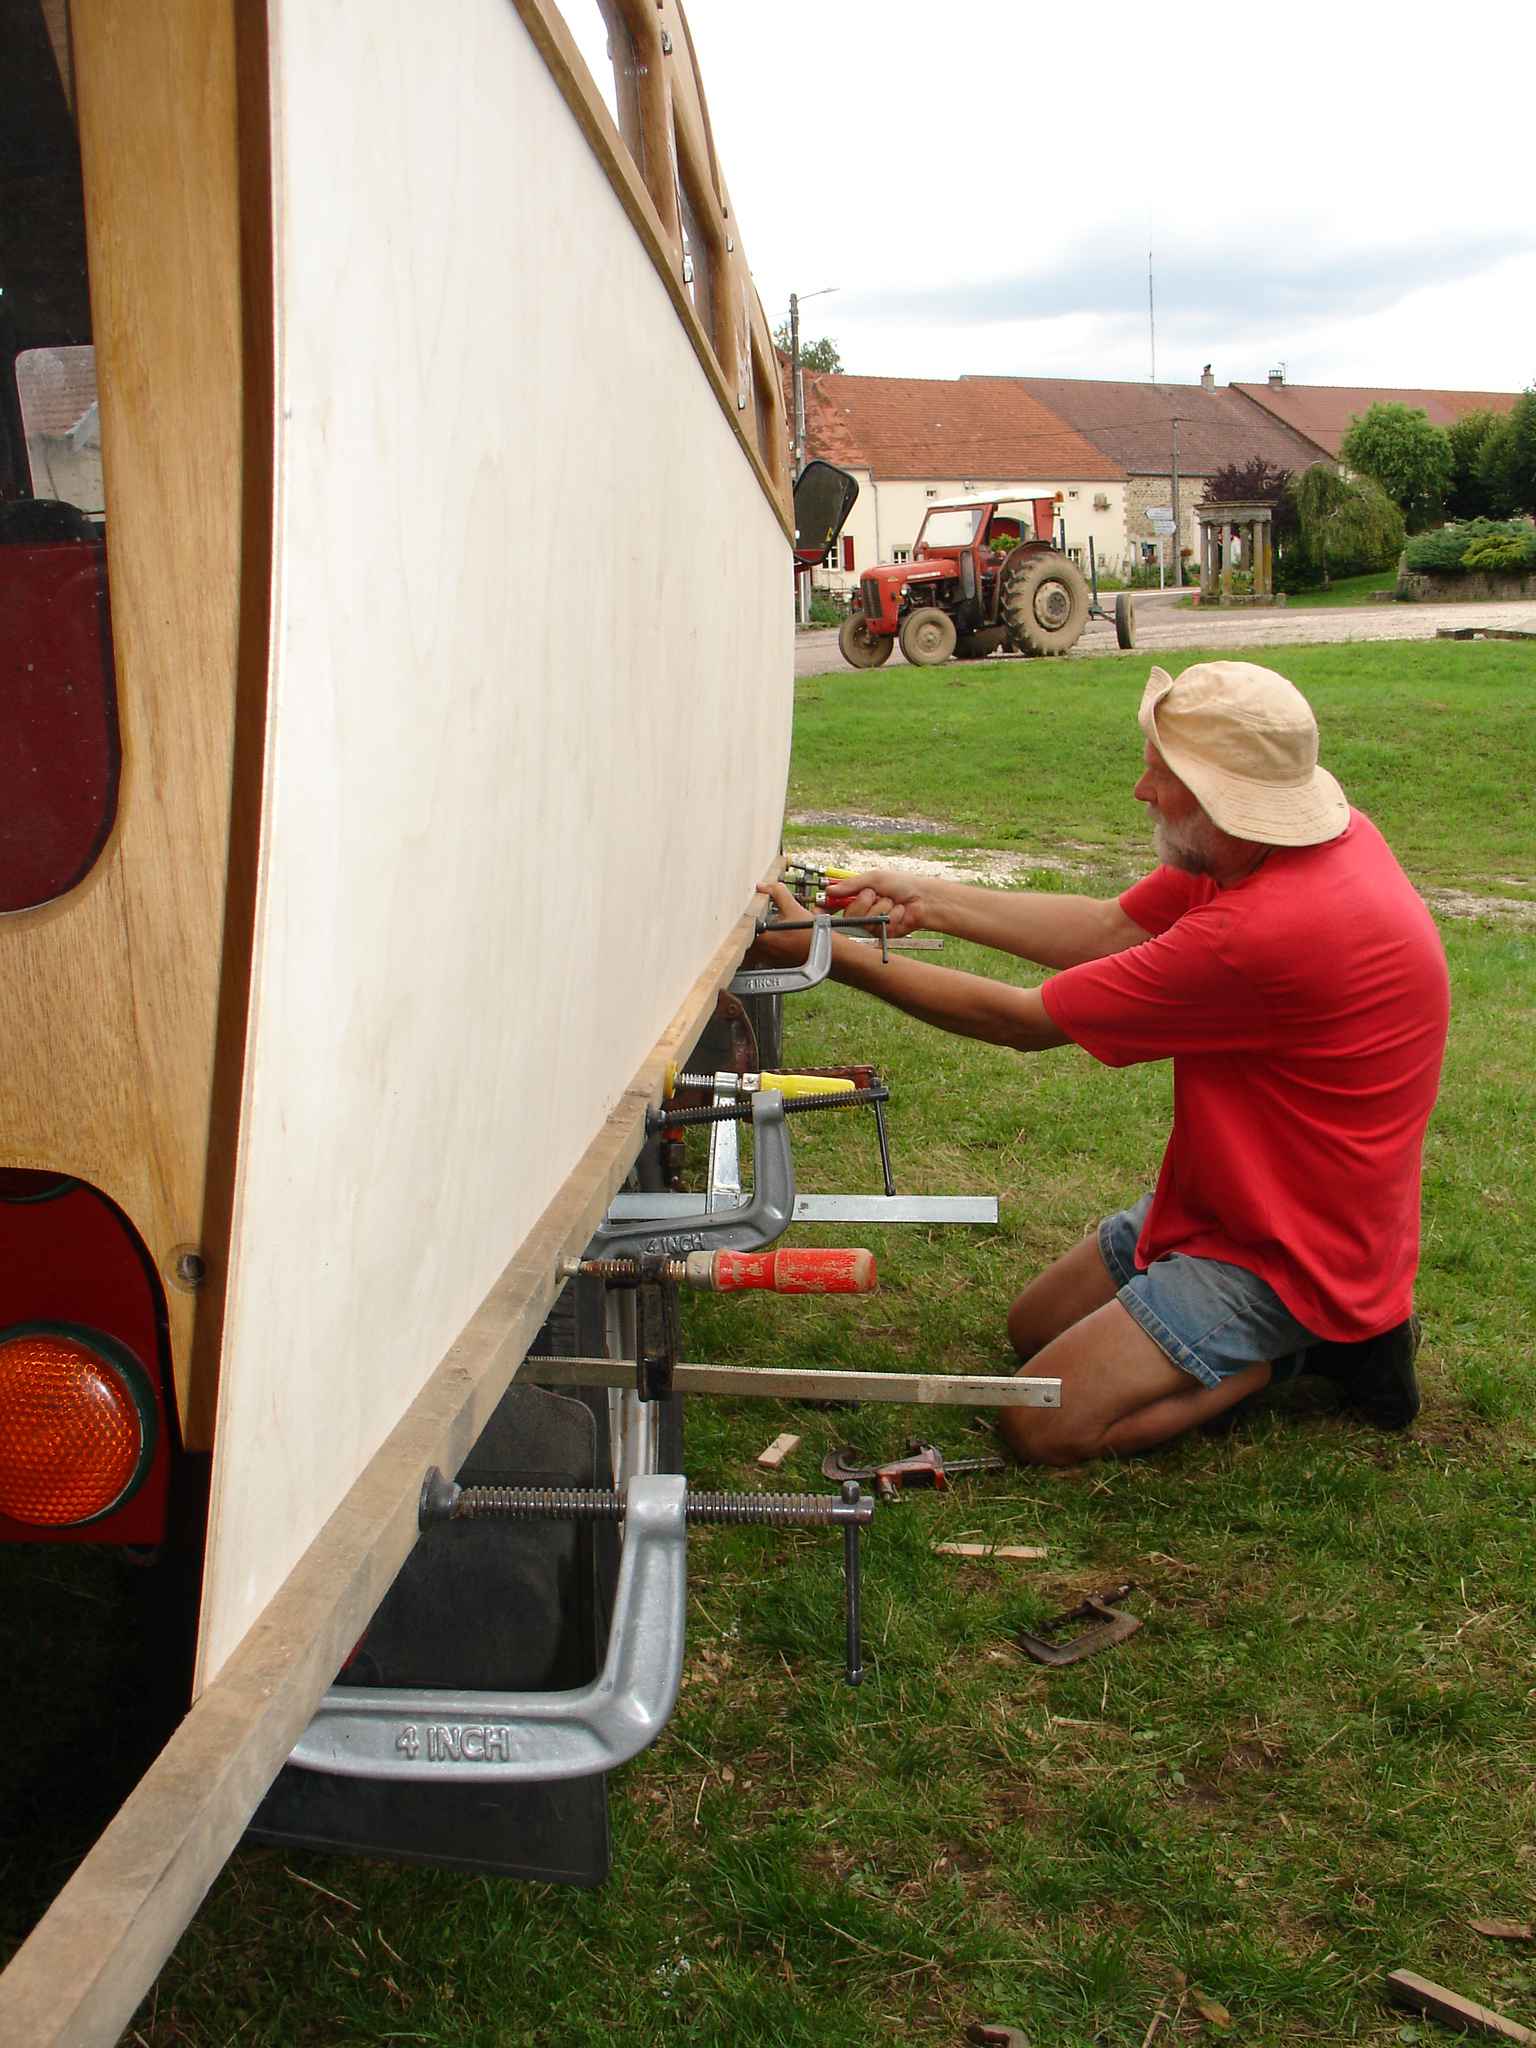
and it was - very! The job started with removing the old rag top and its very substantial framework ( anybody want to make me an offer for those? )
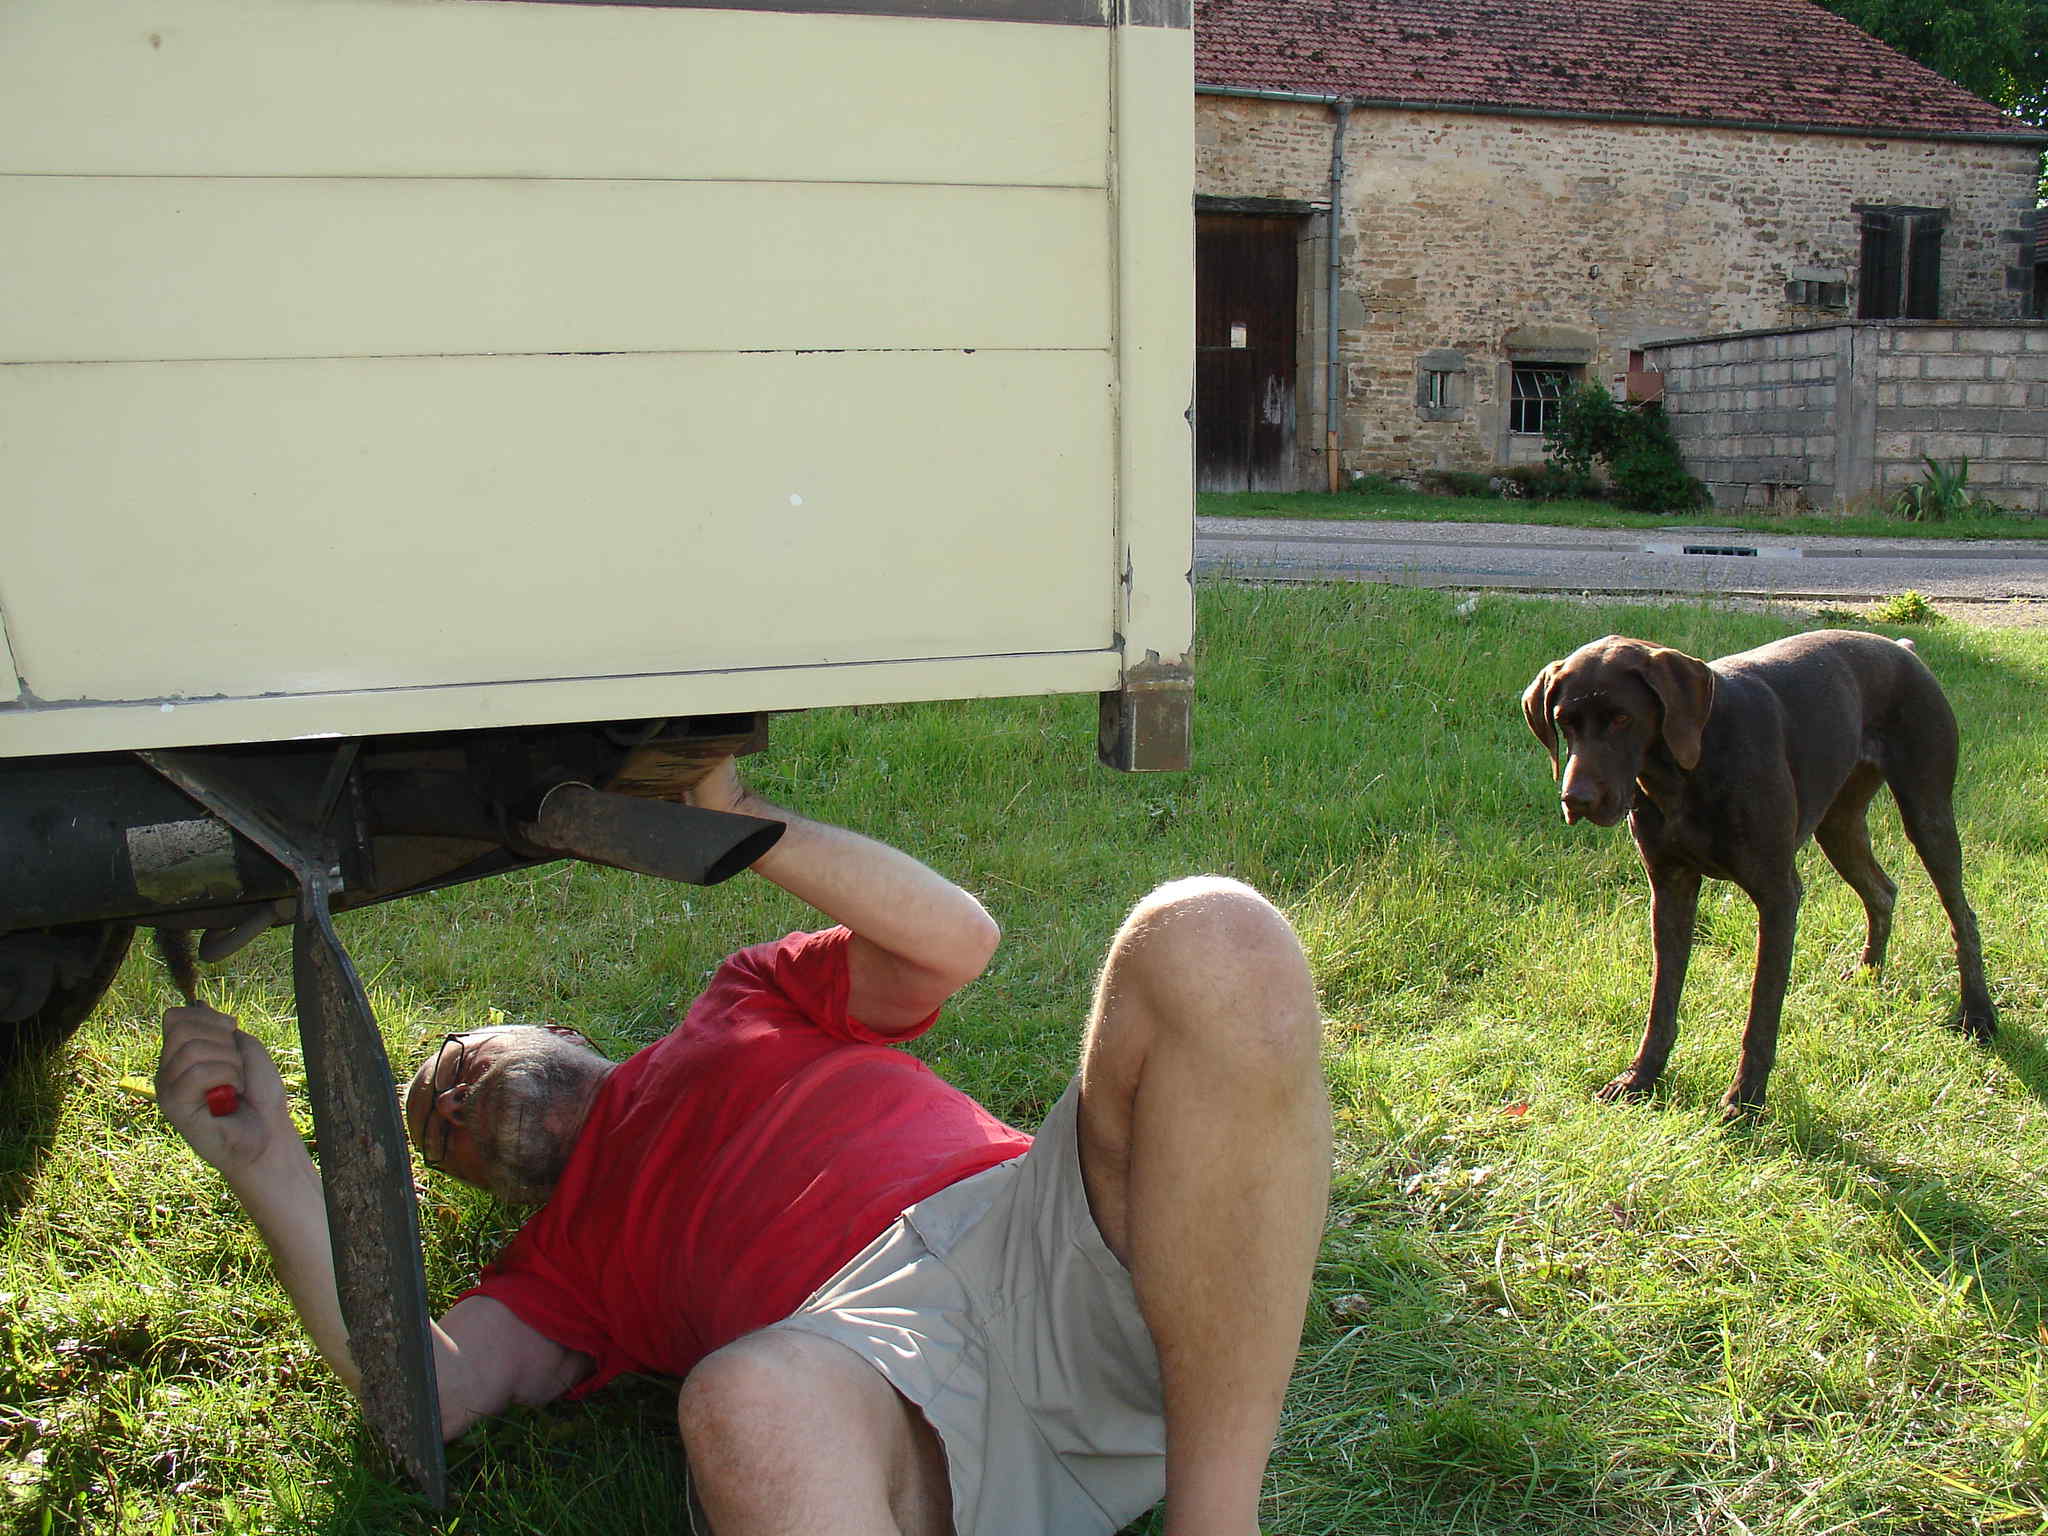
and getting everything cleaned up and rubbed down ready for spraying. With Claire manning the pressure washer and electric sander and me crawling about
underneath.
We prepared both the bodywork and chassis, which was to be painted cream as are the traditionaly finished vardos. I am not sure if paint will protect
as well as the wax/oil mixes which are commonly used but it will look better for sure. One of my beliefs in these difficult areas is that
"professional" appliers of such products claim them to be best because the alternative is too difficult or expensive and so the myths are born.
this is the case in many fields of work and I have learned to distrust advice offered till I have tried it for myself. The wire brushing of the
underside to get off the stuff Land Rover apply was a job taking several days and I hope never to have to do it again. The waxy oily stuff, of
course, just goes over it all, trust me to do it the hard way!
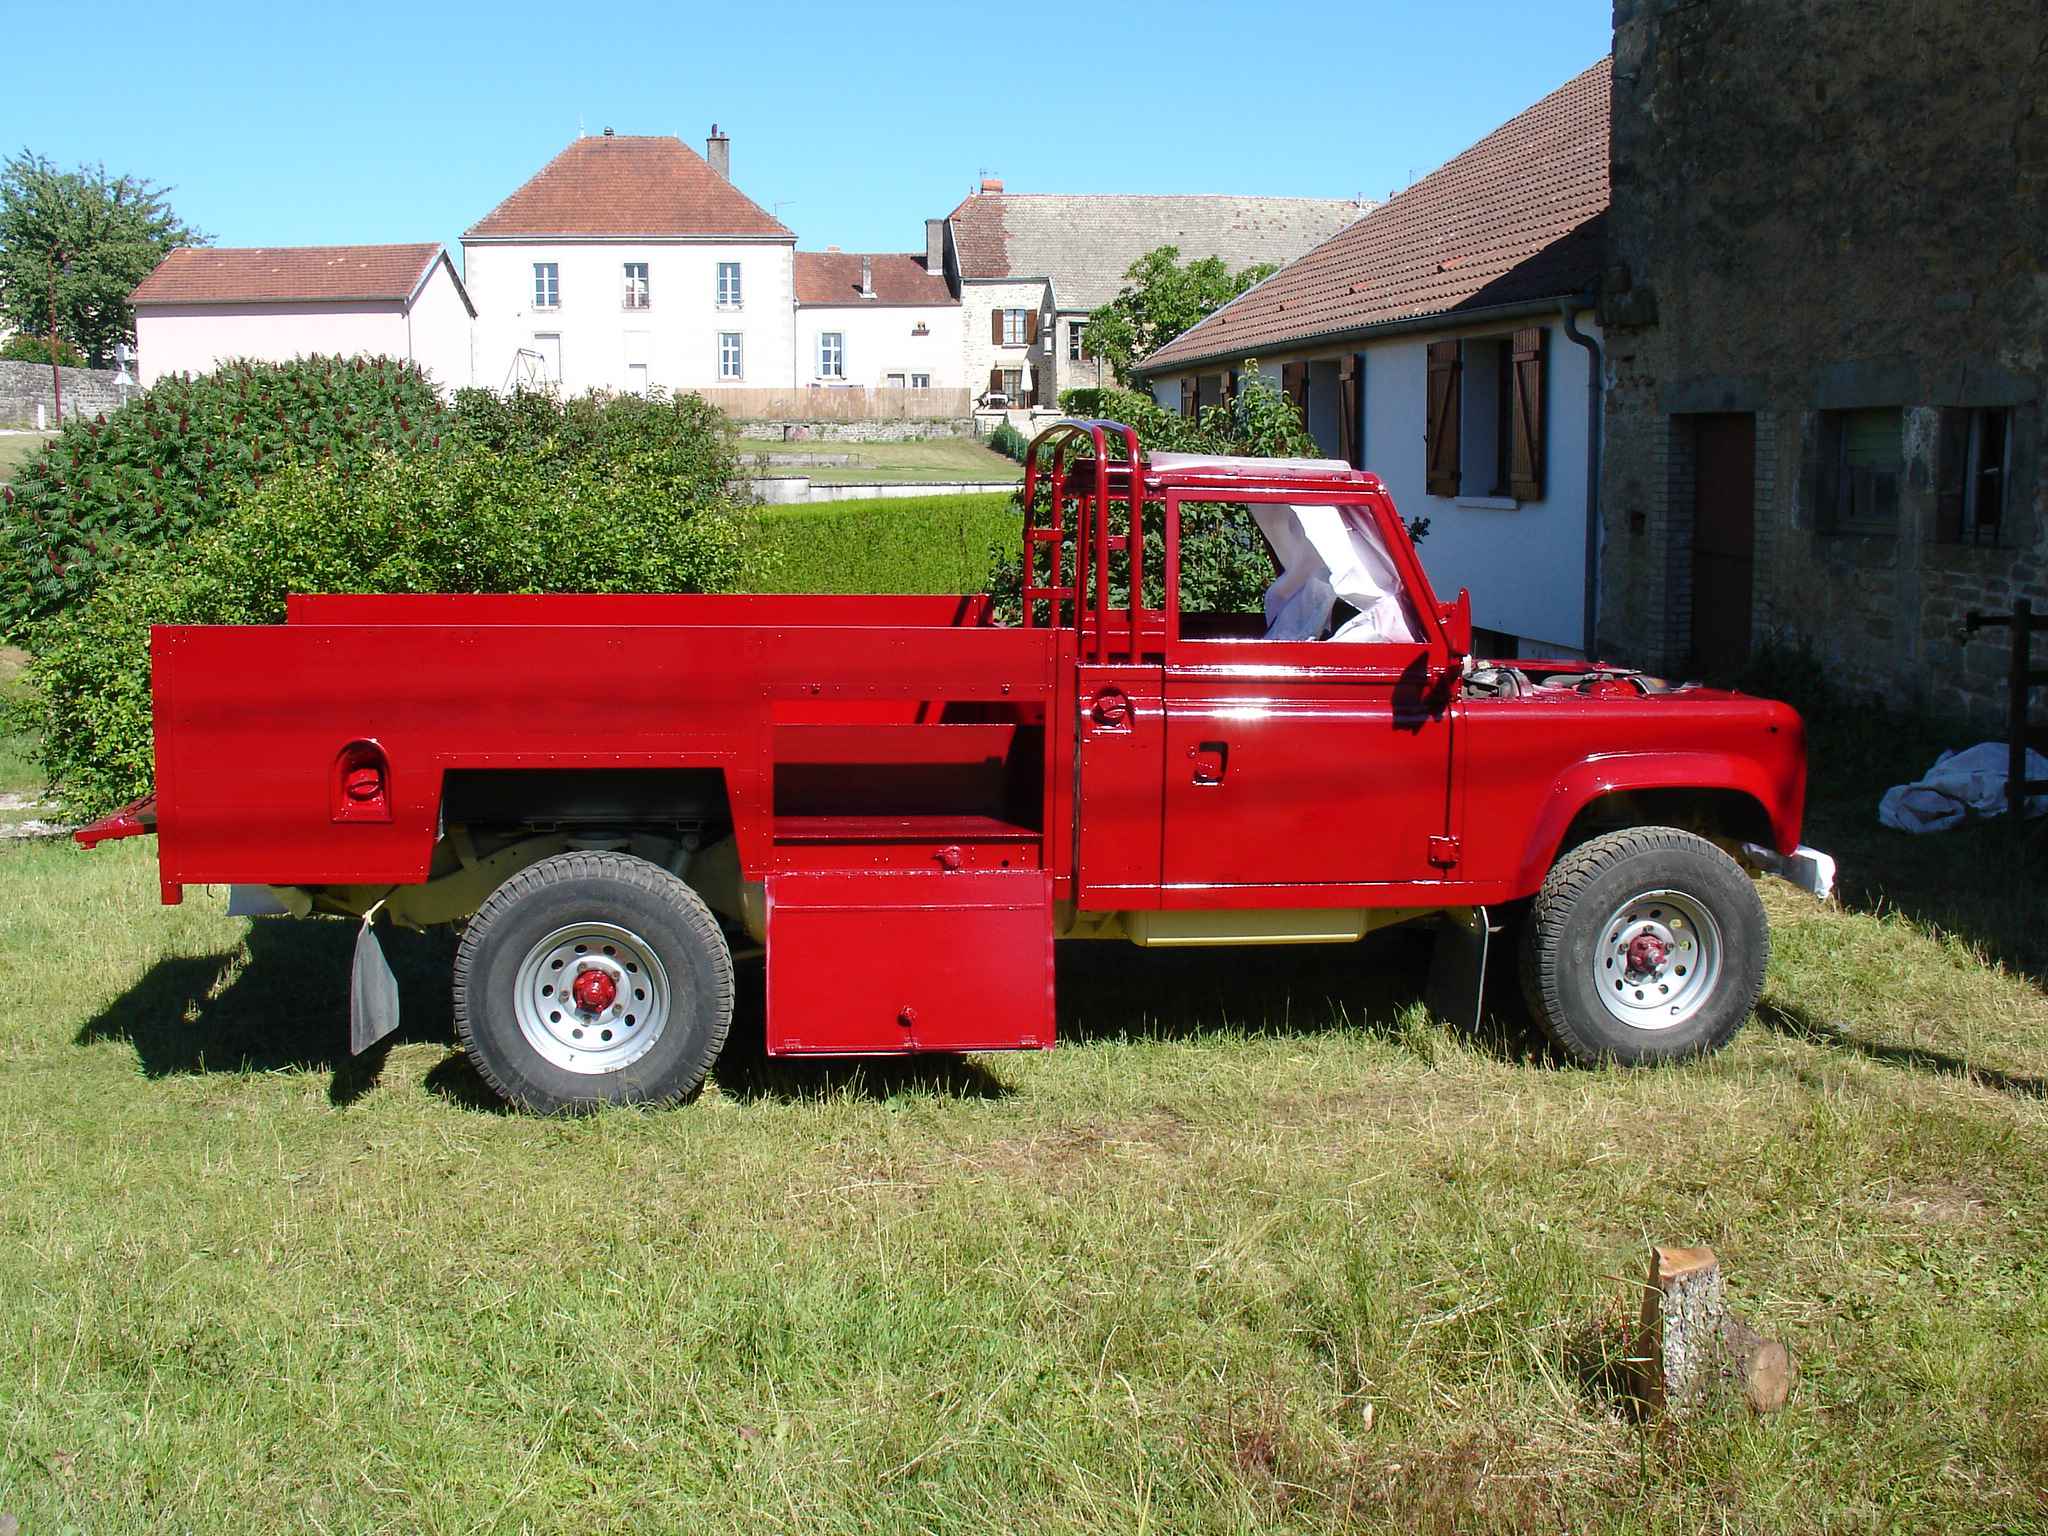
The body was finished in as near to Burgundy red as we could get from the paint makers ( Craftmaster Paints ) which ,when applied, turned out
to be very bright and scarily like an english pillar box but faded down over a couple of days to more or less exactly what we had in mind.
The paint from Craft Master was easy to apply and their rust treatment seems to have been effective on the bits and pieces which needed it underneath.
The resulting finish seems as though it will be durable and we are very pleased with it so far.

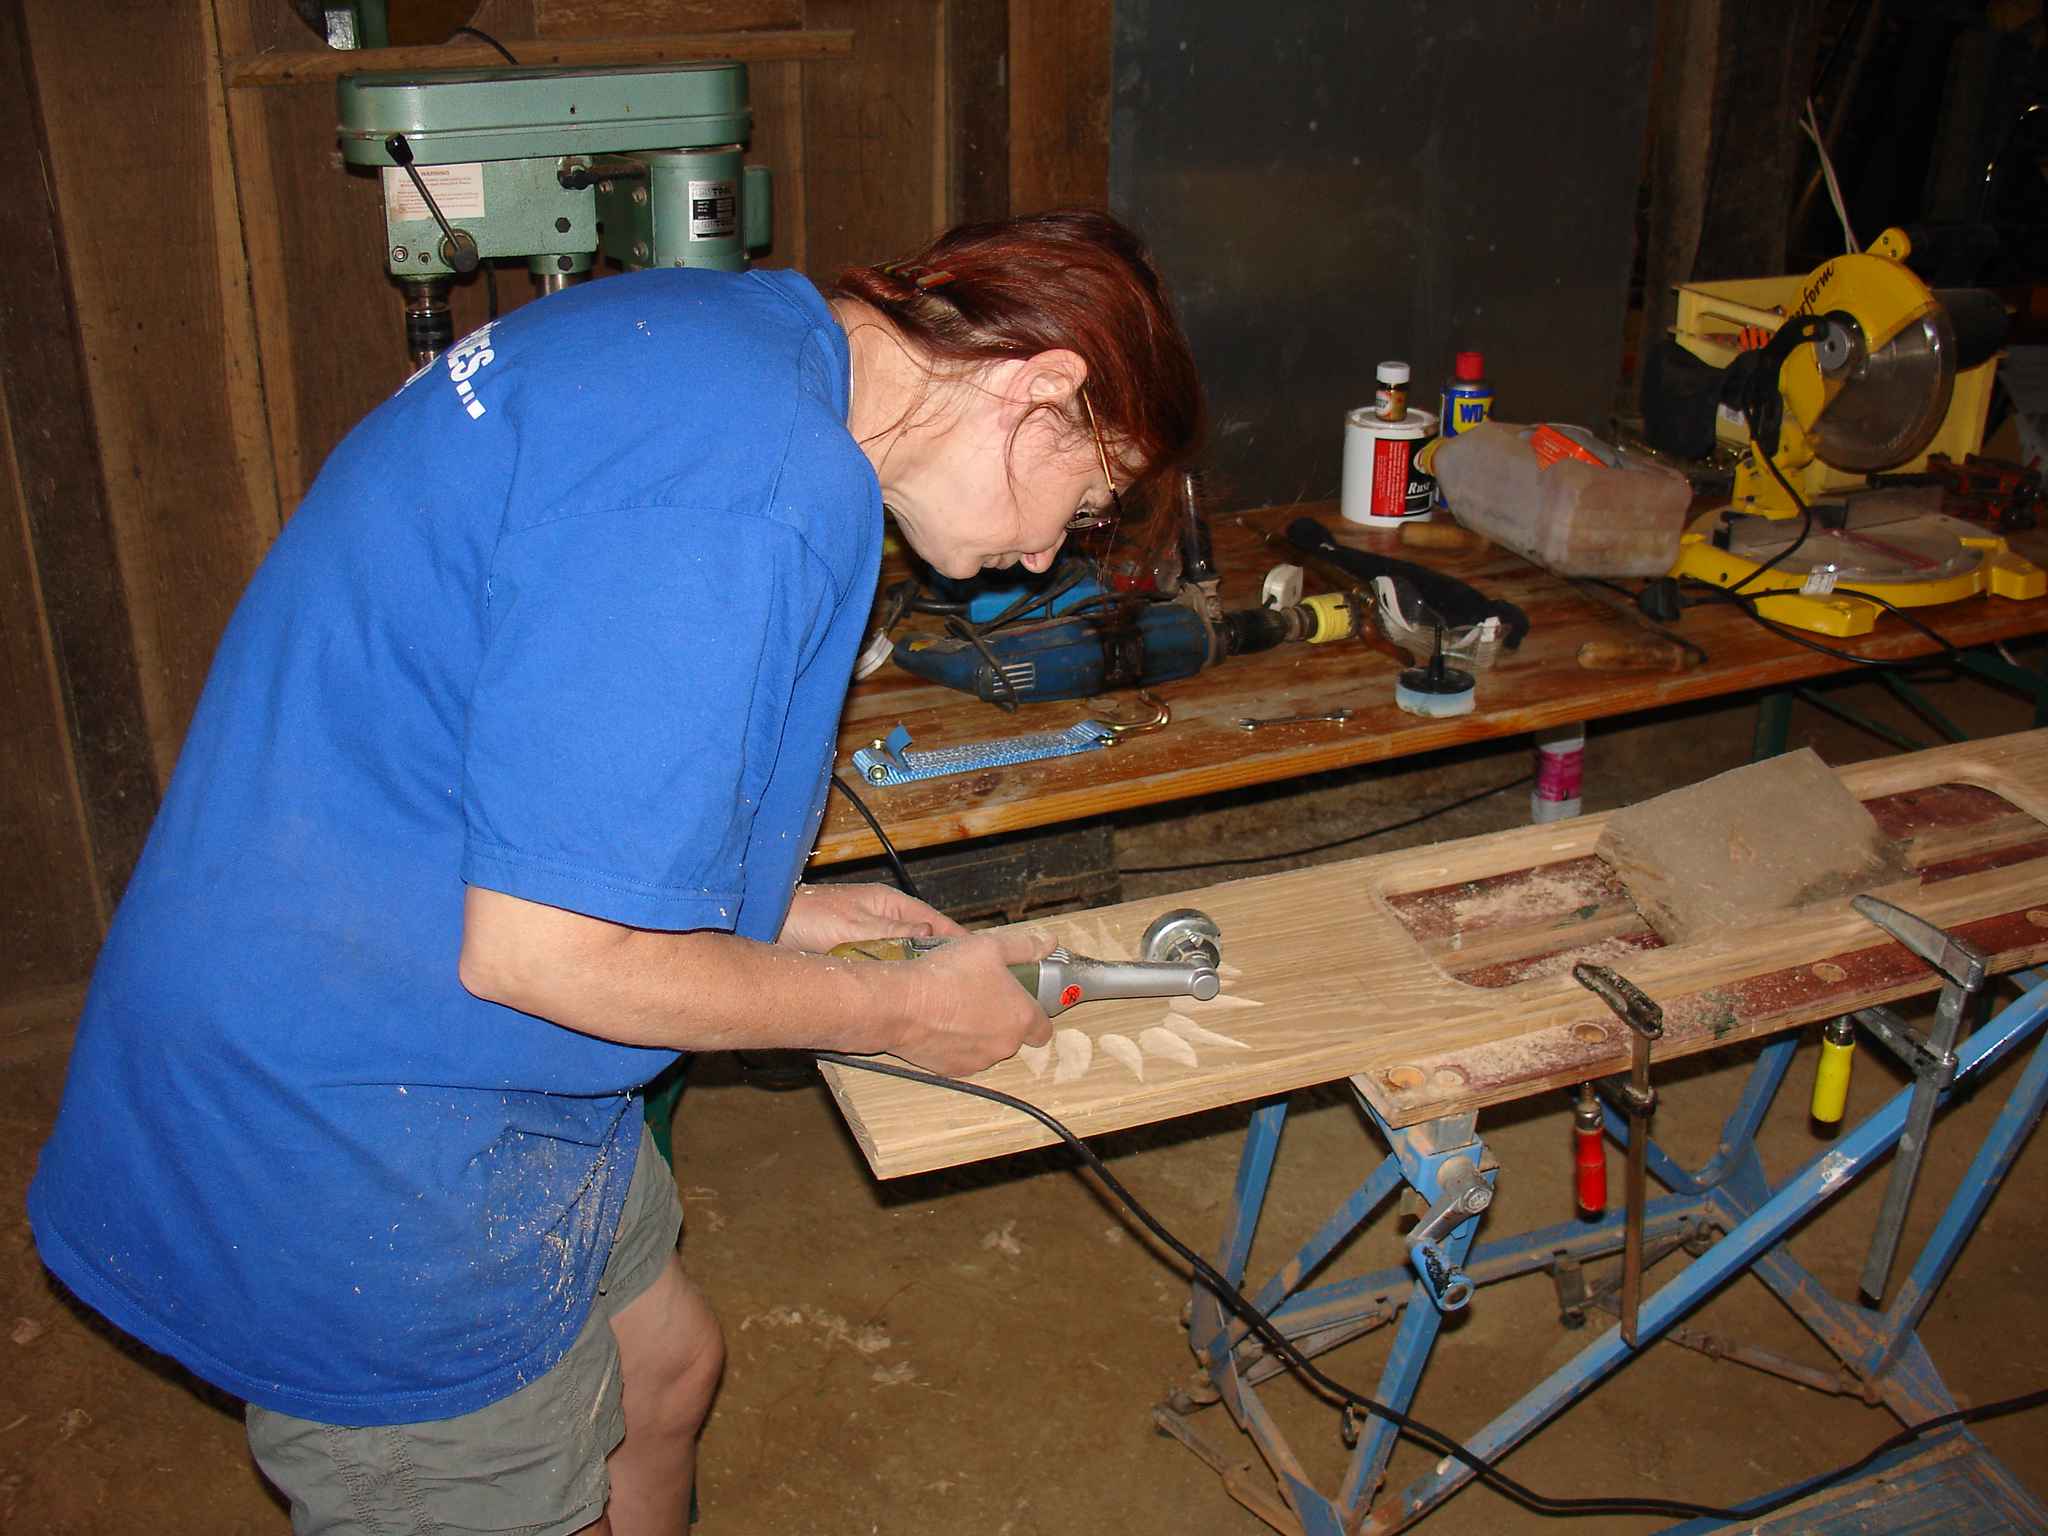
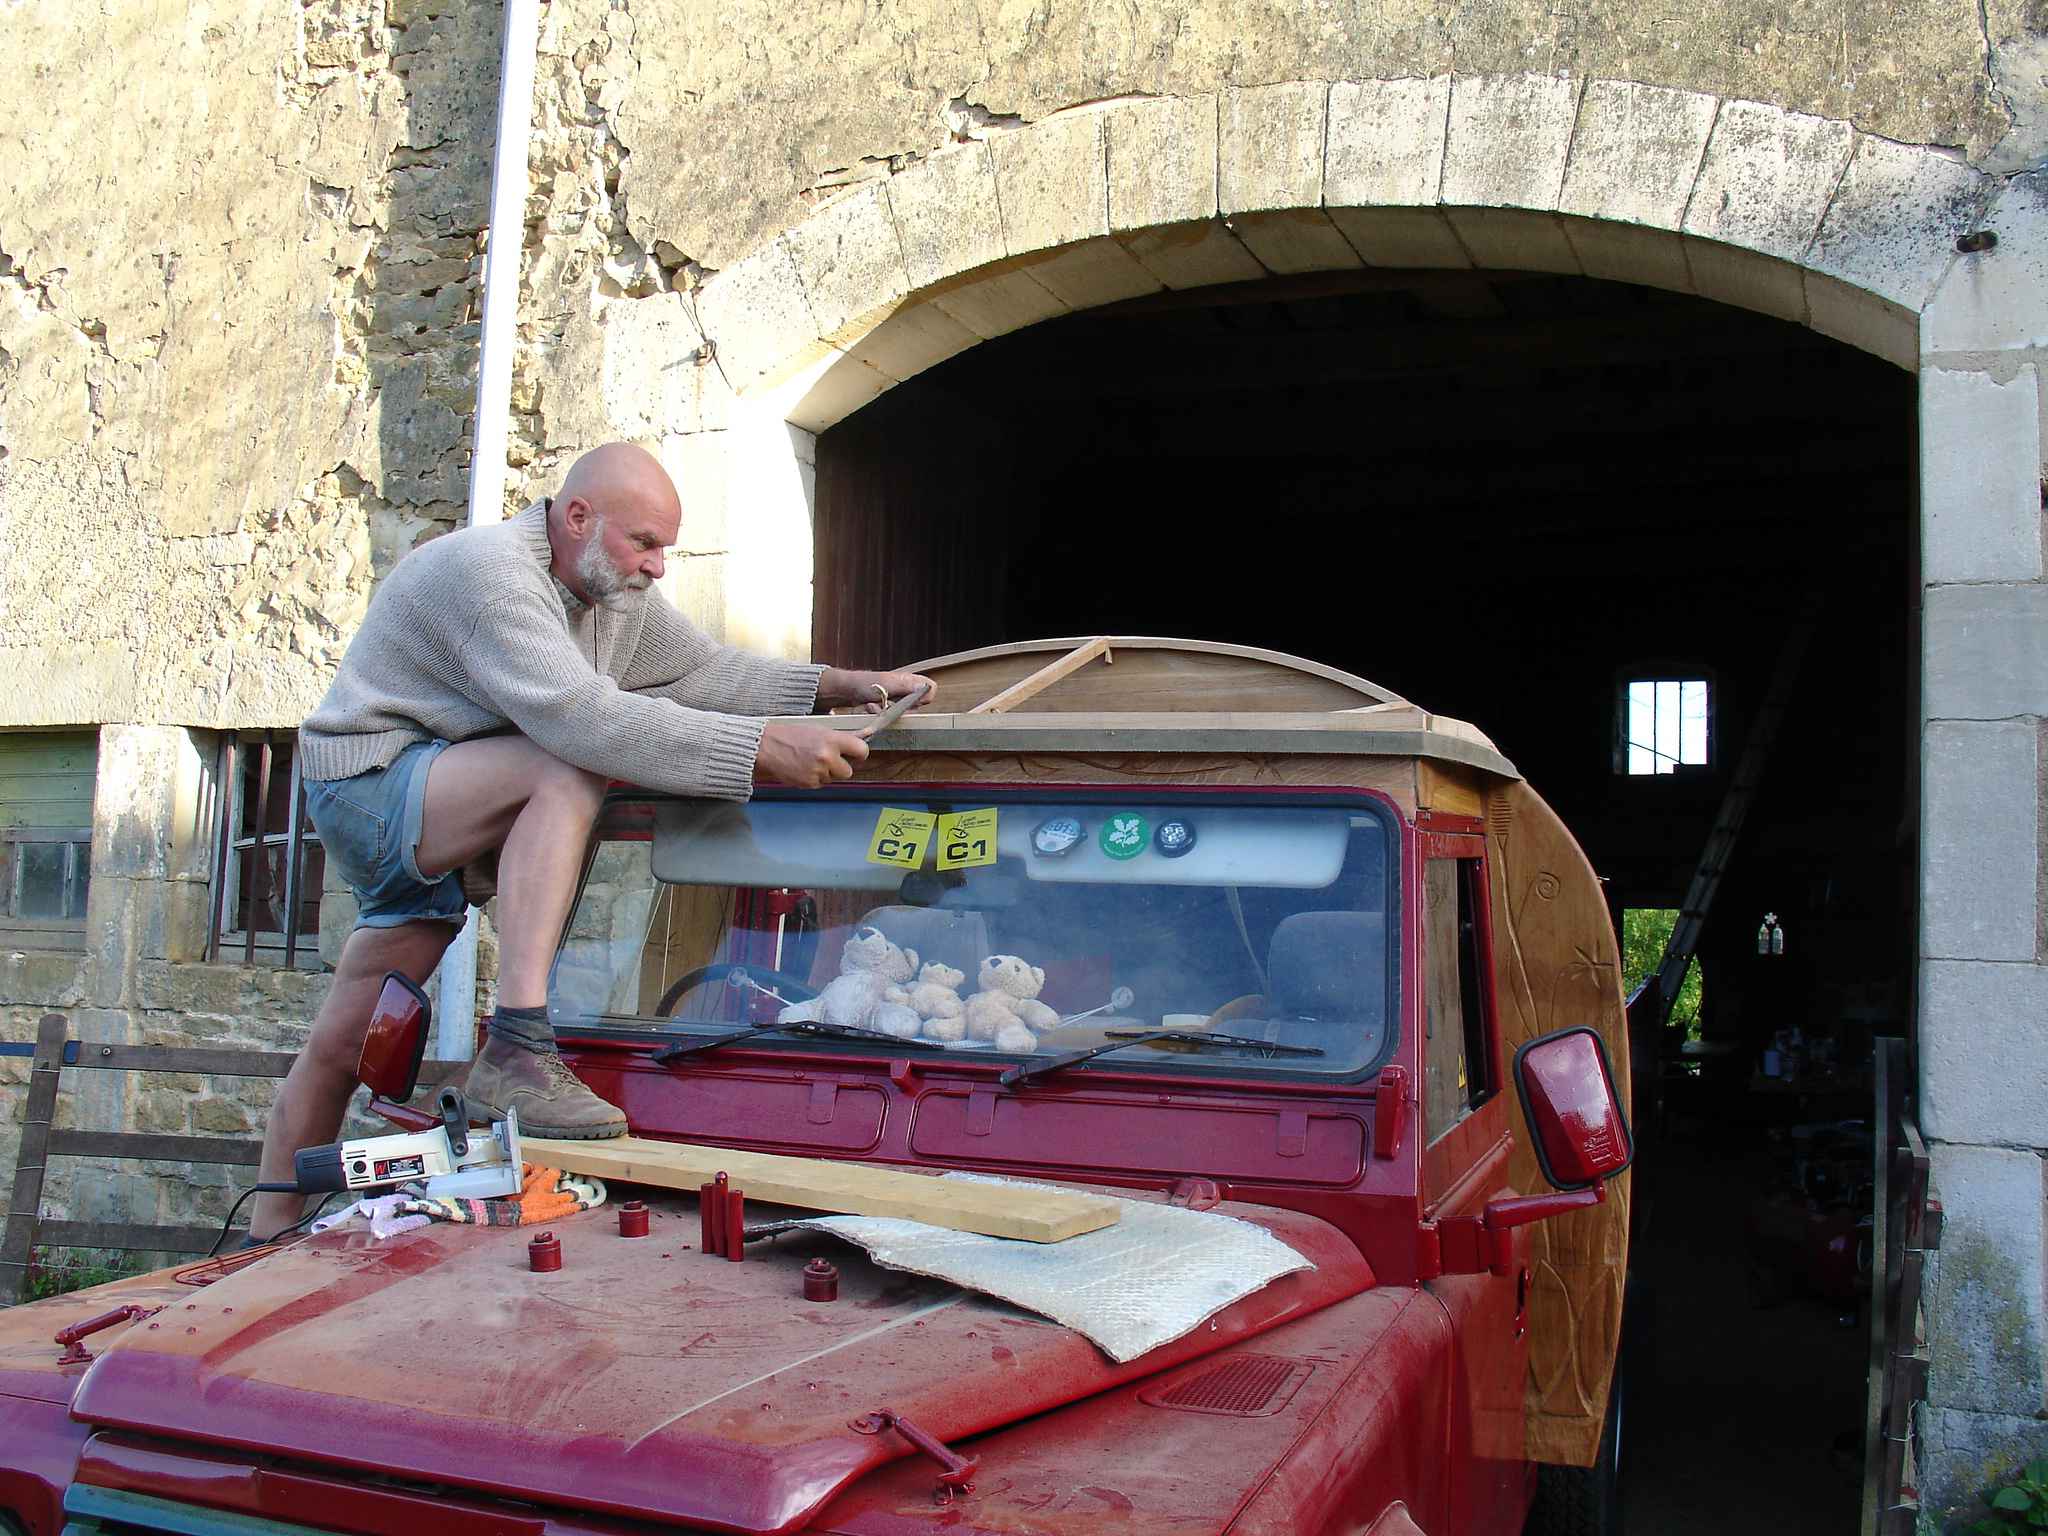
Work on the construction of the new body began with a trip to the saw mill where we bought a goodly quantity of French oak, sawn in to 27mm.
planks ready to be finished at 25mm. We started out with one or two pieces for which I had already done dimensioned drawings and Claire began
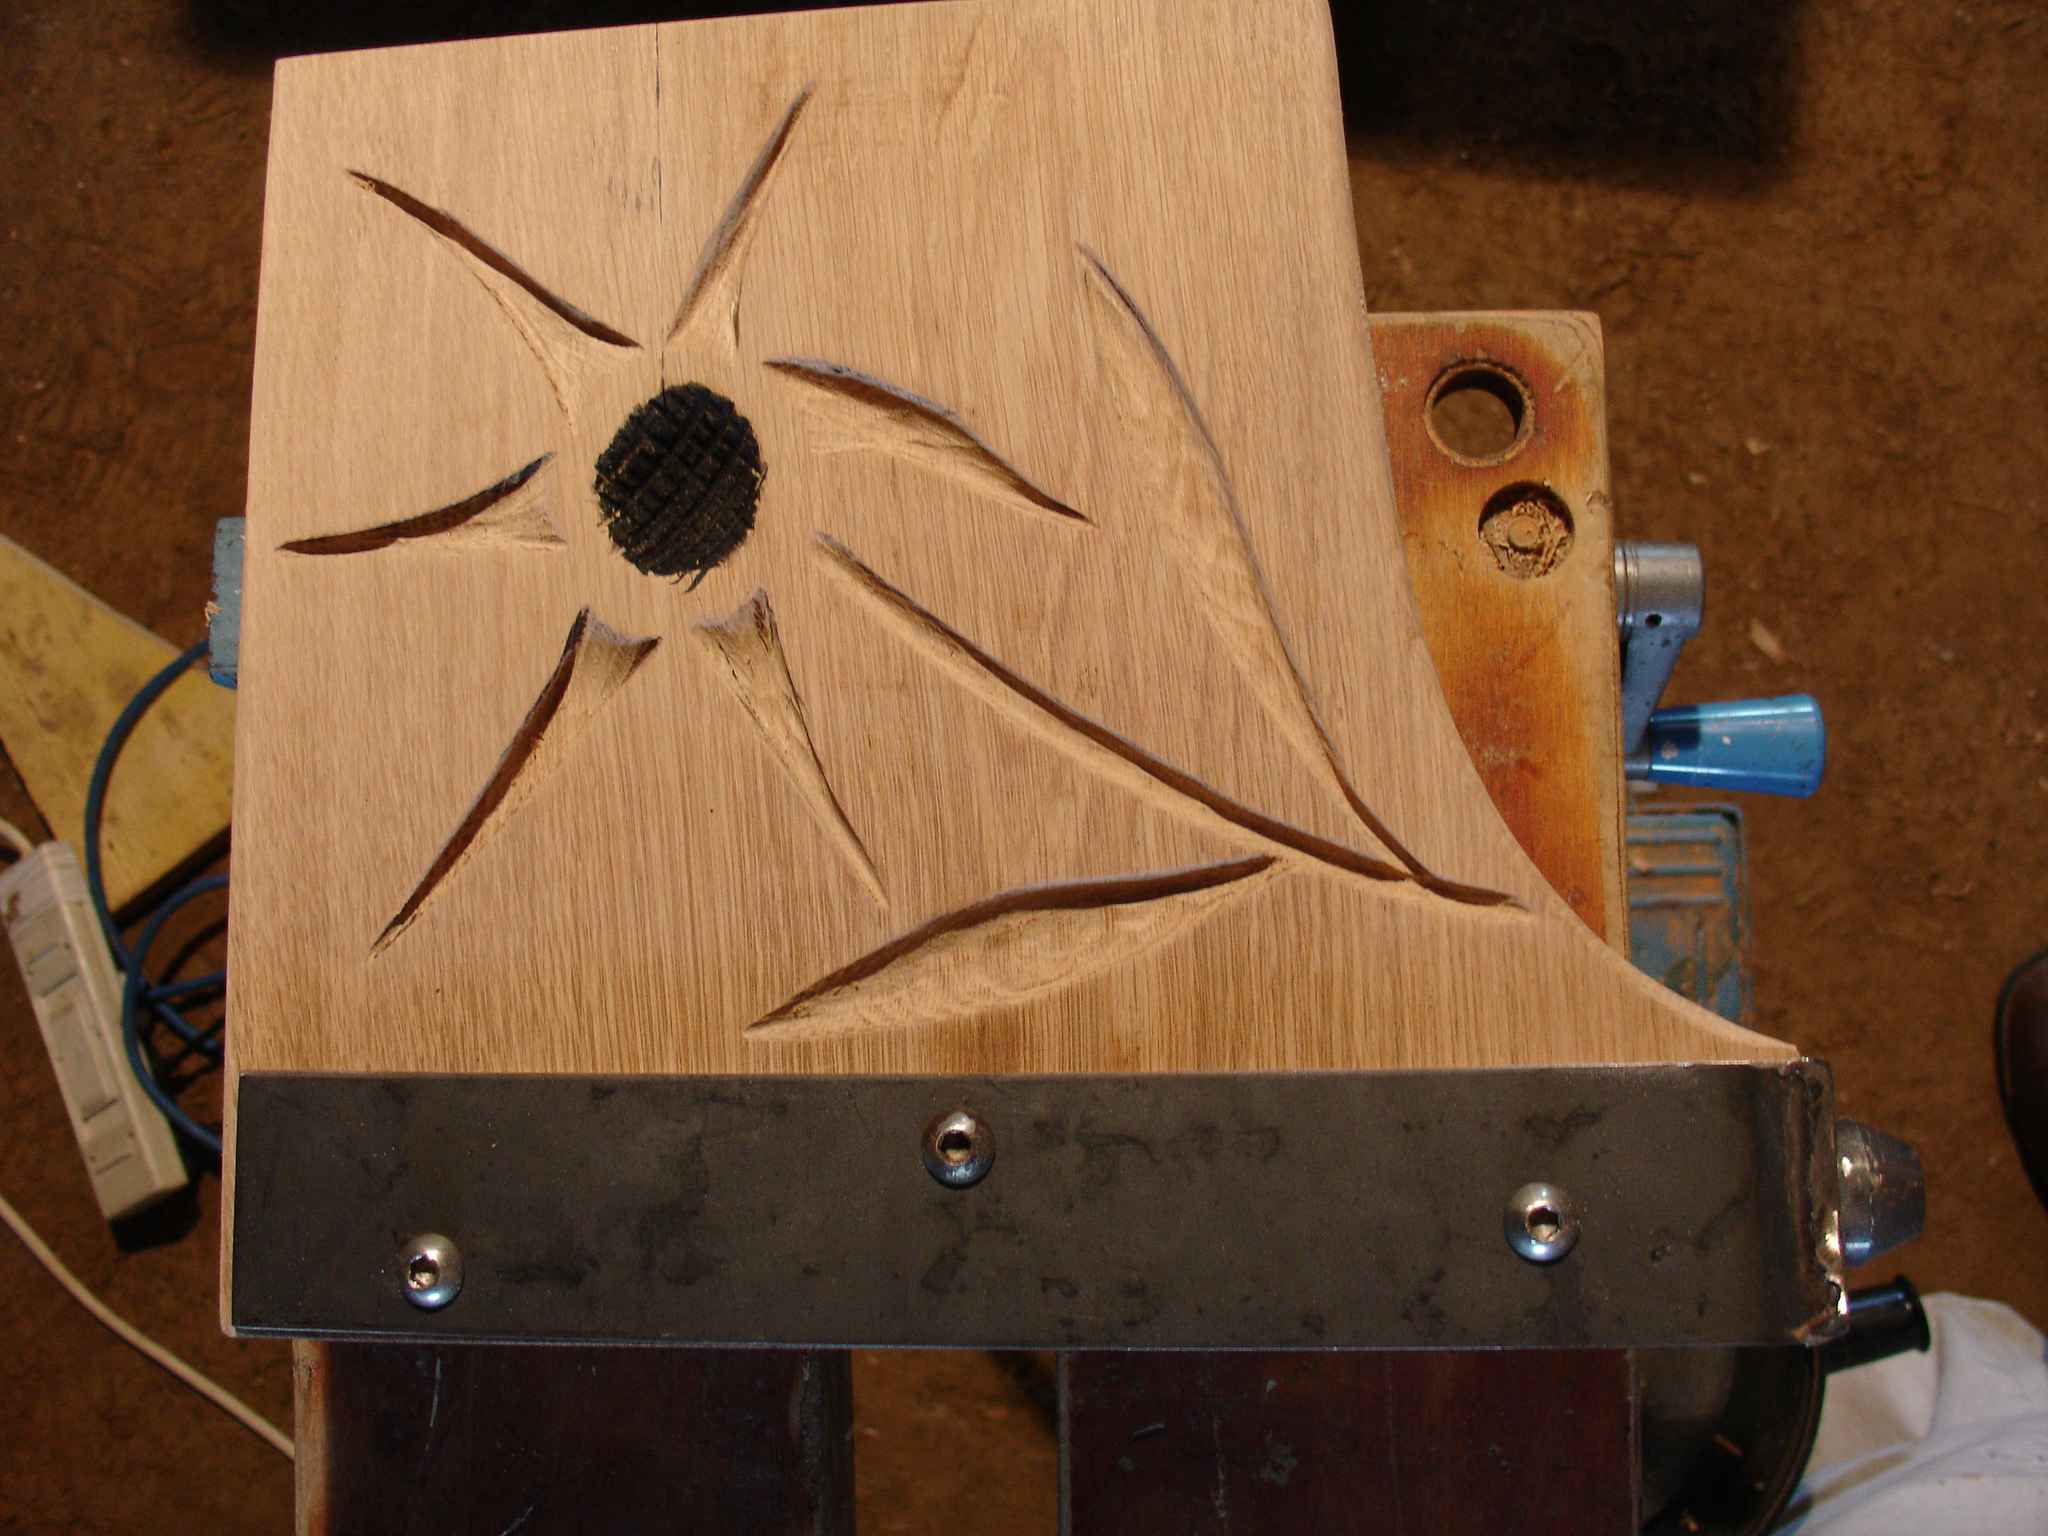
to practise her "carving" skills. She worked with a mini Arbortec disc and the router with a simple pointed cutter for the lettering.
Claire's artistic talents, especially when it came to the layout of the lettering were a great help; had I done this myself the result would
have been cosiderably more geometric and would have contained more straight lines than graceful curves.
The body is supported by 4 "haunches"
made of cross grain laminated oak and these are are reinforced with steel stirrups to recieve the gas struts which do the lifting.
All of the stressed joints are made with a biscuit jointer which makes for a very strong job. The gas struts ( from Ace Controls ) fit inside
the four box section uprights at the corners of the load box which is where the original frame was fitted in to round tubular sockets.
I have employed the same sockets to take four tapered locating spiggots which, when held down by four, three ton load restraining ratchet straps,
prevent the whole thing from landing on top of the car in front if you have to brake really hard!
Cutting out the curved shapes for the roof formers / bulkheads was a bit of a trial. Due to my wanting to retain the original roll bars which
support the door frames and the seat belt mounts it was not possible to use a simple circular shape so templates had to be cut from ply wood
and the formers all made from these. The back bulkhead carries the large rear doors and so needed to be very strong, as did the front one
which slides against two "wings" which are fitted permanently to the bodywork just behind the doors.
The two intermediate formers are a good
bit lighter in construction but still quite rigid which is needed as there is no way to make a tie, side to side across the vehicle, between
the bottom ends at any point. The rigidity and stability of the French oak is astounding and has been fully tested in the near continuous rain
of this summer. A slight problem came from the body gaining a fraction of a mm. in length in wet weather but this has only caused the mounting
spiggots to be an even snugger fit and takes up any movement resulting from the neccessary clearance to get them to enter their sockets freely.
We were due to show our instruments at Chateau D'Ars and things looked a bit behind so we were considering putting the canvas back on just
for that event when help arrived in the form of Pip and John and almost immediately Hazel and Alan. They were all on route to Chateau D'Ars
and stopped off to visit; we hi jacked them to help with fitting the sheets of plywood in place and were quickly back on schedule. The ratchet
straps purchased for pulling the roof back down were long enough so we used them to clamp the plywood sheets in place while the glue set.
The plywood is 4mm Finnish birch which bends cold without cracking, unlike the very similar Russian stuff which will only bend when warmed up
and this weakens the glue causing it to de laminate. This knowledge comes from years of making drums from the same material. The glue is a
marine polyurethane mastic which is claimed to be a sealant and strong adhesive which will work under sea water but I think any of the polyurethane
seal/glue products would be sufficient for the vardo roof job. So with only the upper half of the roof in place we fitted the gas struts and
everyone cheered when the roof elevated for the first time. Some quick coats of Varnol at midnight and we were ready for the first trip,
although with no sides in place we had to sleep with the roof down, which is possible if a little cramped. Varnol is a Danish product which is
used diluted with natural turpentine to impregnate the timber and then neat to impart a gloss finish; I am very well impressed by the way it has
worked on the plywood which is the most vulnerable part where weathering is concerned. We intend to get a canvas cover made for the roof to protect
it from the nasty UV light and the worst of the weather while the vehicle is parked up and not in use which is 90% of the time as is the case with
most vehicles; this should make the finish last ,maybe, ten times as long.
Three years later I have removed the Varnol manually as it has proven to be none too good at withstanding the weather even using the canvas cover at all
times when the vehicle is laid up for more than a few days. The finish cracked and peeled allowing moisture to enter the plywood and turn it an unsightly black!
I have now refinished with Flag brand yacht varnish which I think will be better (more in three years time on this?) and is a good bit cheaper than some of the rival brands.
Having passed a comfortable weekend at Chateau D'Ars we returned to continue the hard slog of getting finished in time to come back to England.
While we were away Pip did a lovely watercolour of the house with the vardo just visible in the doorway and I have put it up here for all to see
- I hope she does not mind! The sides were quickly fitted in place and a 25mm square rubbing strip of French Oak glued along both sides. I takes
a while to come to understand the strength of Oak; this rubbing strip, like those fitted to boats and unlike the flimsy metal bodywork of most cars,
will withstand a good scrape in the carpark as it is flexible without taking dents and slippery enough for another vehicle to slide along it with
only minimal damage to the finish which can be put right with a bit of sandpaper and some Varnol in a couple of minutes. I might fit wooden rubbing
strips to all my cars in future!.. Bending some of the strips of oak was done using heat but not steam as is often done but using a hot air paint
stripper to progressively heat and bend; working slowly along the length of the strips with one end in the vice and pulling on the other till I felt
the timber relax and start to bend and then moving smartly on before it bent too far. It is heat that changes the cellulose in the timber when steam
bending, not the water, no ammount of soaking in water is of any use at all.
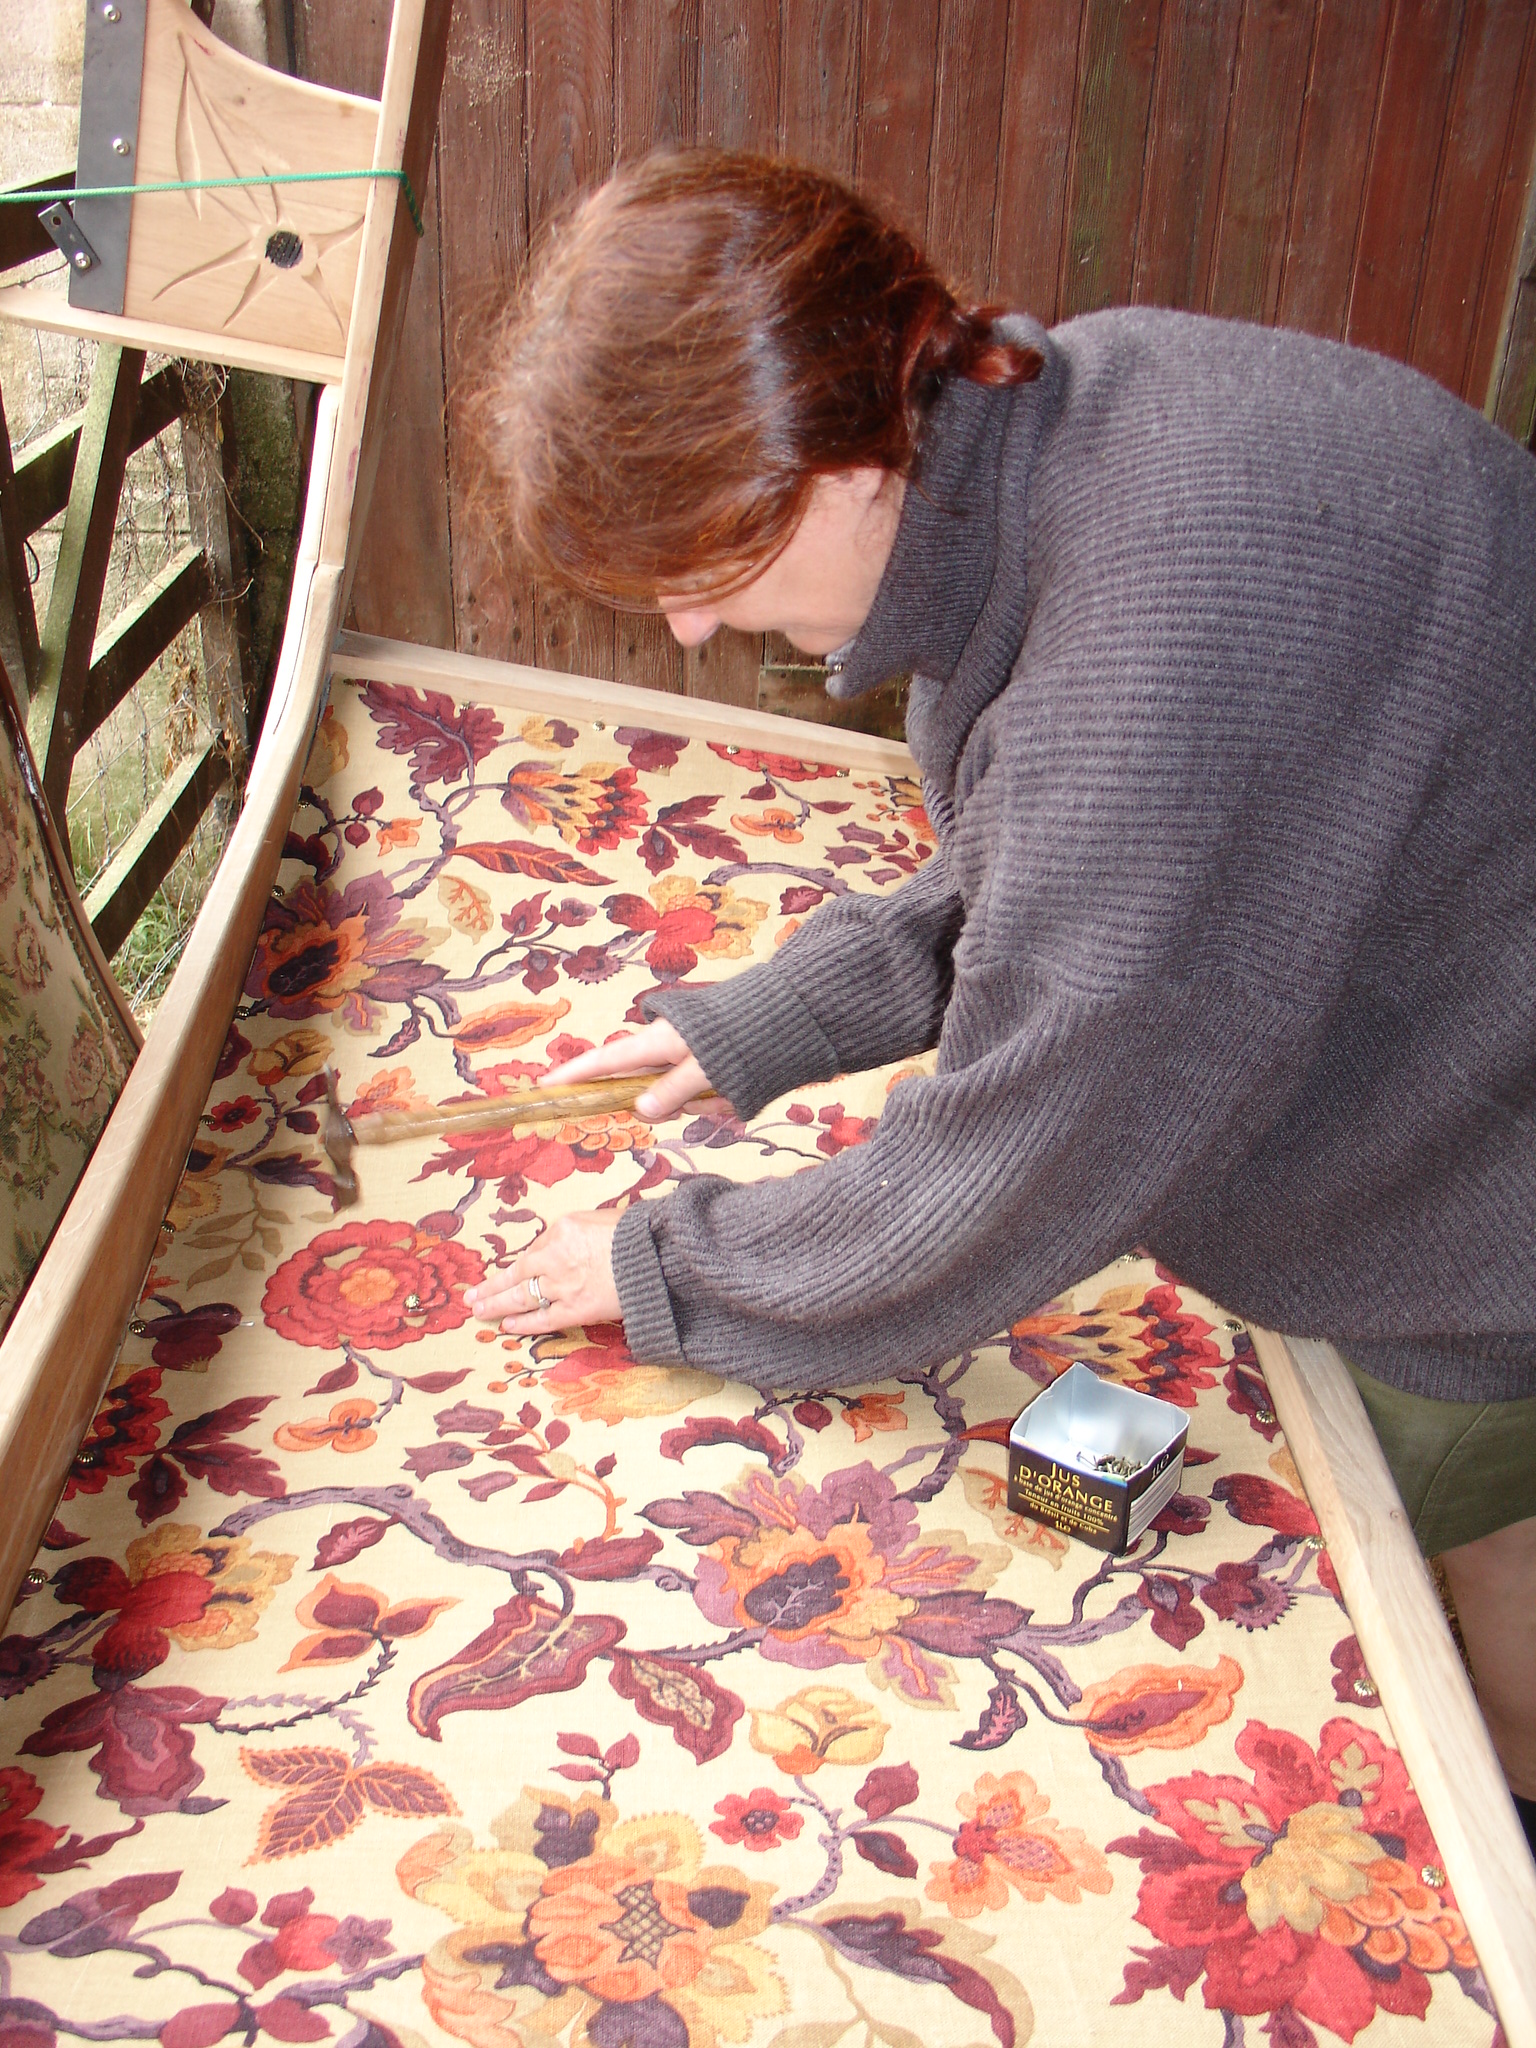
Claire made a start pinning the roof lining in while it was upside down - or maybe up the right way??
By the beginning of August we had, with the help of my son Doug, his partner Amber and Little Tessa, got the vehicle ready for some serious travelling.
The roof goes up and down with the gas struts and ratchet straps quite well although Claire would like it to happen at the touch of a button.
I will have to get the struts re gassed as they are struggling a bit due to my underestimating the weight of the roof. I had guessed at about 100Kg.
but it is more like 130. Buying good quality struts pays off as you can get them re gassed and they come with a little knob to let some gas out if
you have them over filled. The straps on the ratchets to pull the roof back down,for neatness, were kept as short as possible ( about 100mm. showing
in the down position) but this prooves to be a folly as there is not enough stretch to allow you to get to the last notch without a bit of extra
leverage so I will take them right down to the floor and get Claire to make some pretty cloth covers for them.
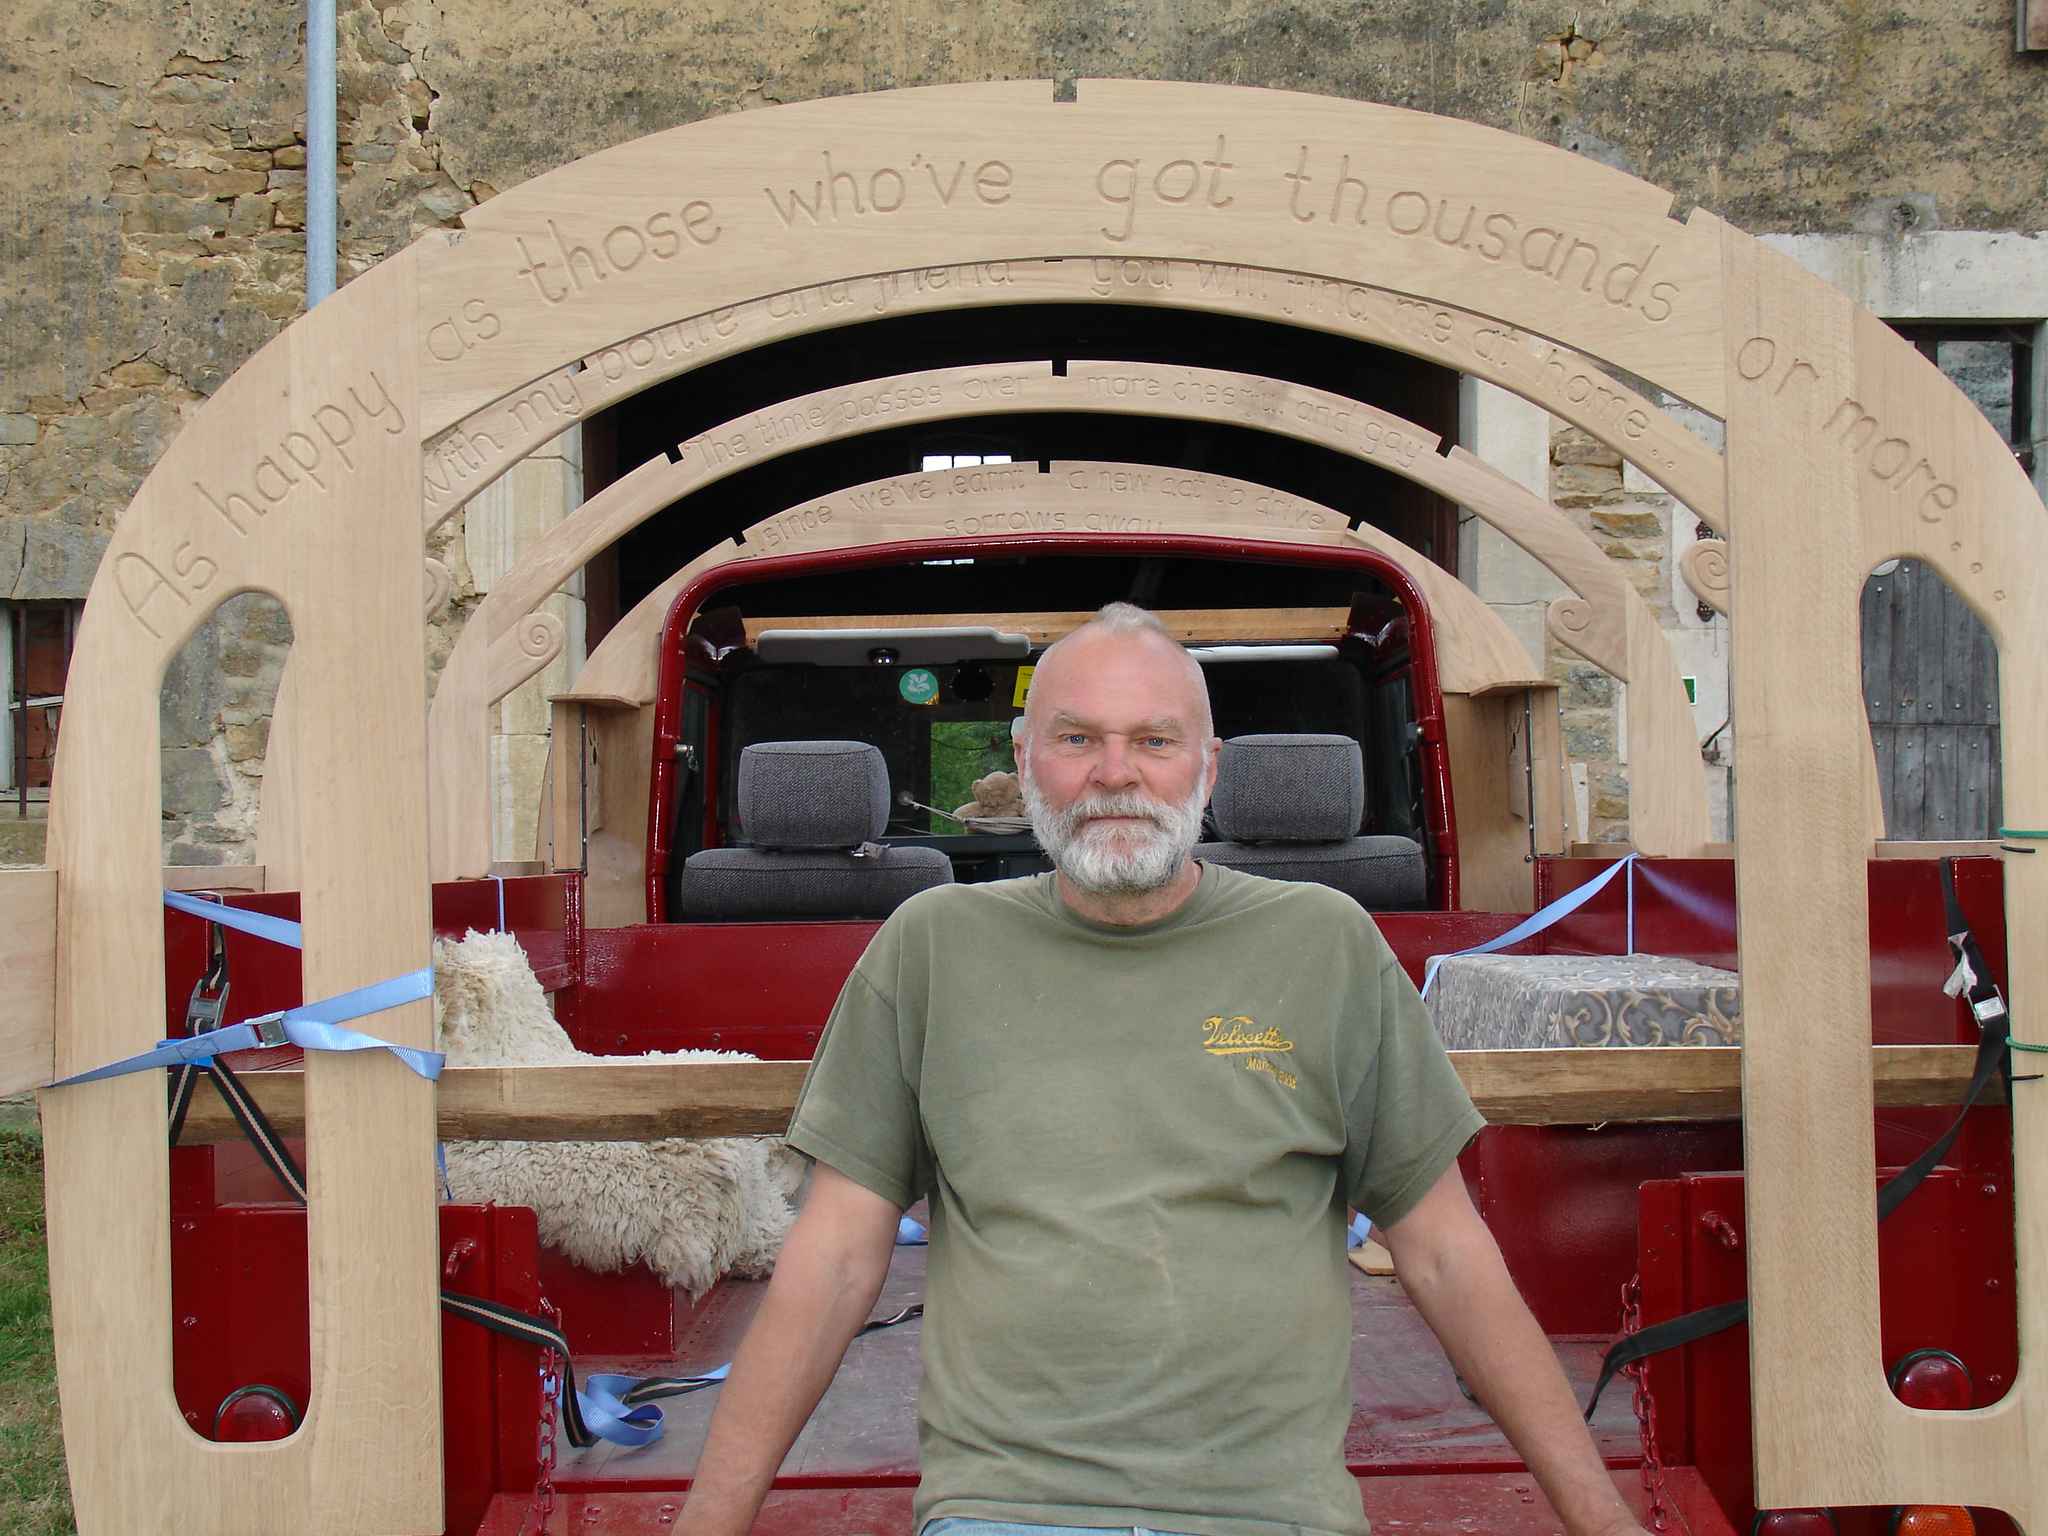
Before we left we invited all of our neighbours in the village and some friends to come and "arrosez" our new vardo ( the nearest translation is in
our expression "wetting the baby's head"). Cheap champagne substitute was sprayed liberally over the spare wheel and "Bright Phoebe" began her new
life. We lit the barbeque, ate and drank and sang songs till the early hours with The Holmfirth anthem, The 30 foot trailer and Roll Alabama all
echoing back off the church to prove to the rest of the village that the english still have a bit of heritage to show off. The French have a love
of anyone who displays good craftmanship and we had numerous curious visitors dropping by to inspect our progress one of whom, another Landrover Owner
coined the name "landroulotte"
Landrovardo - landroulotte - land Rover Camper -Call it what you will; we love it and intend to spend many happy nights in places other campers can't reach!
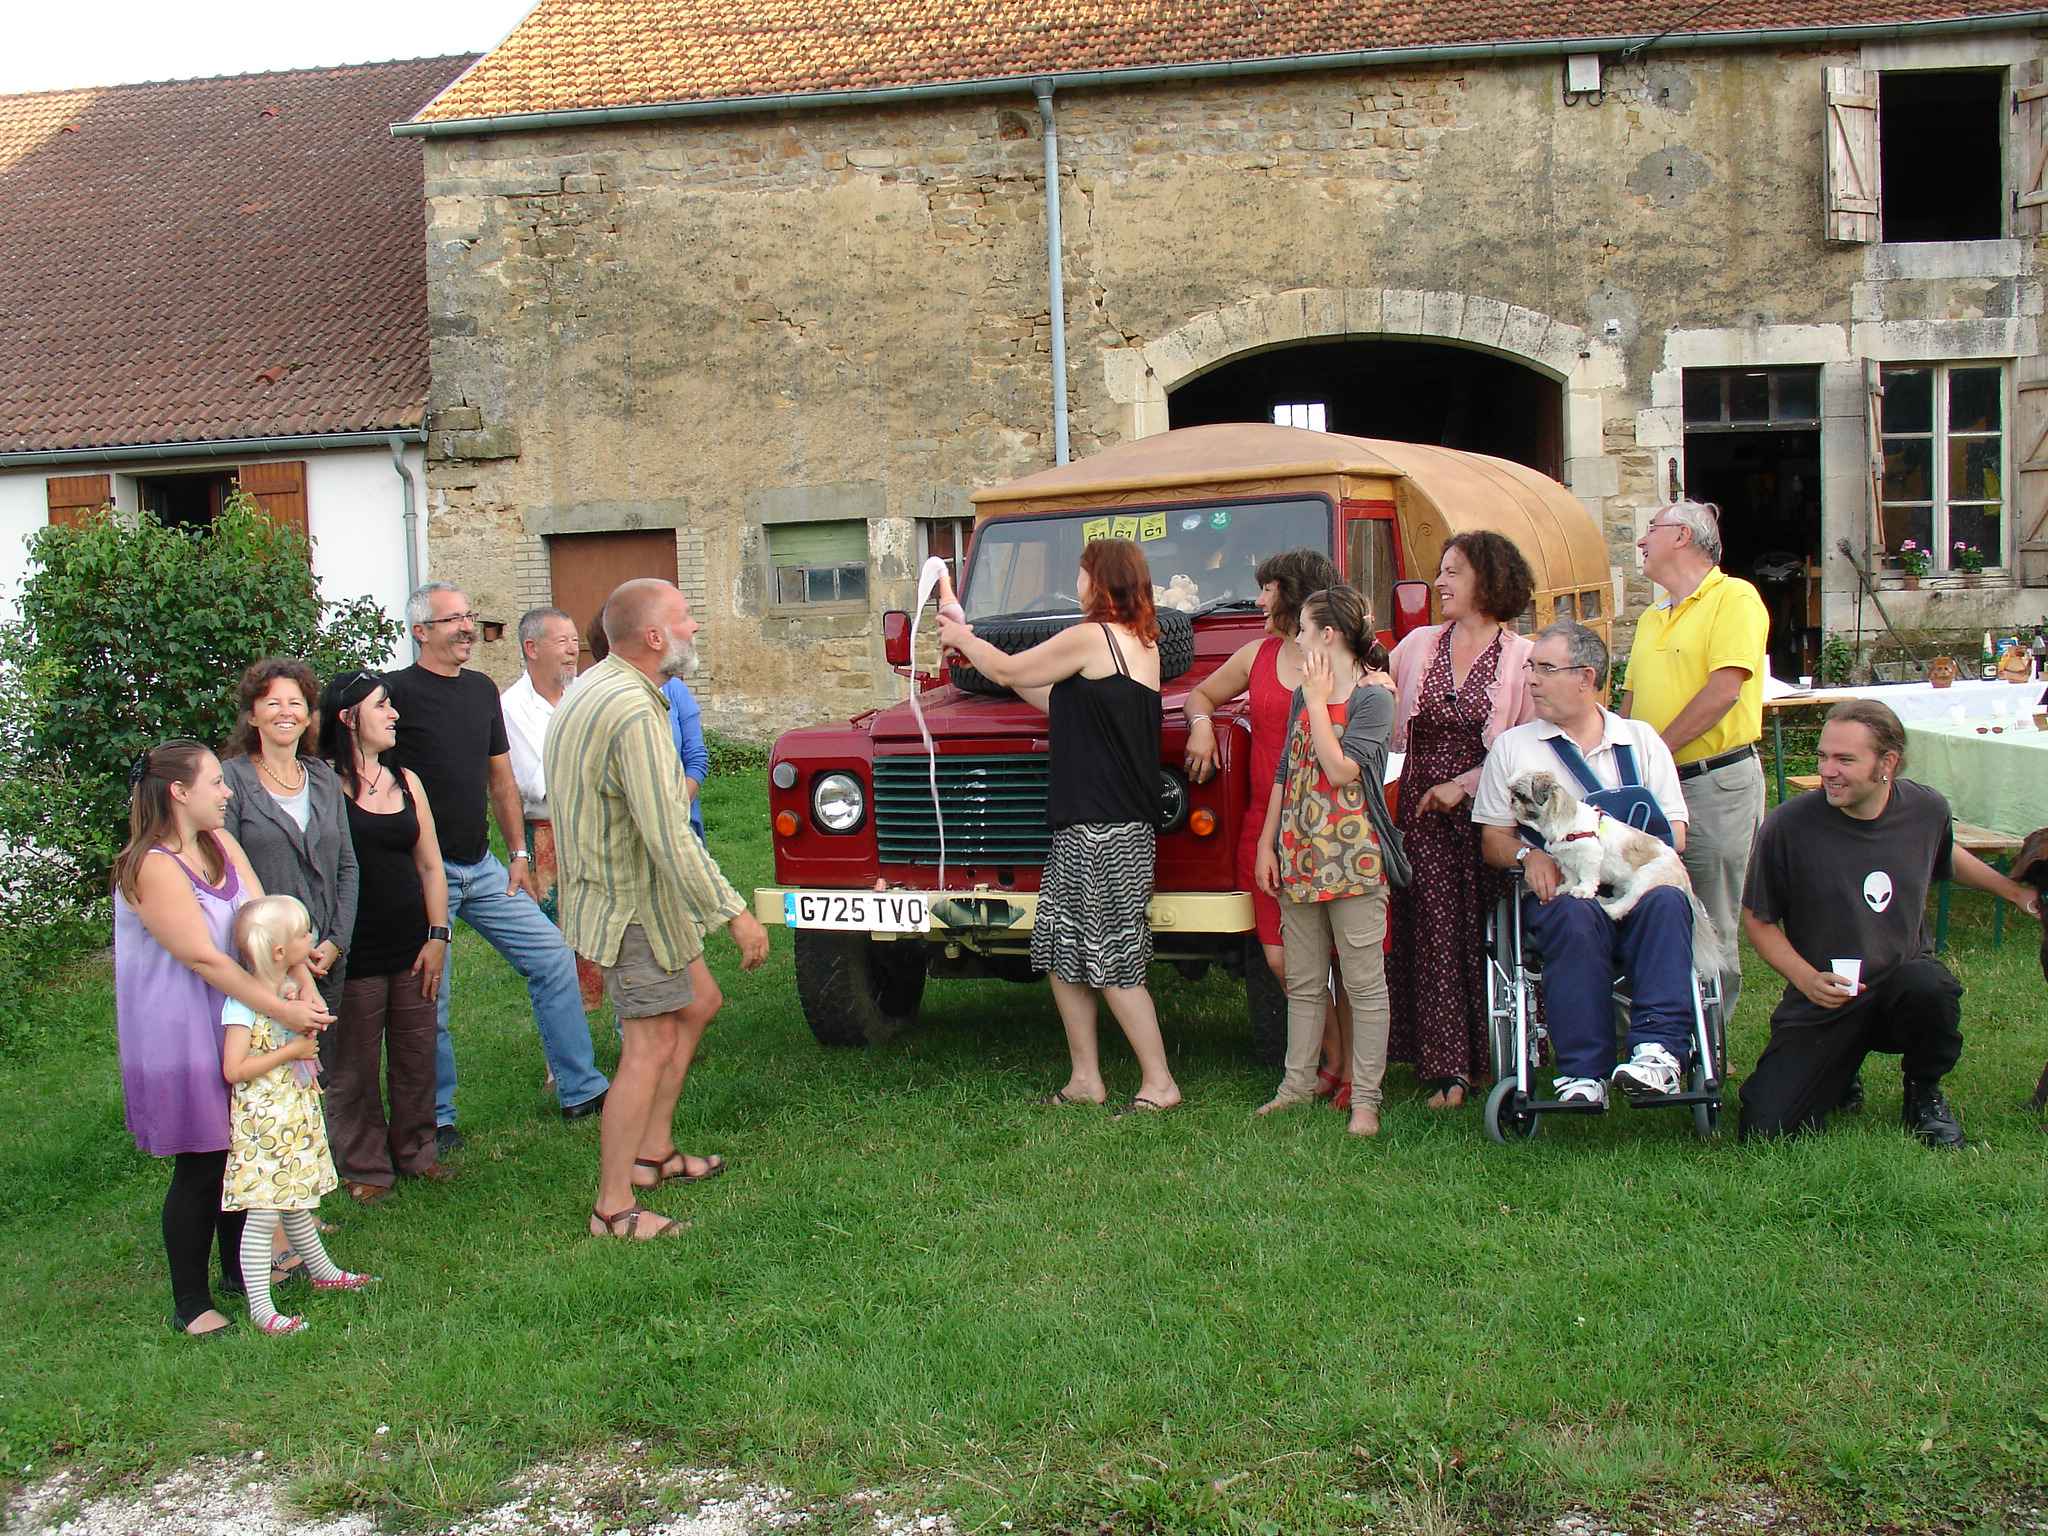
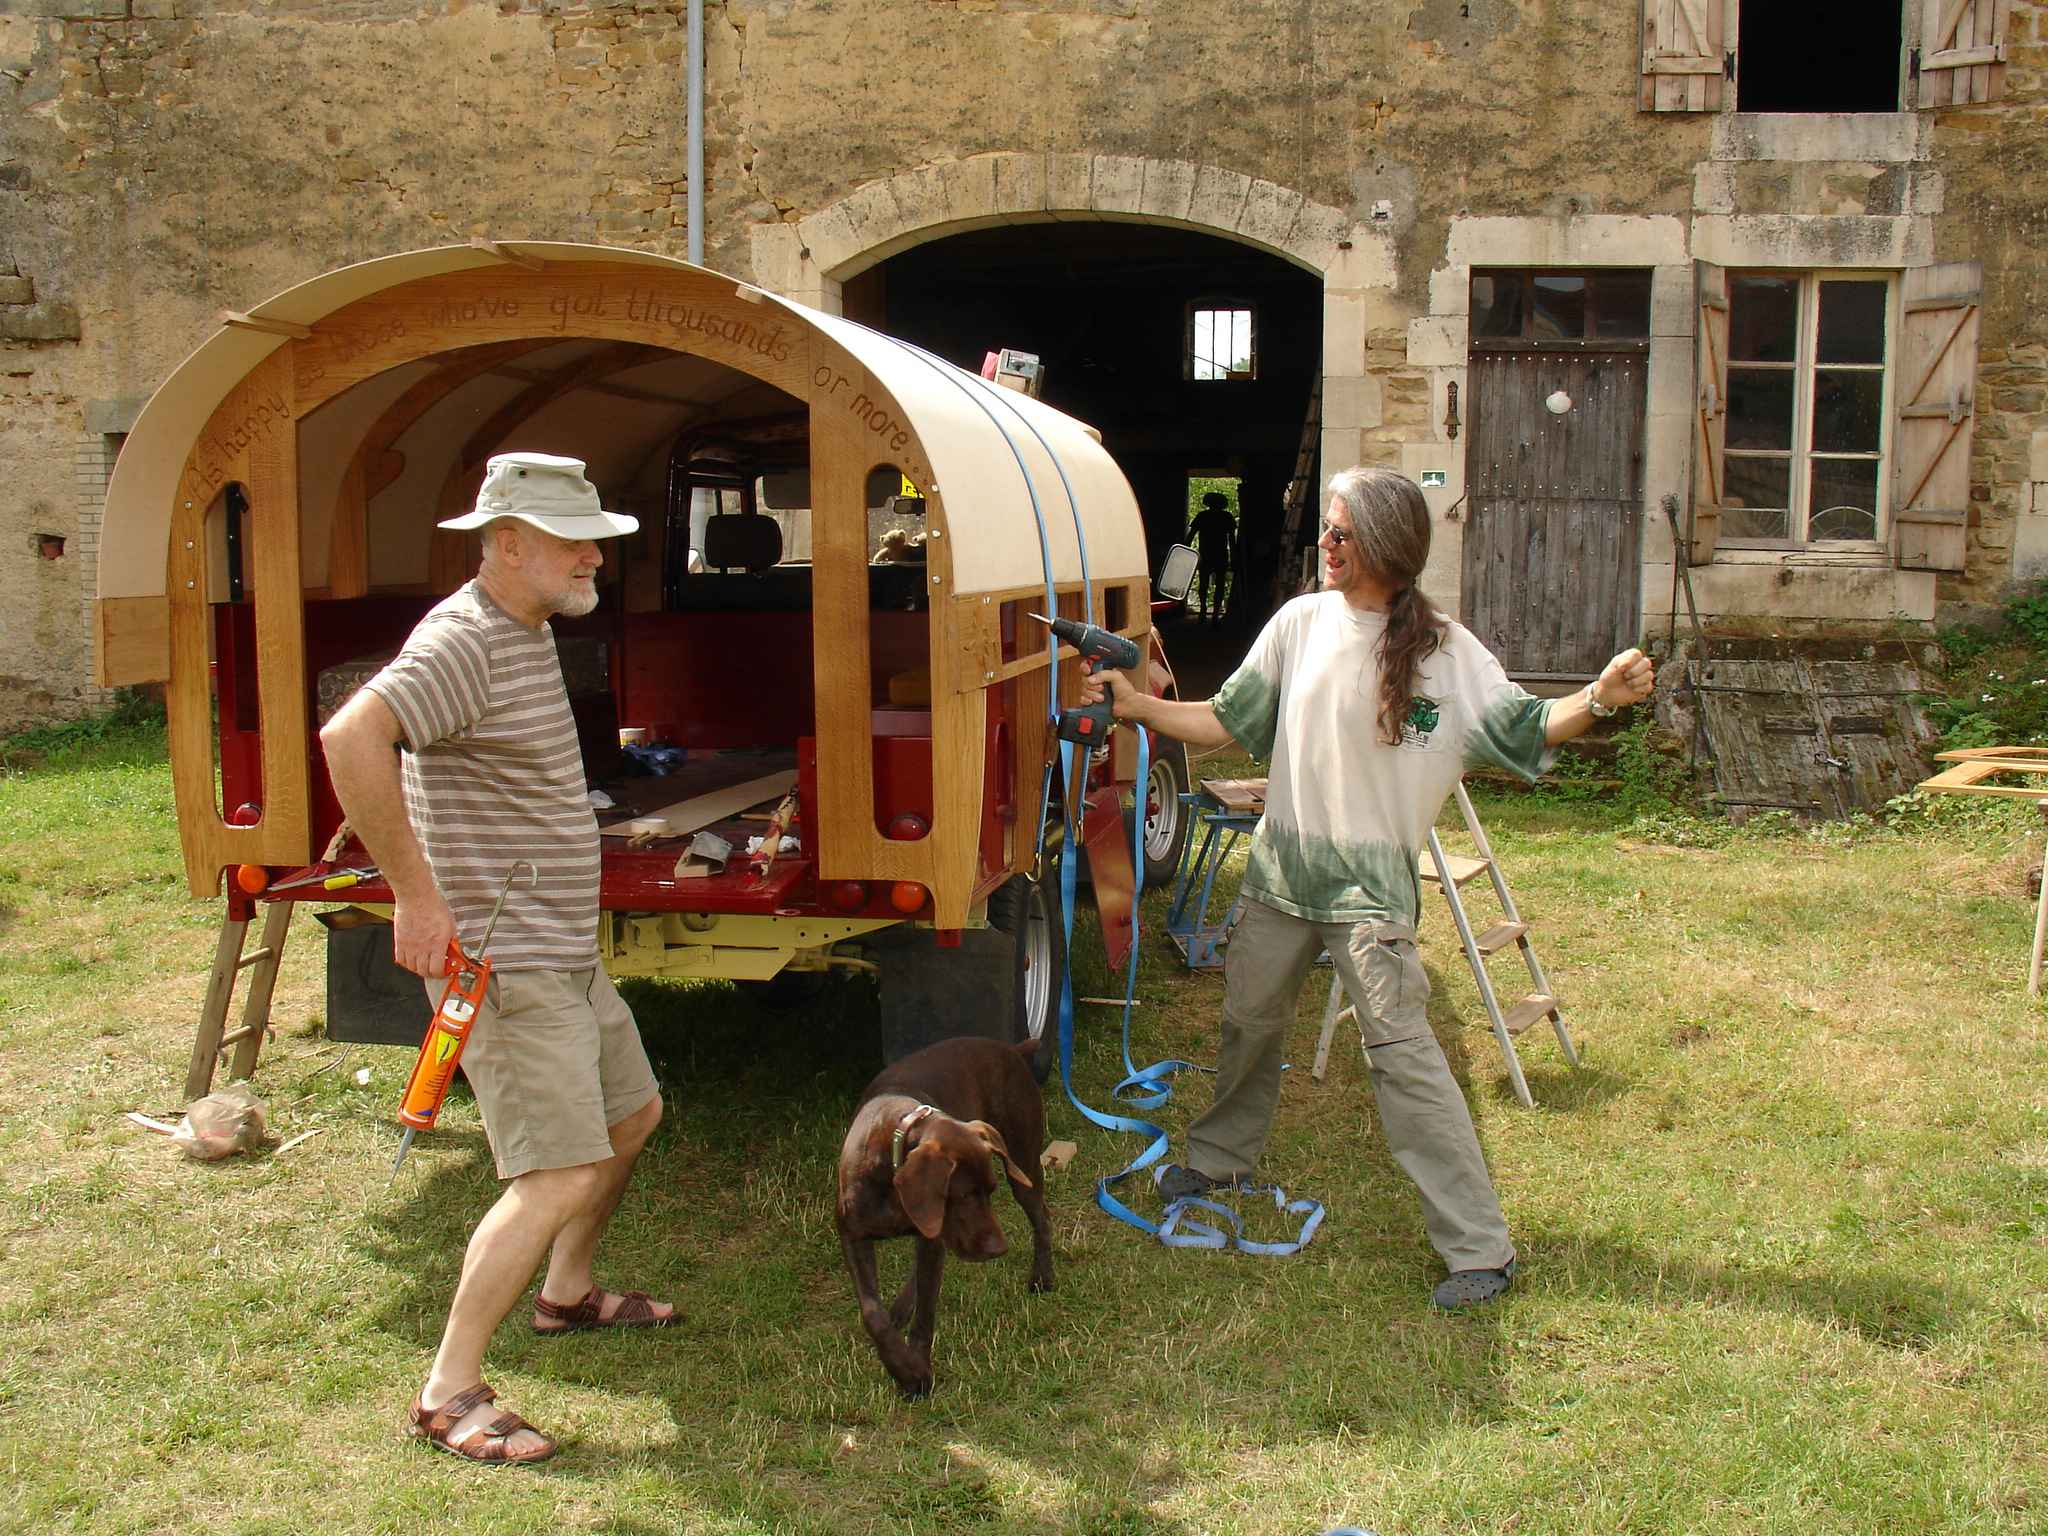
Champagne for Phoebe
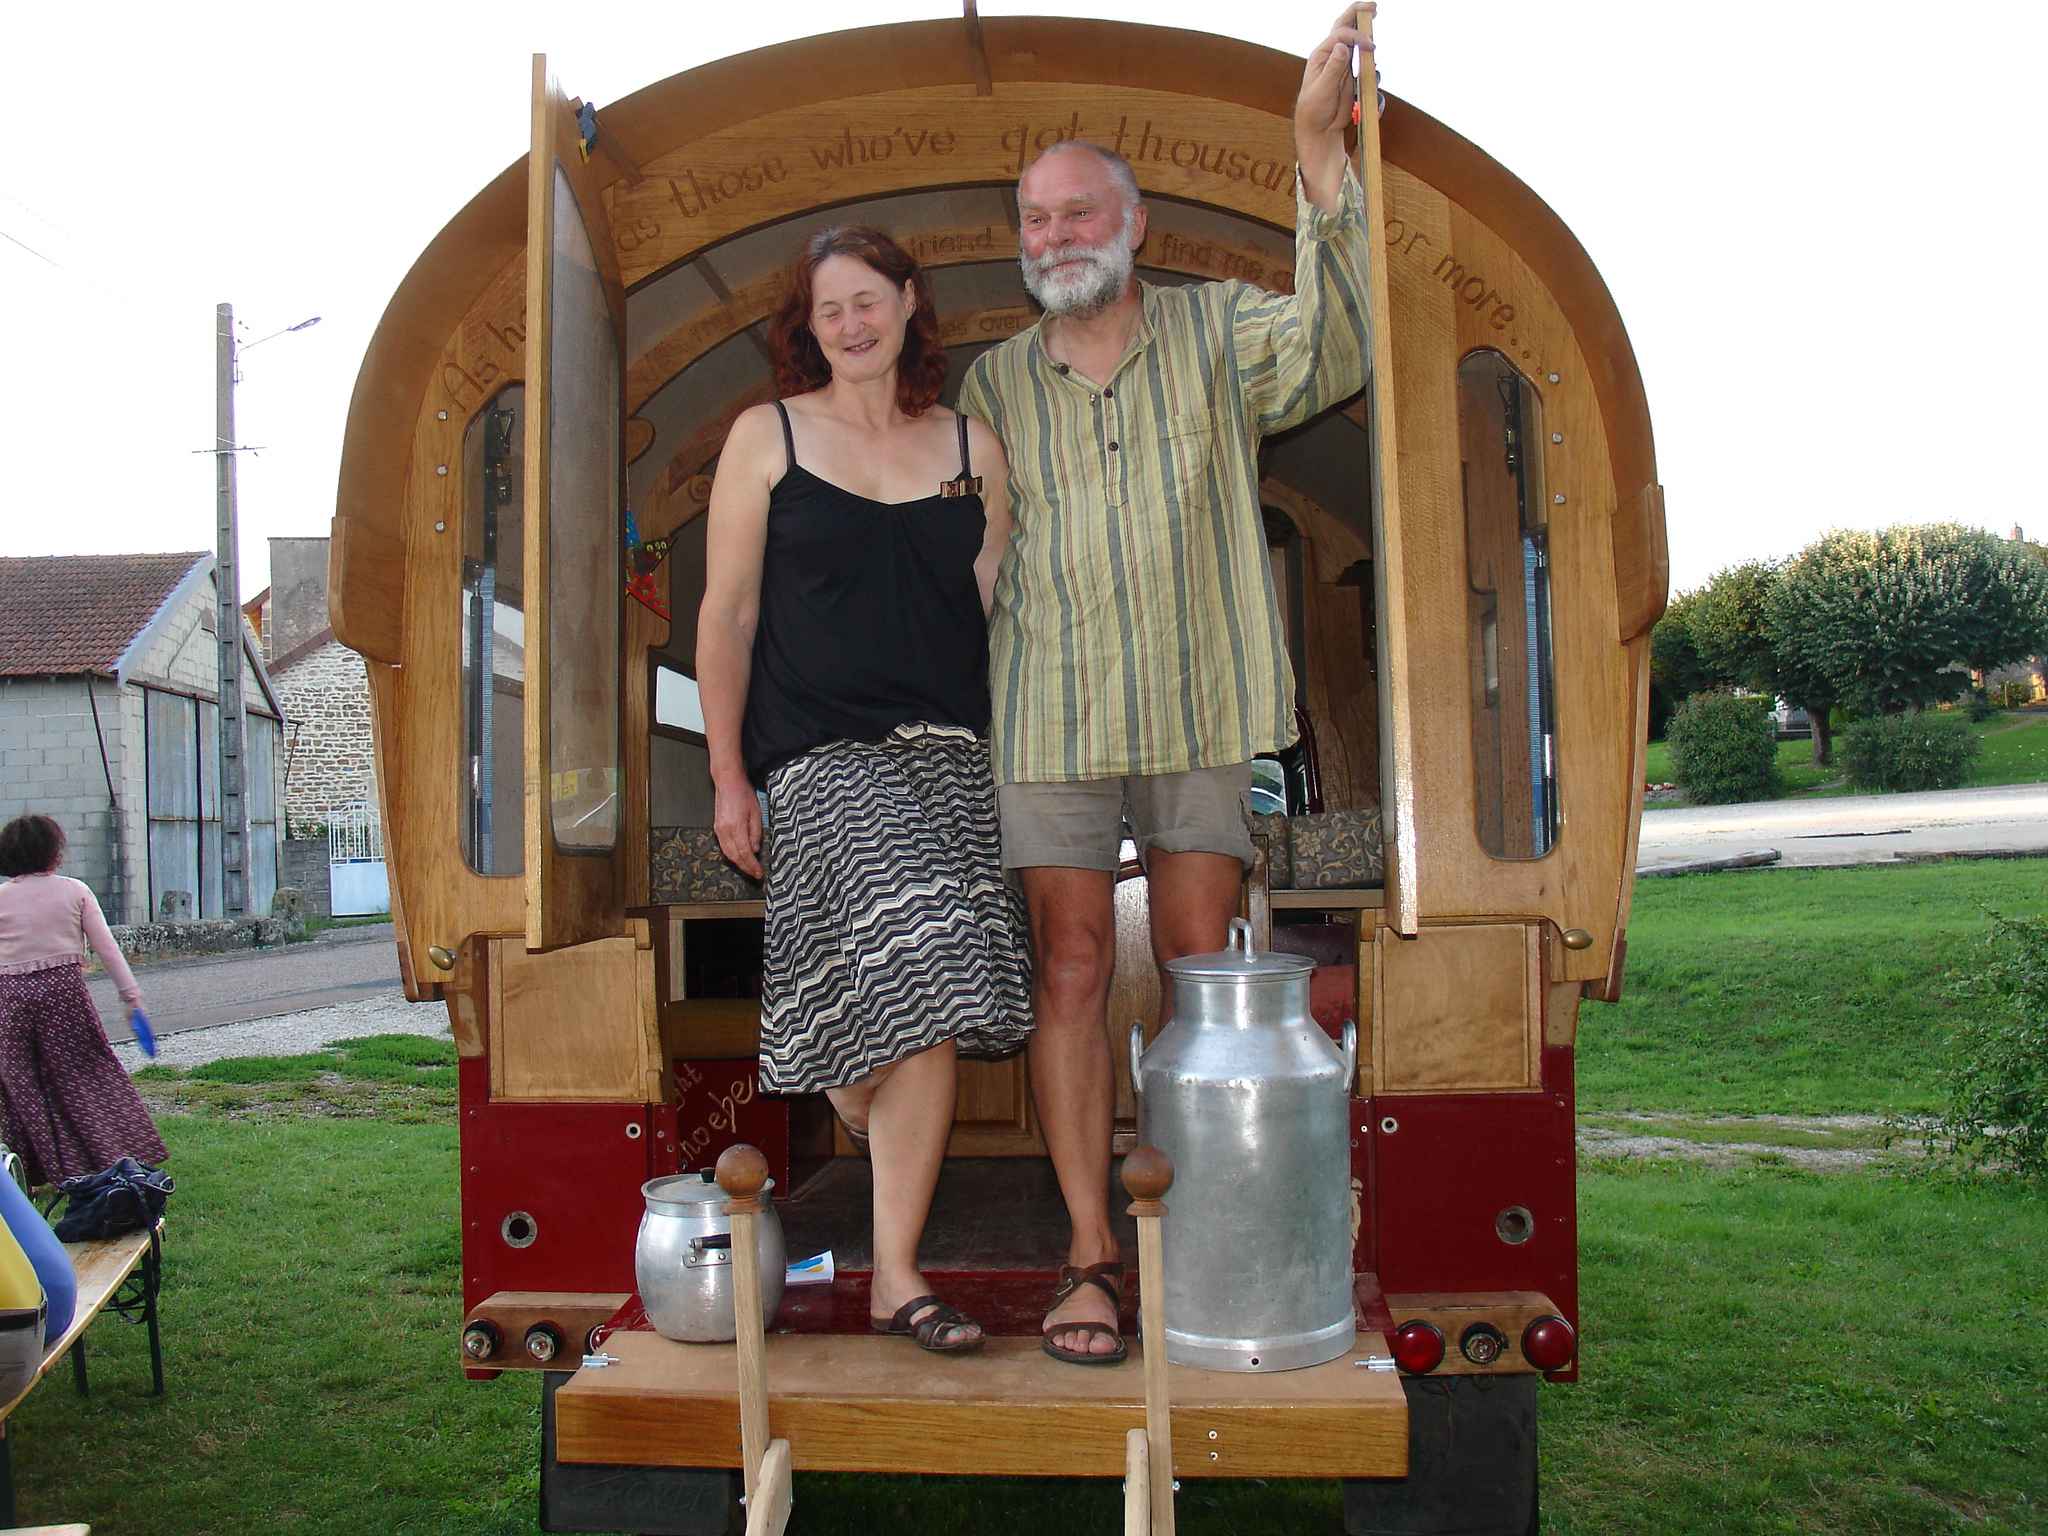
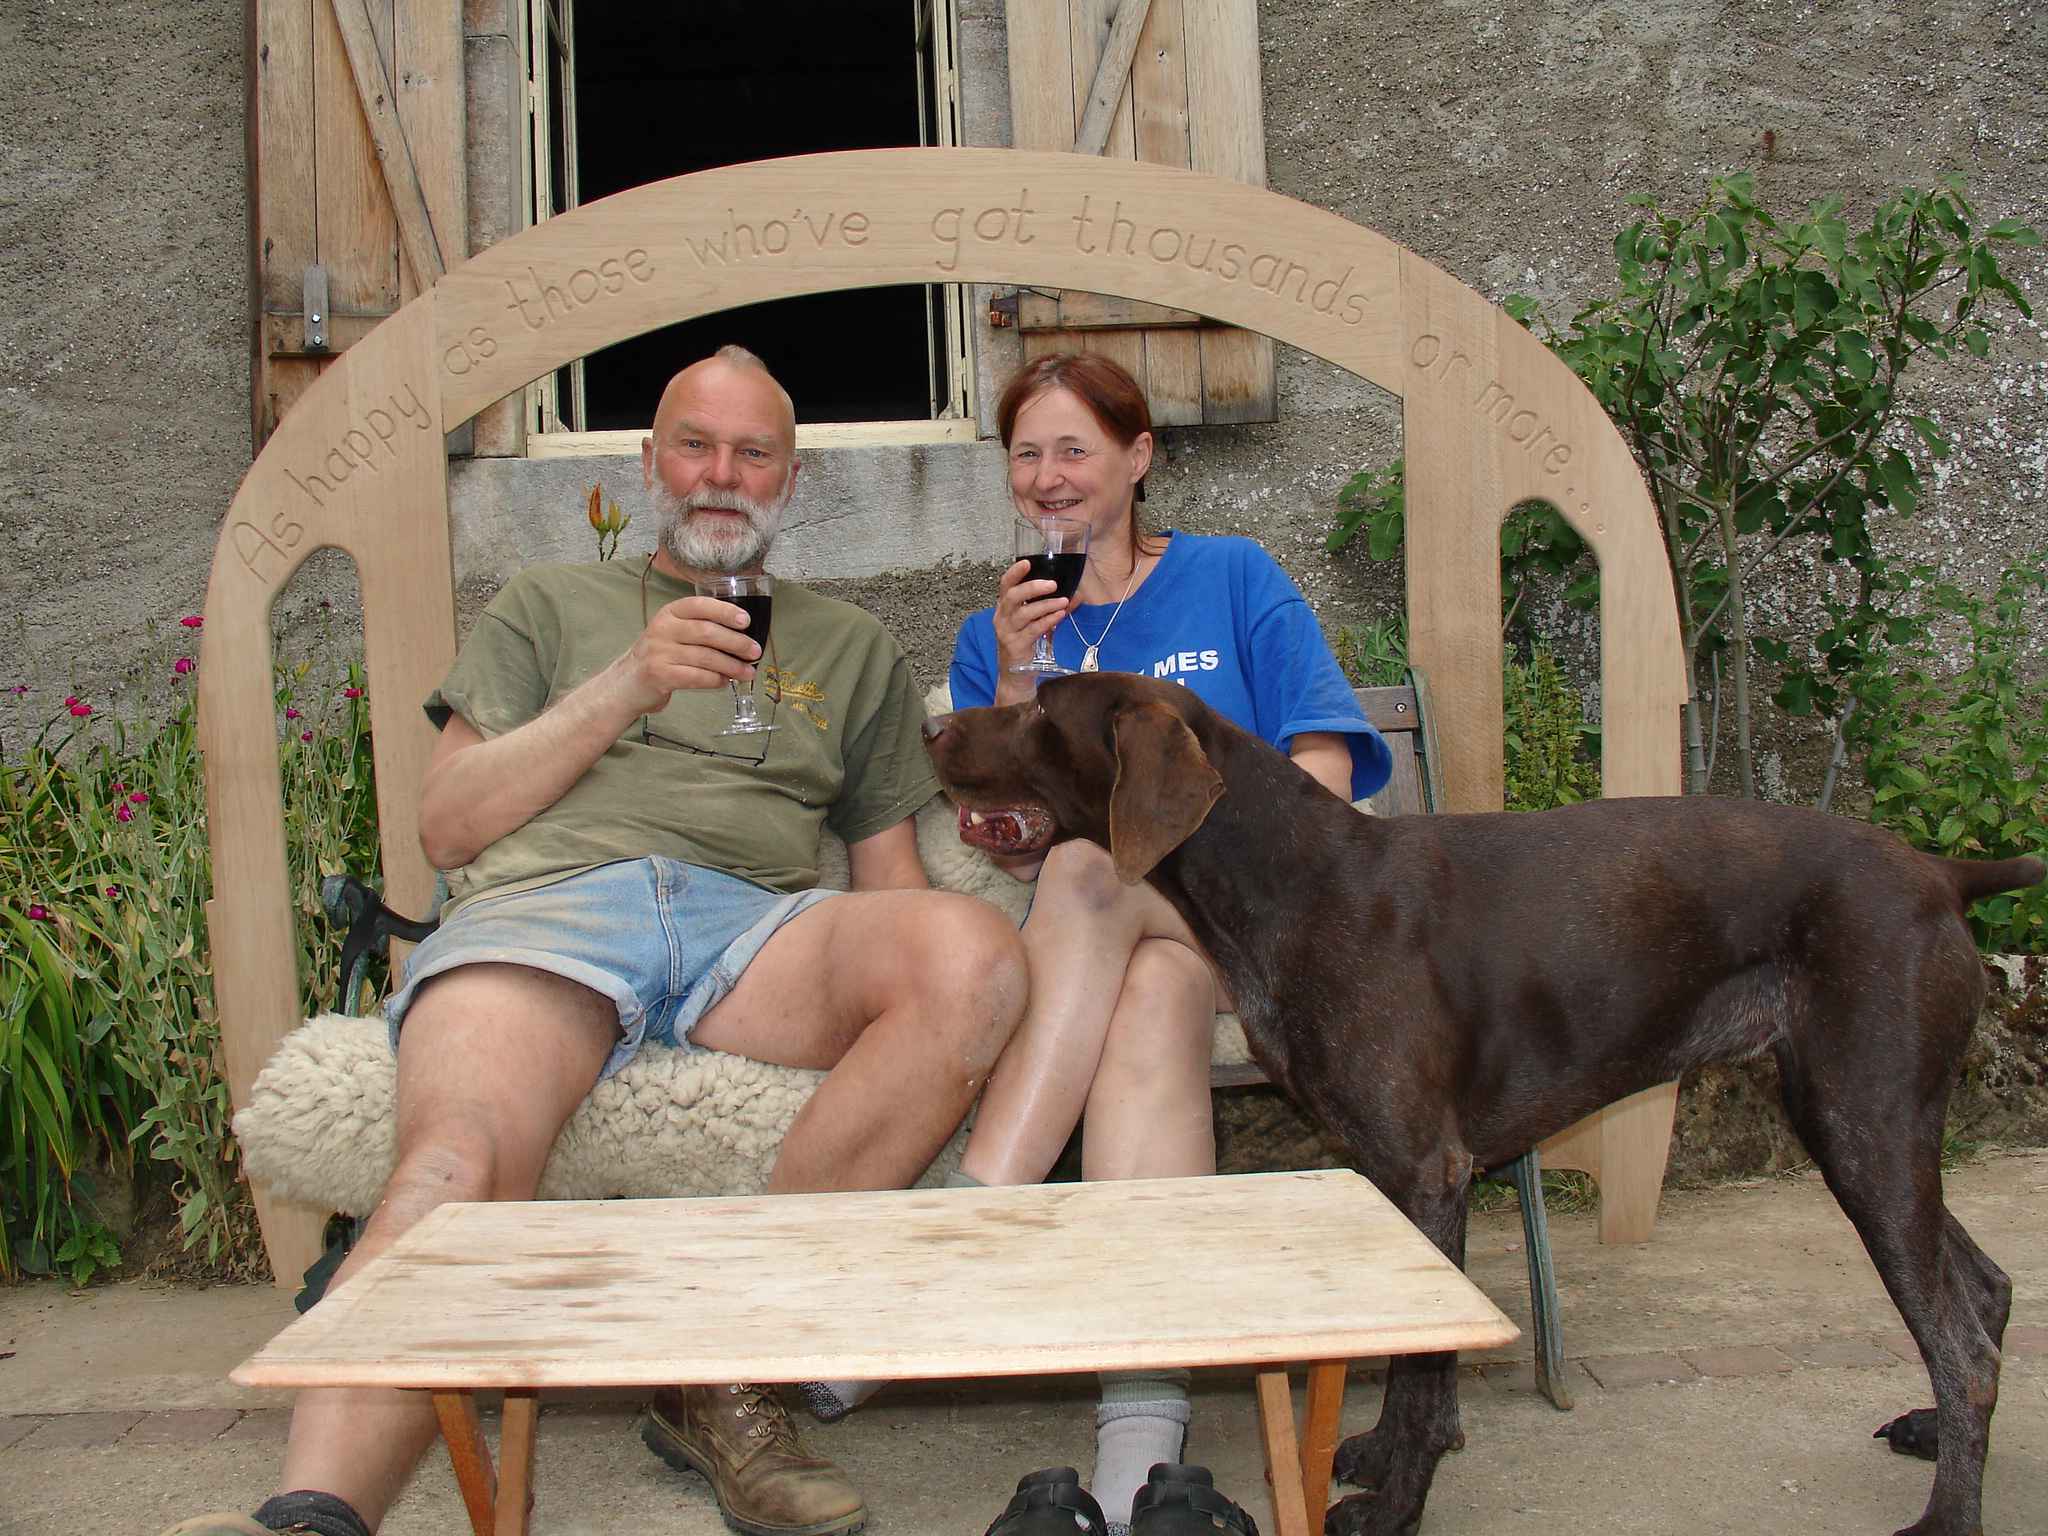
A happy couple at the end of two months hard graft
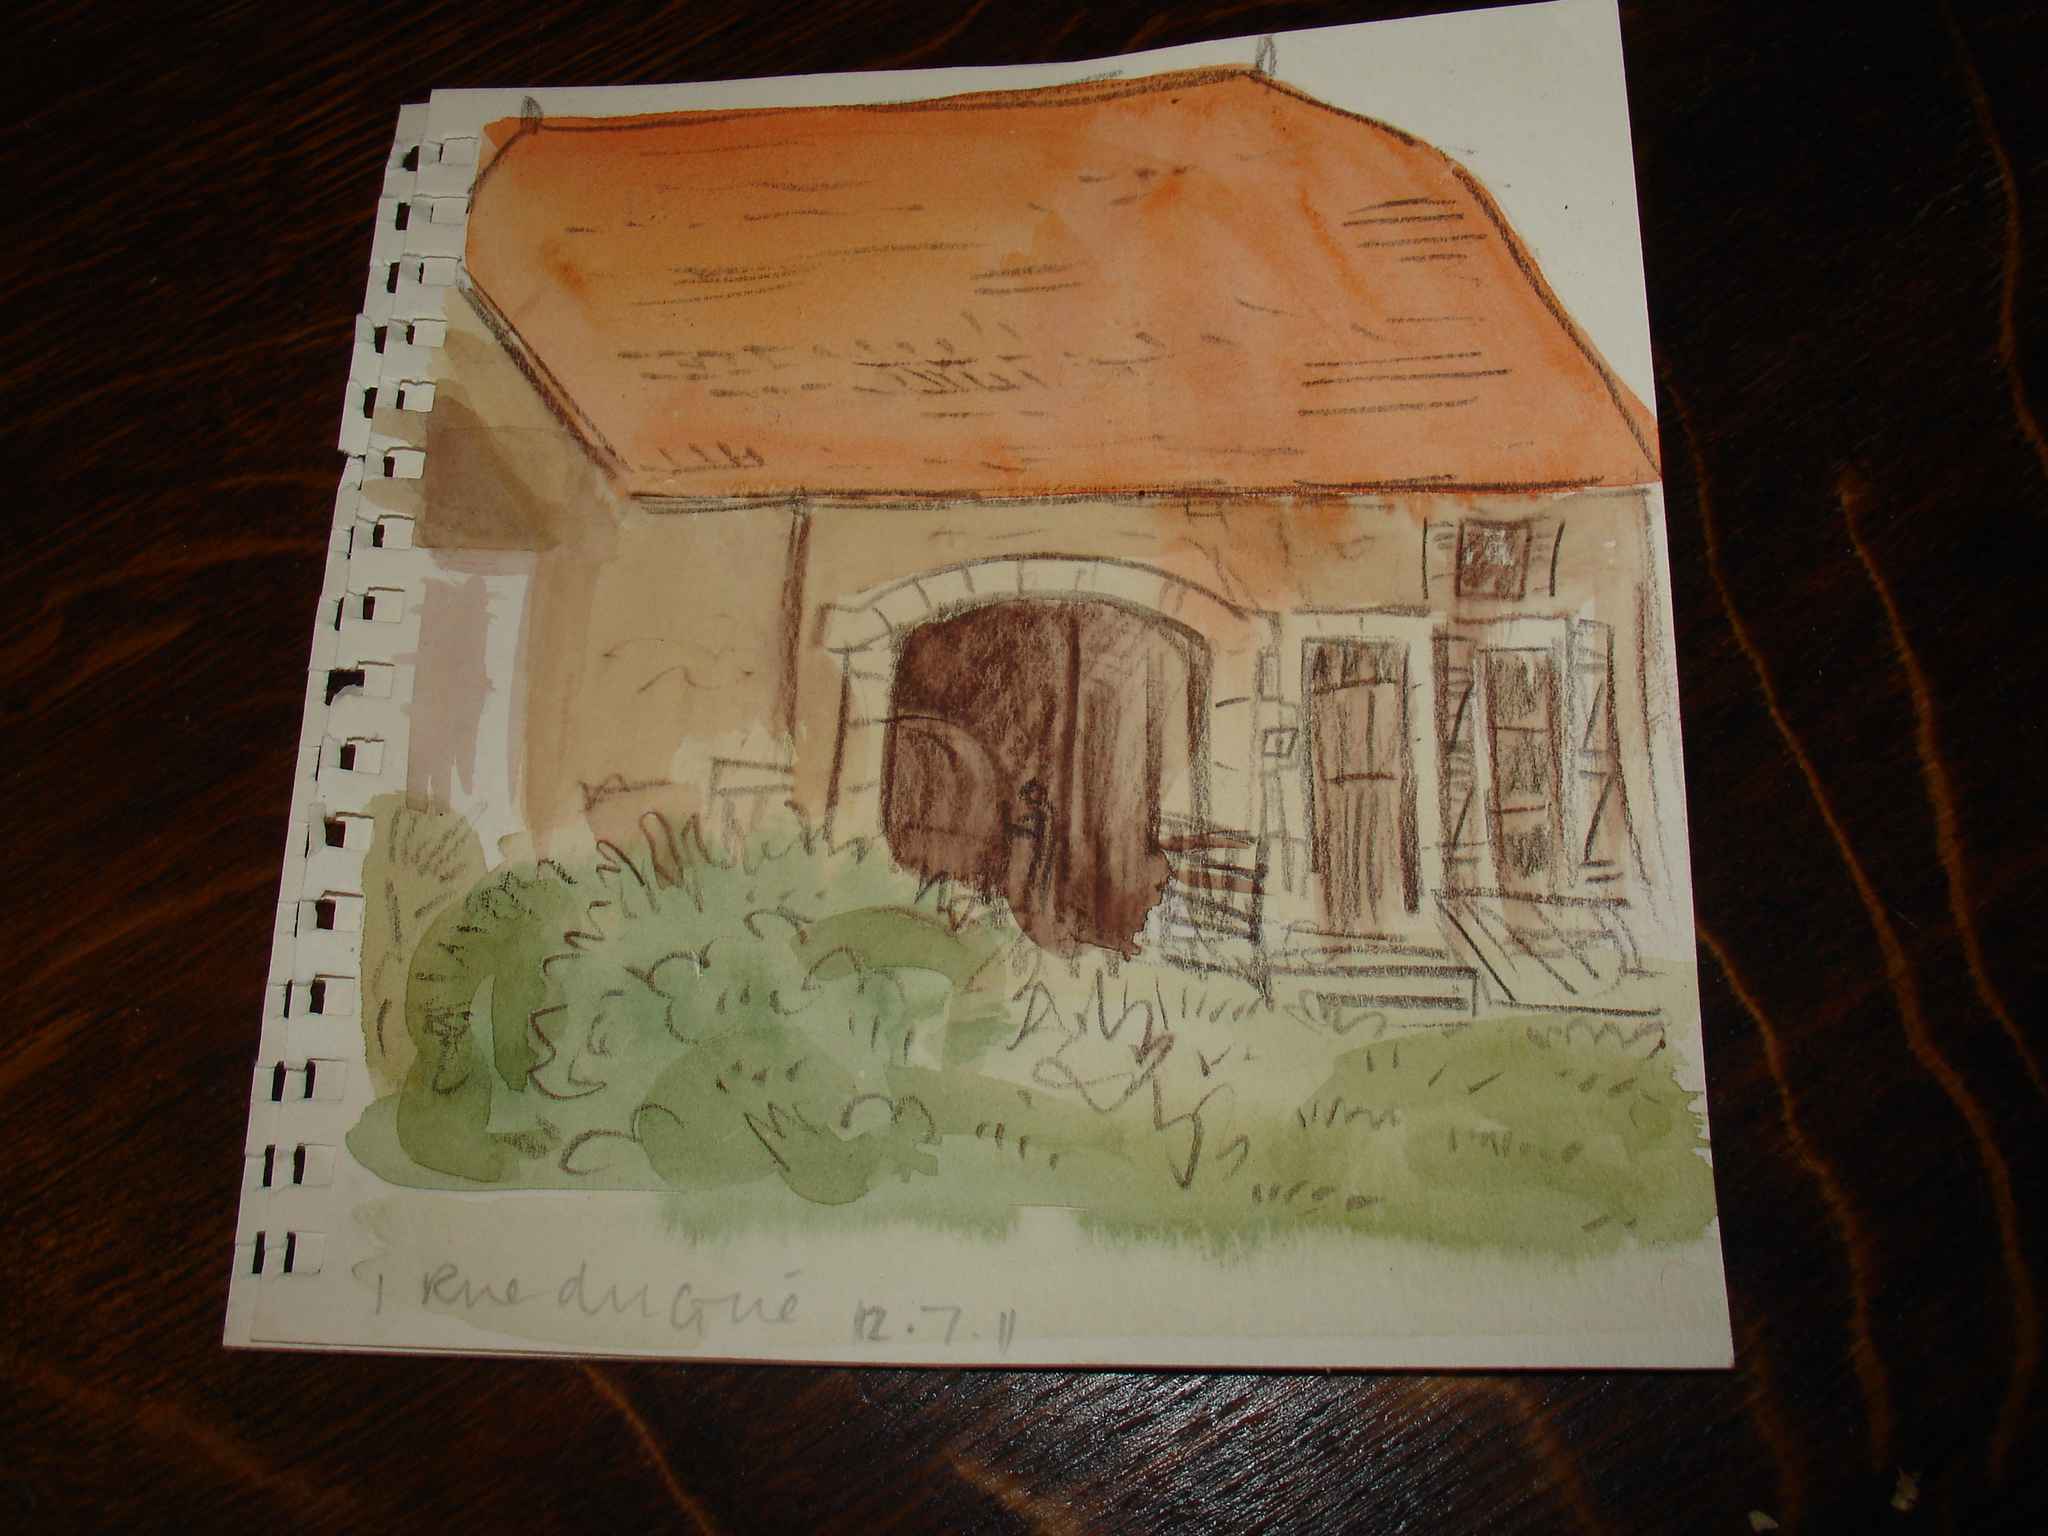
Pip's lovely water colour
Now we are ready to park up and enjoy the scenery almost anywhere
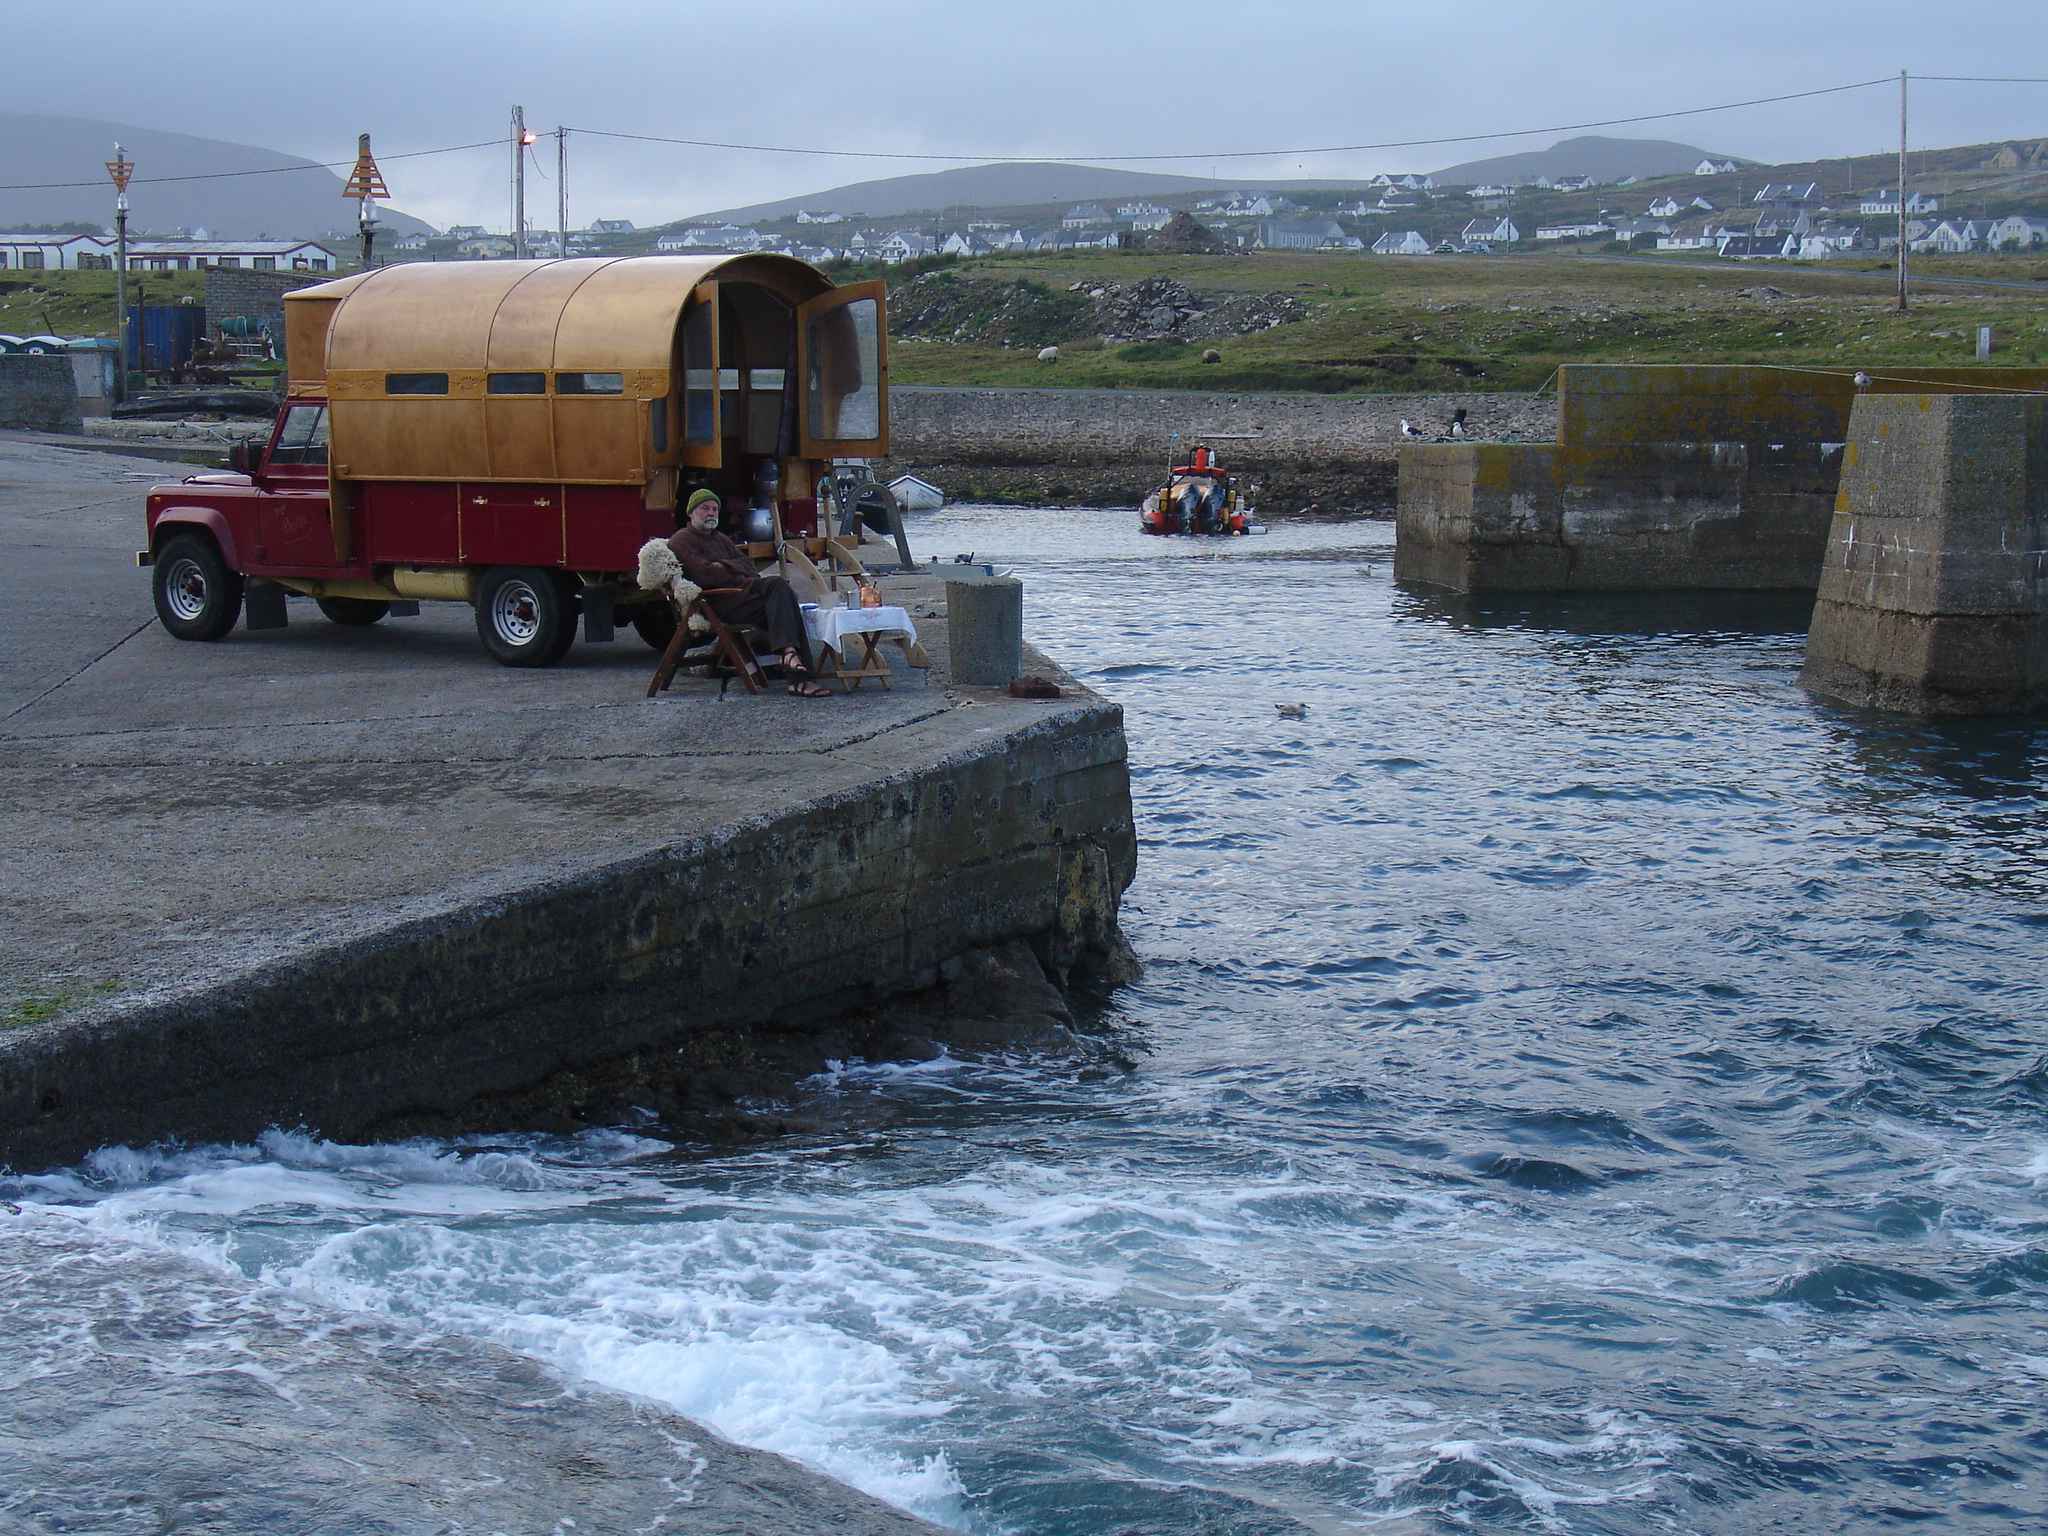
On the west coast of Ireland
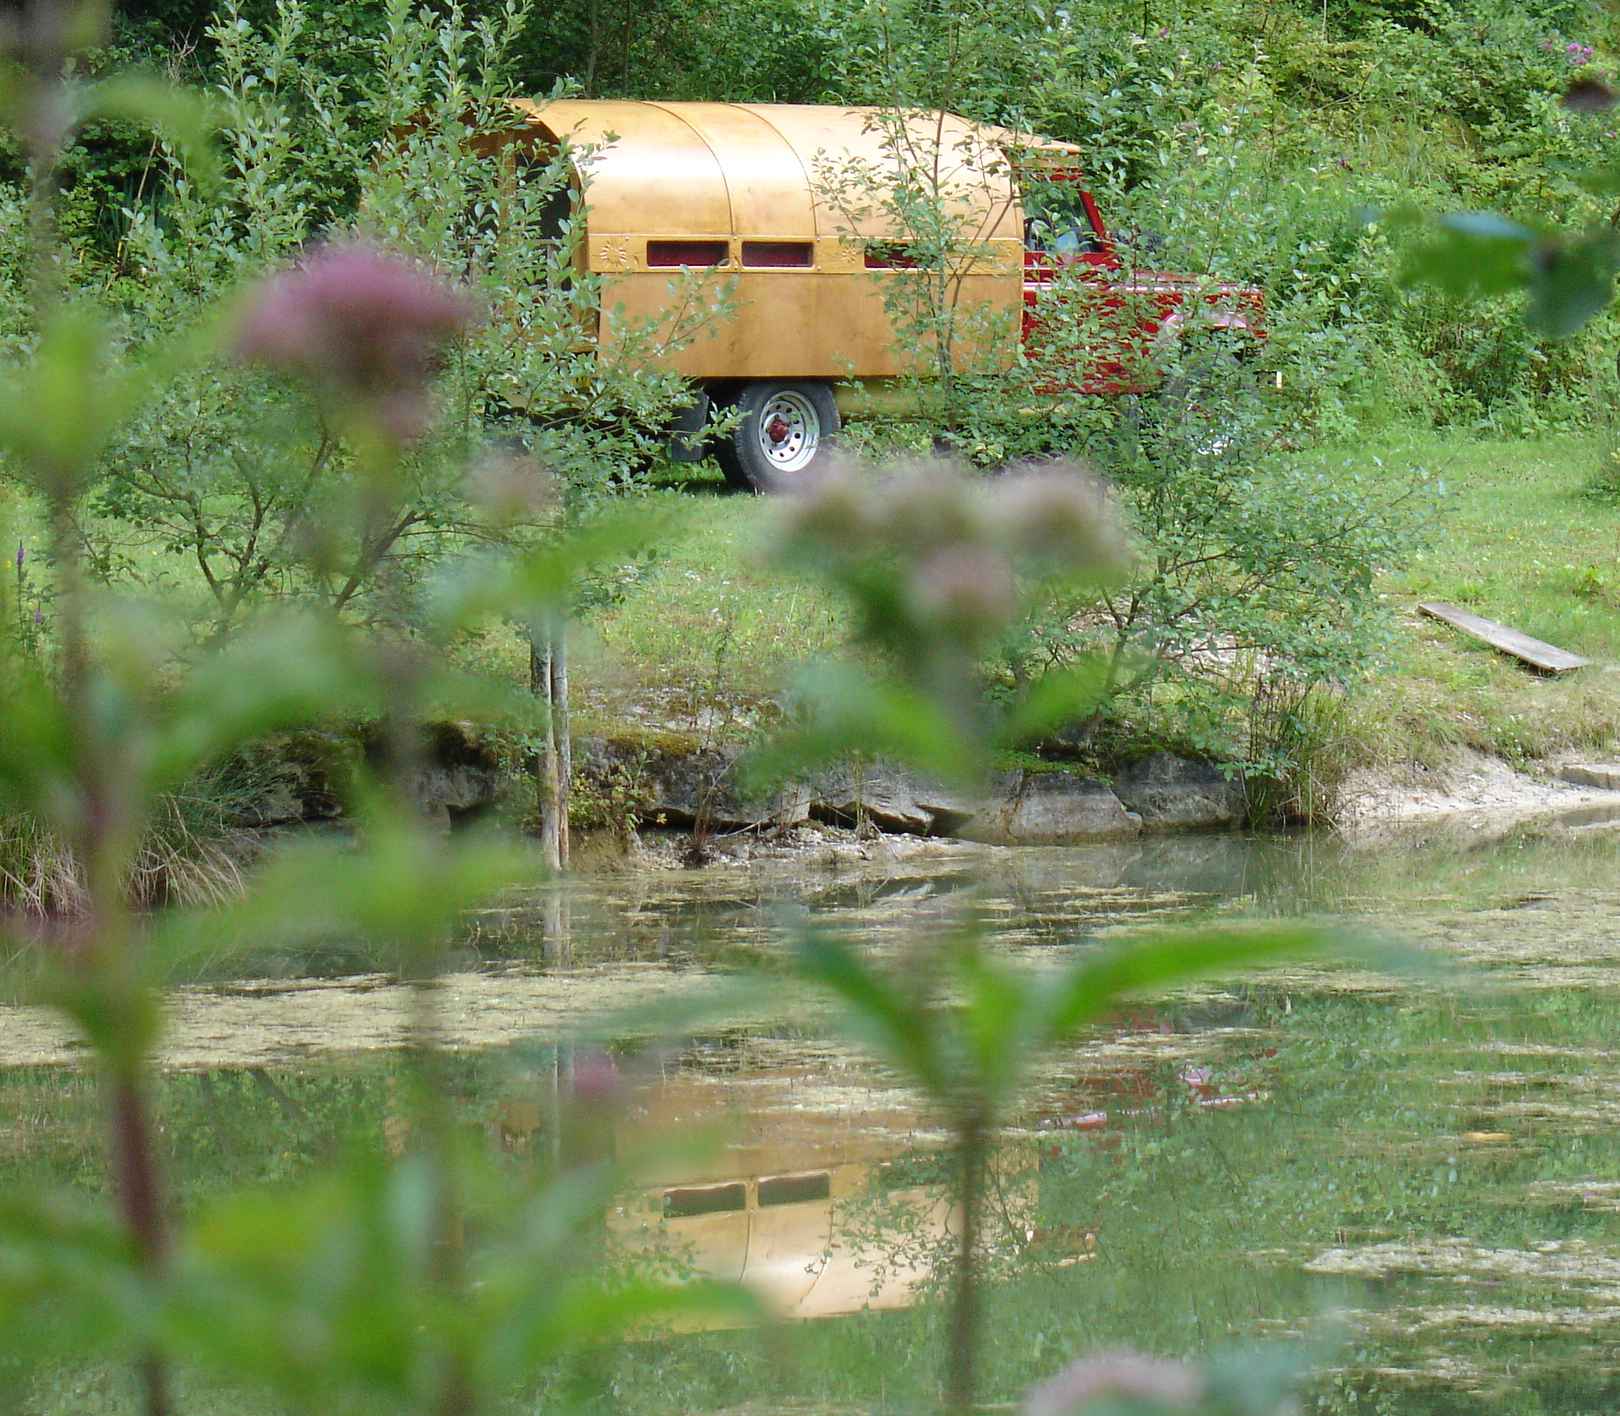
Beside lac du Ciel
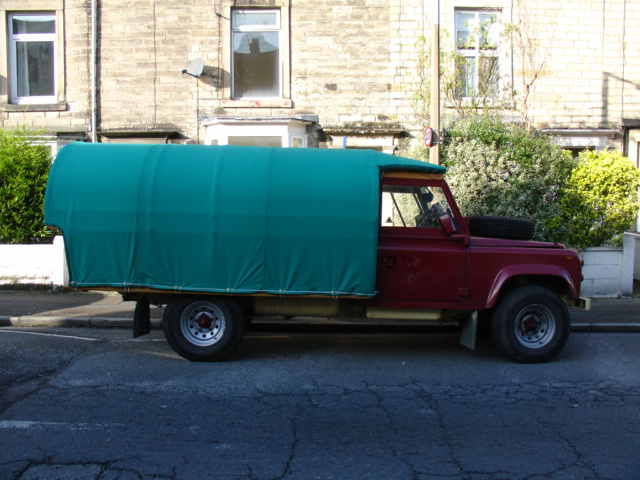
All covered up at home in Lancaster
The canvas top will keep of the worst of the weather and UV light so the
timber and it's finish will last a good bit longer.
A day and a half in the workshops of Simon and Justine from Yurts and Squirts
click here to see their website.
Produced a really good fitting top which can be left on for short, low speed journeys which is very convenient.
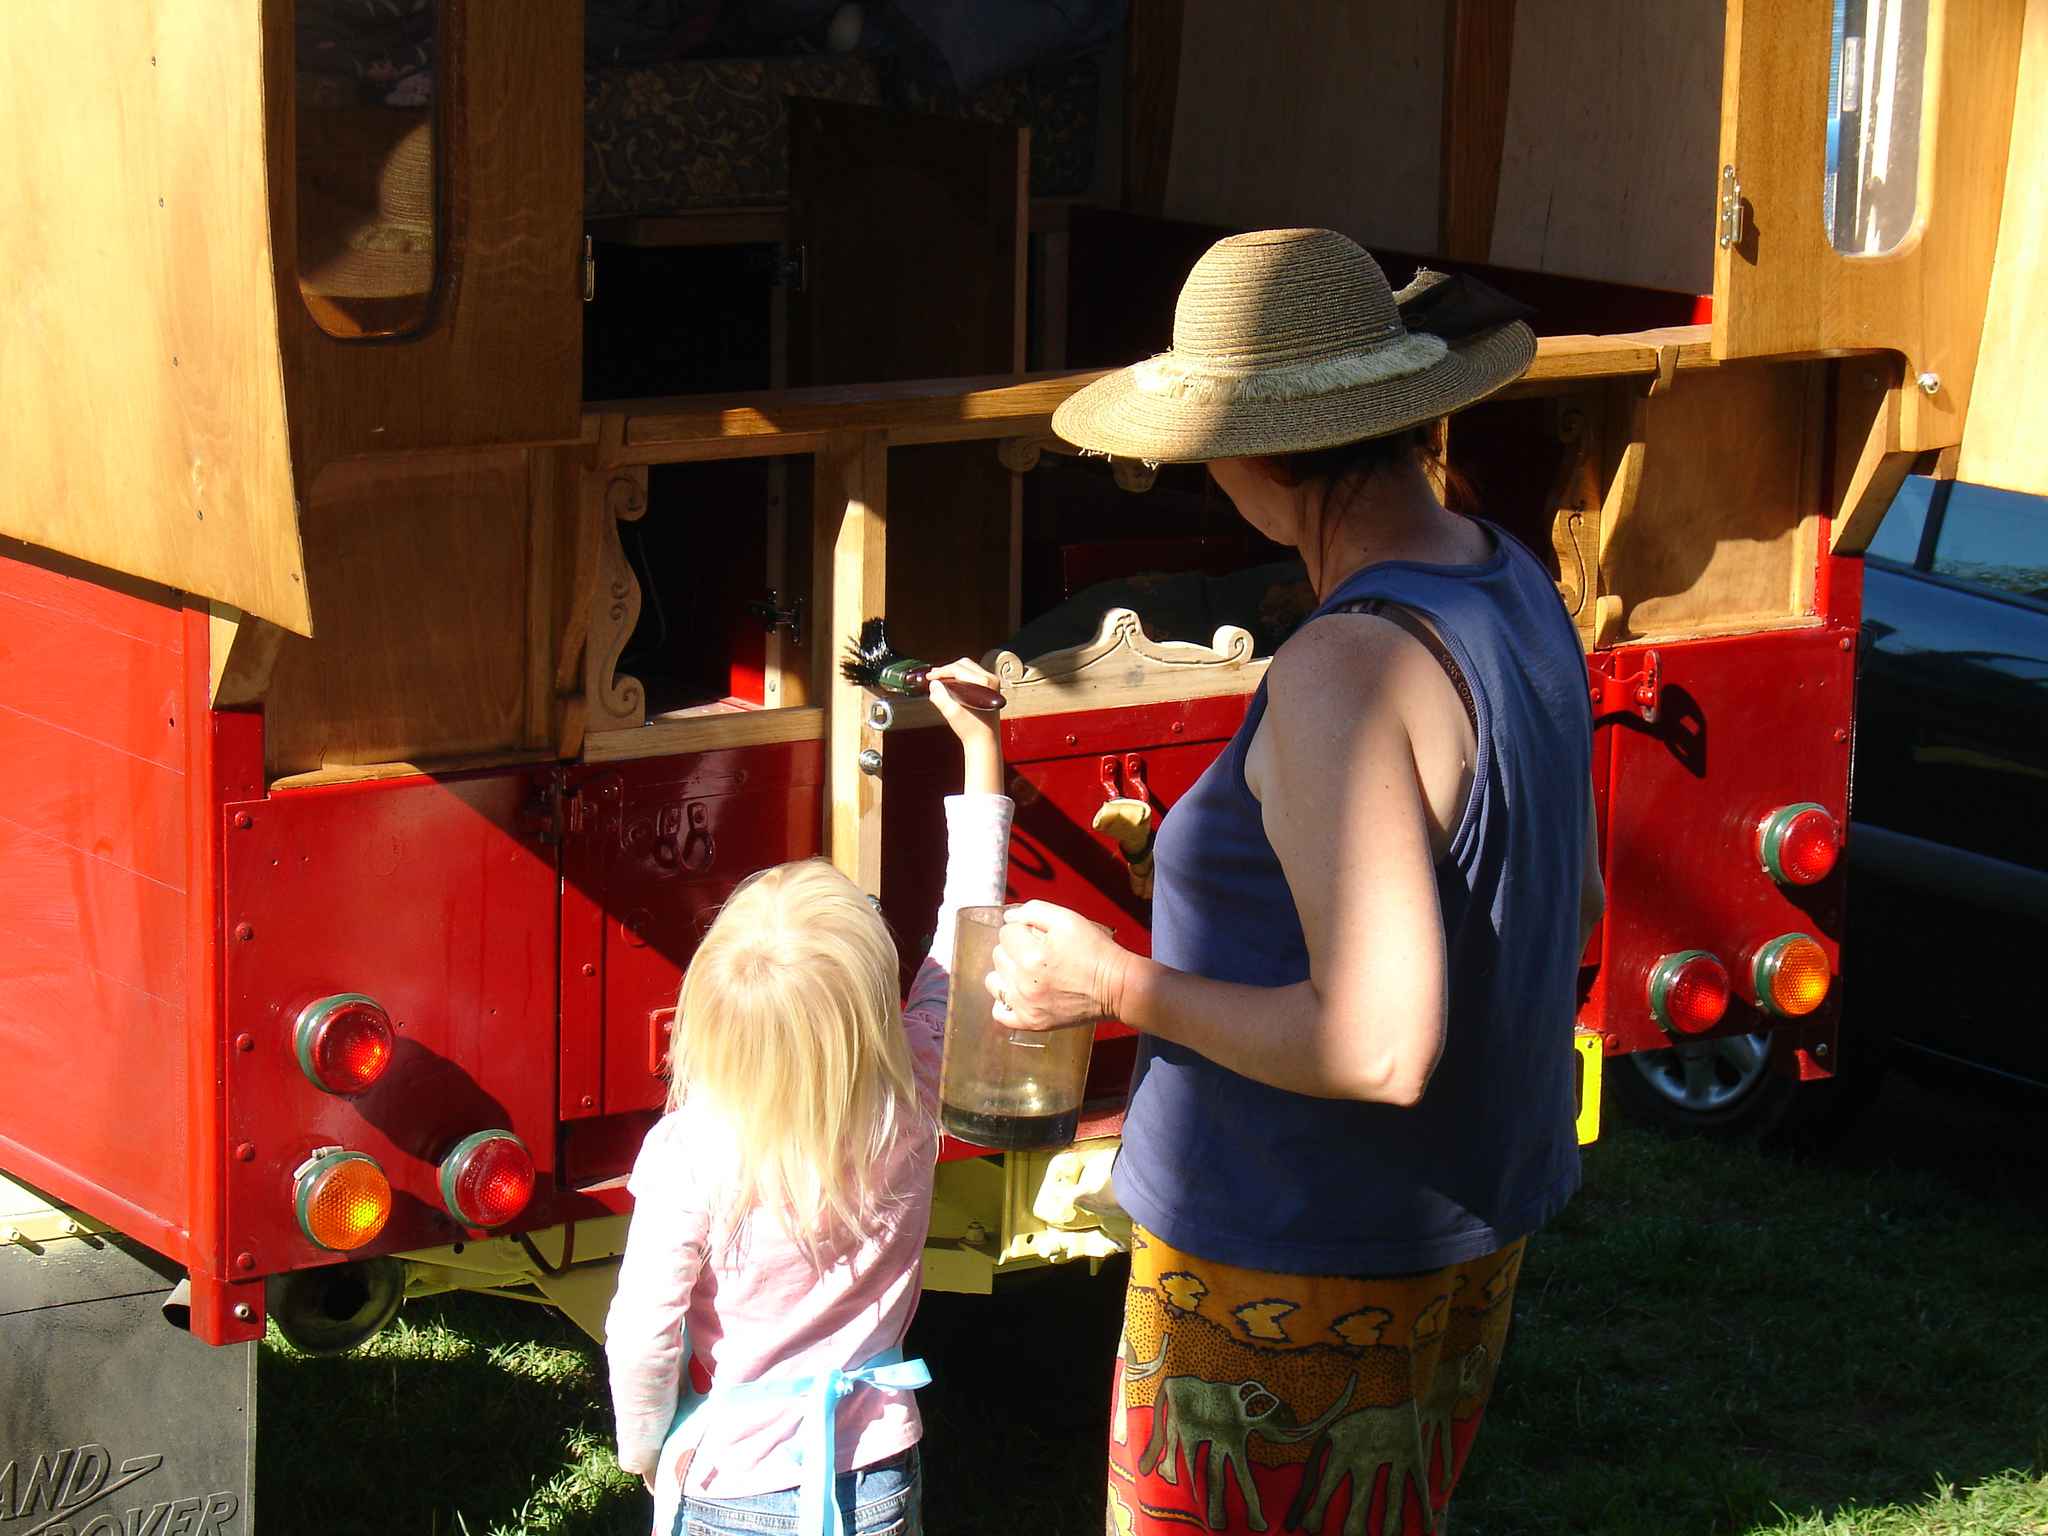
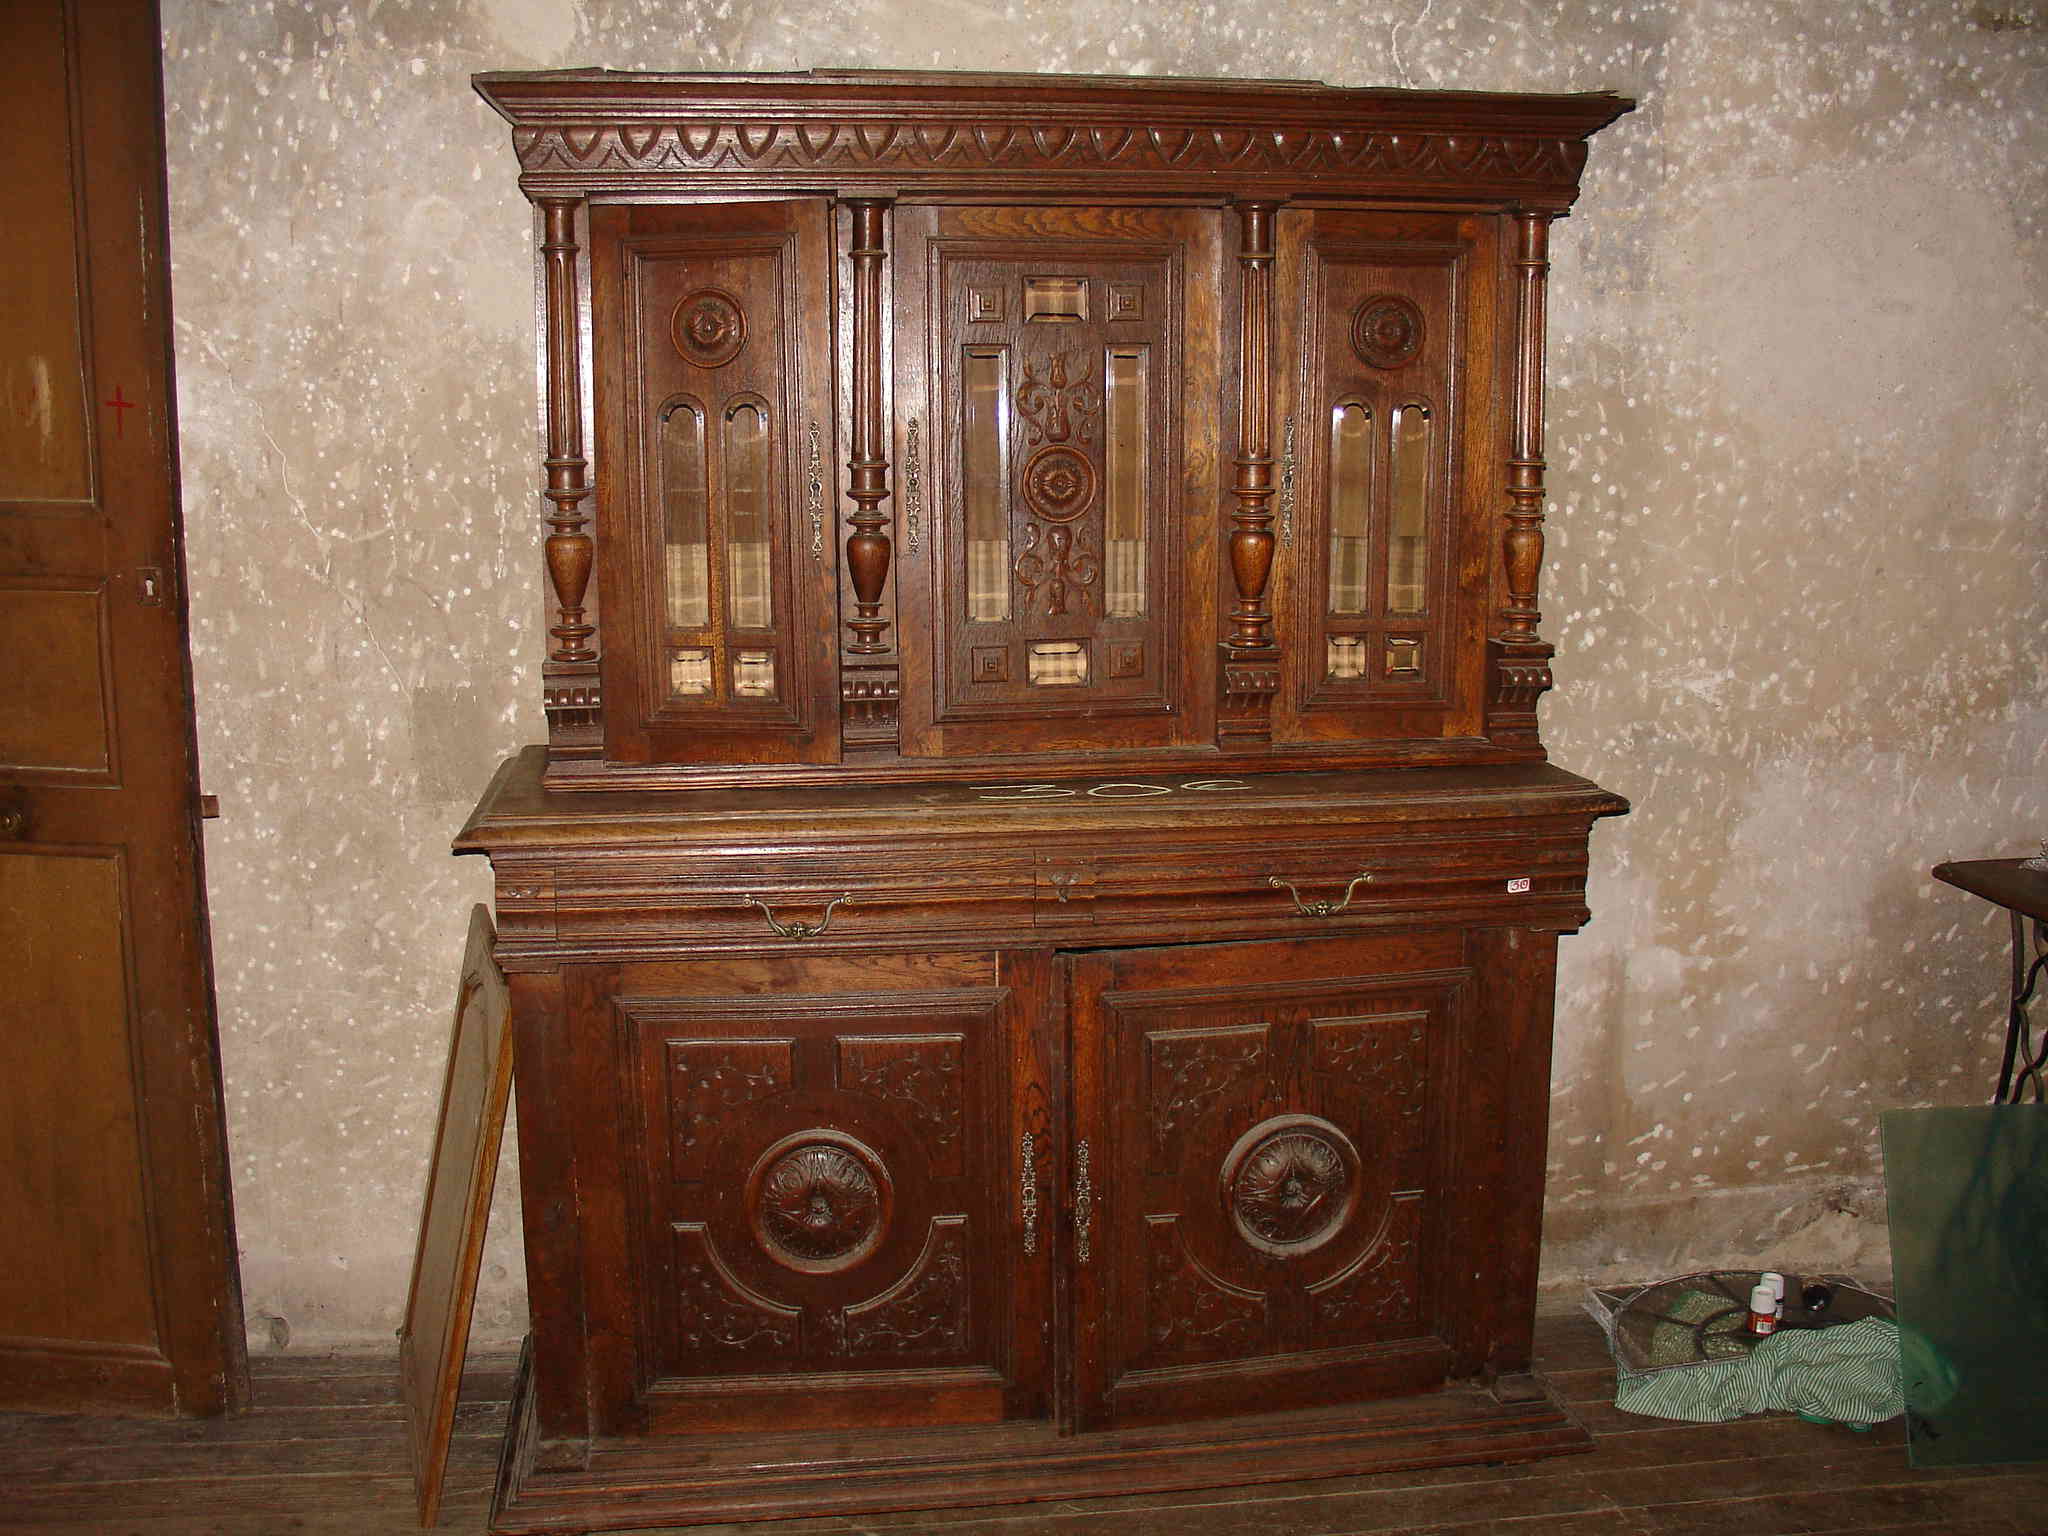
Three years later in 2014 we find ourselves with time to do some internal finishing and a french "buffet" dresser which was purchased for 30 Euro is to
become the basis for the vardo cupboards. The price was low because someone had kicked the bottom doors off their hinges and the middle
section was missing but this is unimportant as we intend to completely cannibalise it .
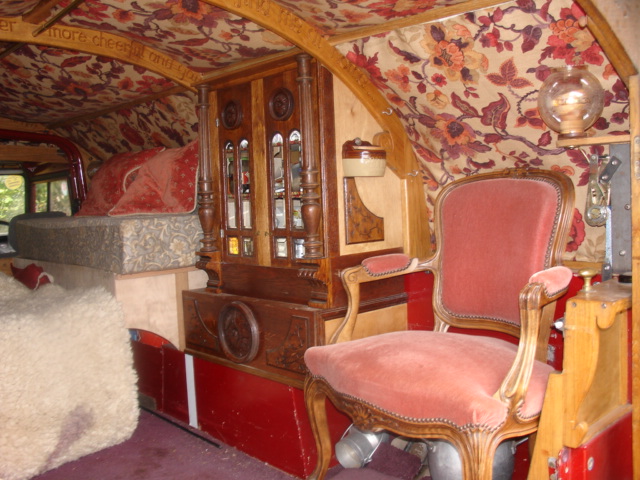
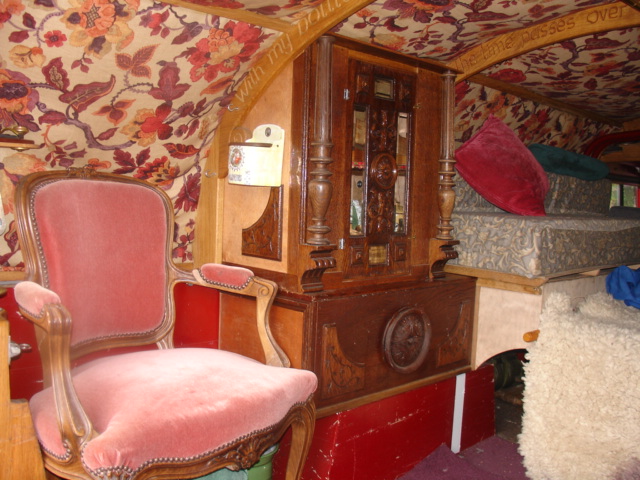
Various parts were re assembled to make the cupboard bases
which are fixed in to the body of the vehicle and which house the two burner cooker and the kitchen sink with water tank and manual pump.
The water tank is a stainless steel milk churn which nests in the nearside wheel arch. above the bases are two cupboards which rise and fall with the roof.
When the roof is down the cupoards meet the bases and hide the sink and cooker but when the roof rises they are exposed with a window behind each,
this is a really nice touch. the whole is finished off with a pair of LouisX1V chairs which just fit in between the cupboards and the tailgate, ideal for
having a cuppa while chatting to passers by.
|