RETURN TO M3W HOME PAGE

DETAILS OF THE WORK I CARRY OUT IN MY LANCASTER WORKSHOPS


If you wish to discuss any of my work or get a quotation please contact me via the button below.


contact

The Cush drive upgrades


A full upgrade, fitted in my workshop, will provide the following advantages :-

1 An O ring seal for the hub / crankshaft, in place of the original silicone sealant.

2/ A new crankcase seal fitted to the correct size and surface finish on the hub.

3/ An alloy steel splined hub hand fitted to the crankshaft. This reinforces the crankshaft and will withstand being removed and replaced for future maintenance.

4/ An intermediate bearing mated to a stub shaft to withstand the sideways forces introduced by the wedging action of the inserts in the Centa coupling.

5/ A reconfigured inner rotor for the Centa coupling to facilitate quick changing of the inserts.

6/ A bearing retainer sleeve to secure the counter shaft bearing

7/ Improved design fixings for the alternator rotor and flywheel back plate.

8/ An access hole in the bell housing to facilitate quick changing of the inserts.

9/ A heavier duty clutch friction plate.

10/ A new spigot bearing

The above advantages can be realised whether you choose an upgraded Centa unit or my Bleazey Cush drive

The Bleazey Cush drive has all of the improvements built in at time of manufacture which is a more professional, engineering approach than a modified original.


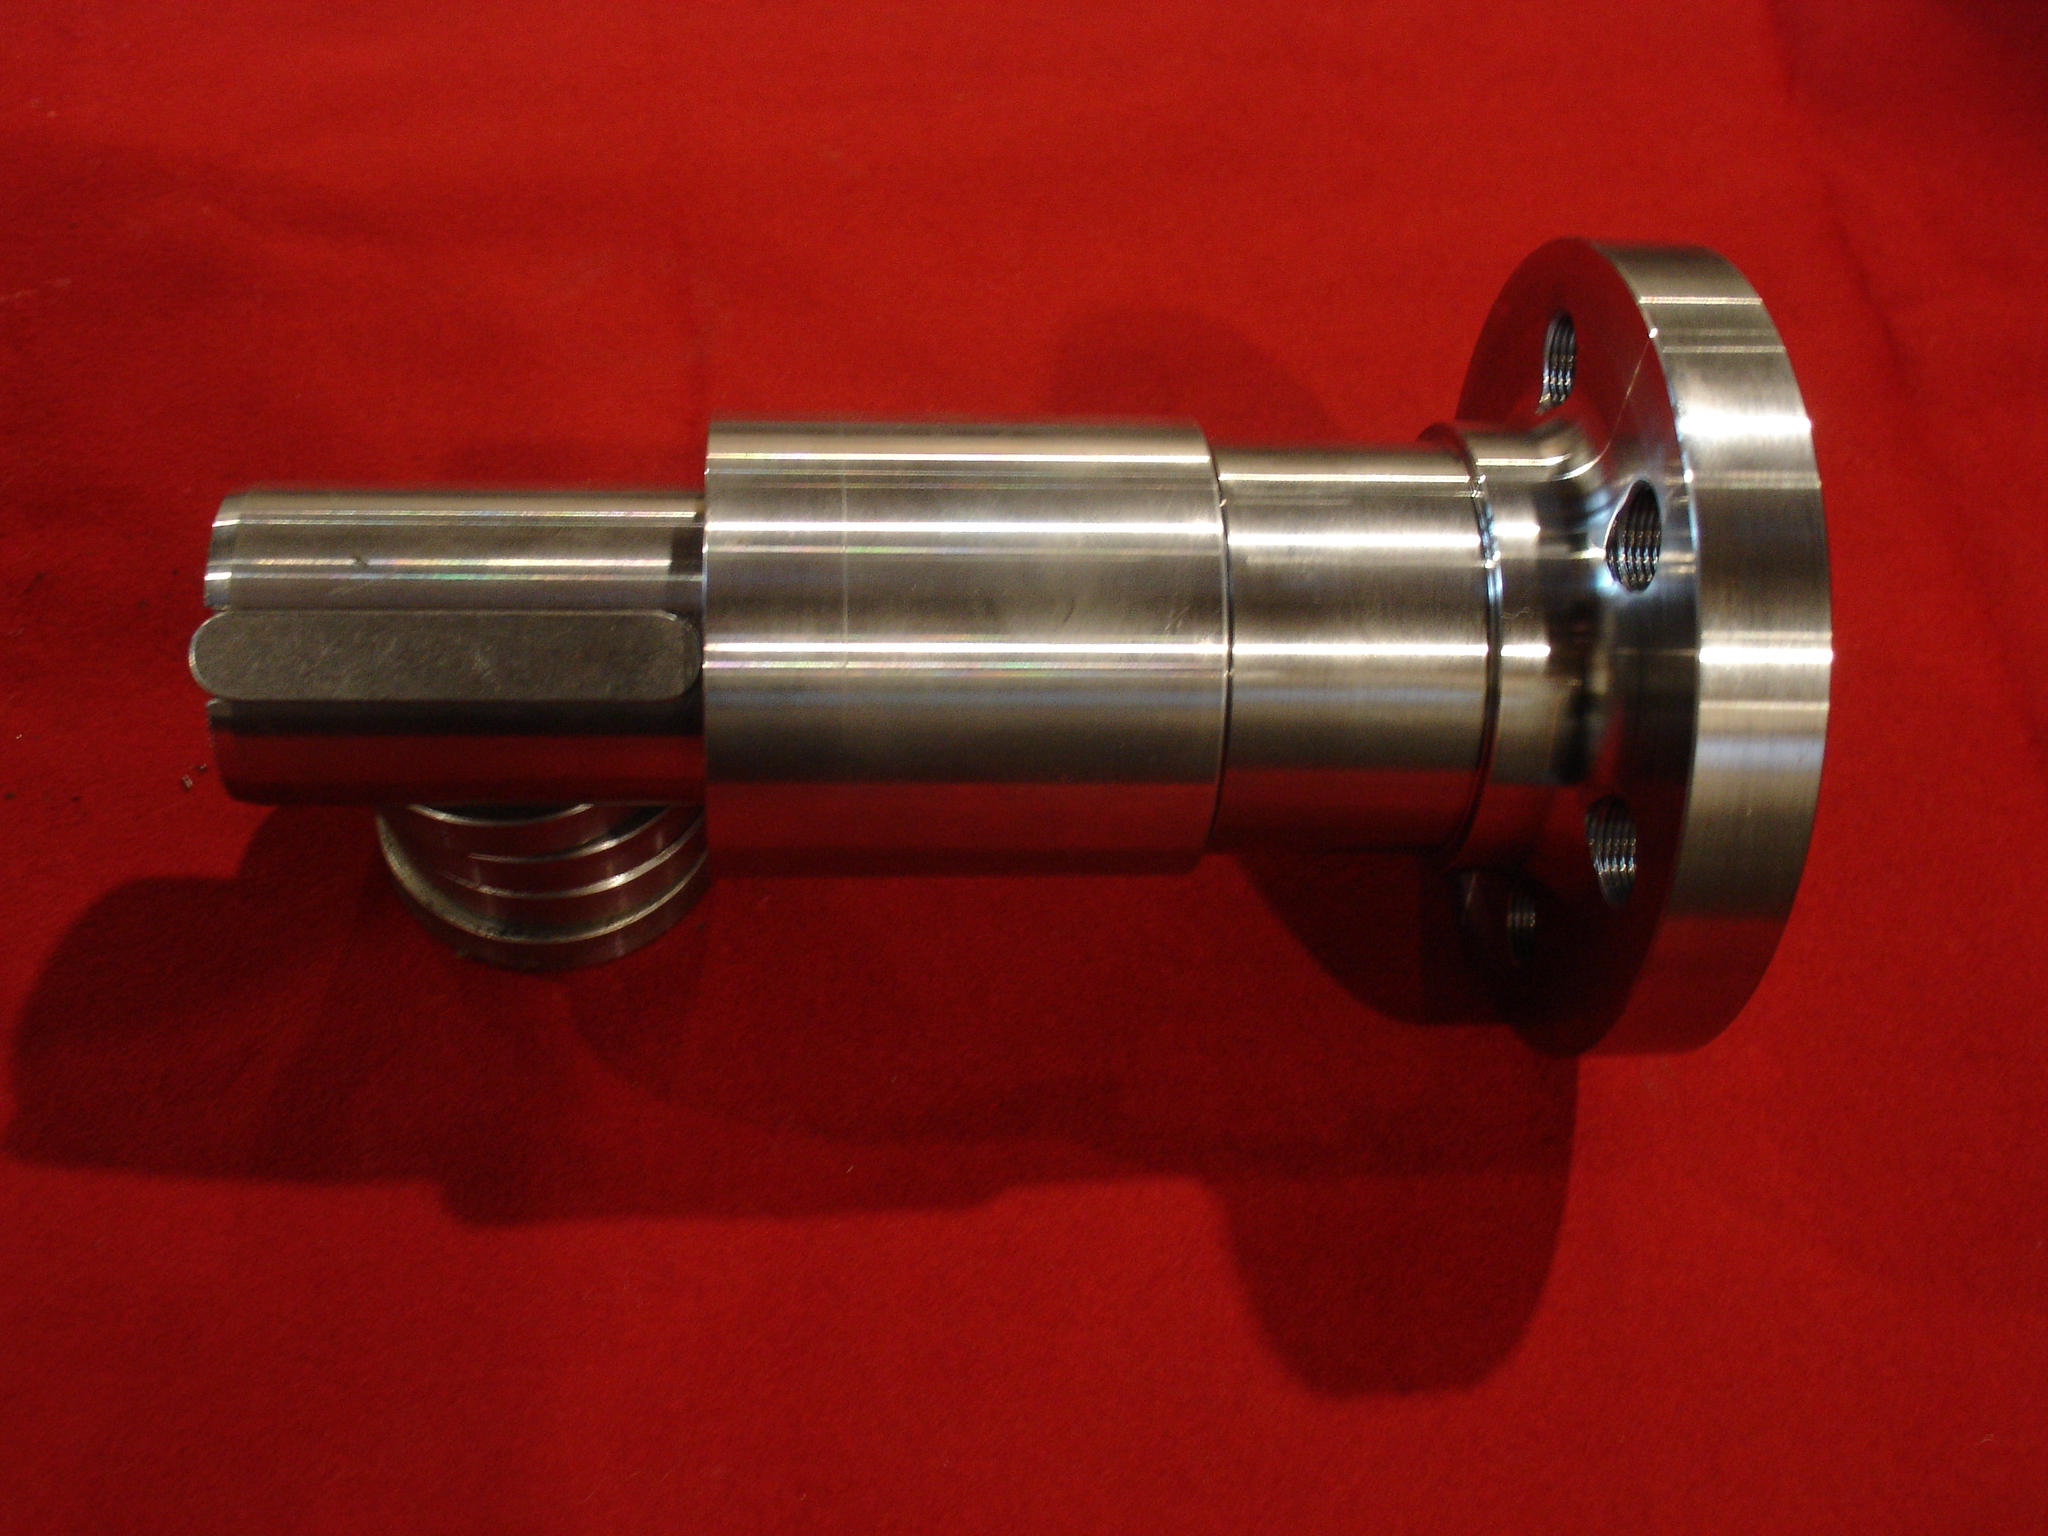
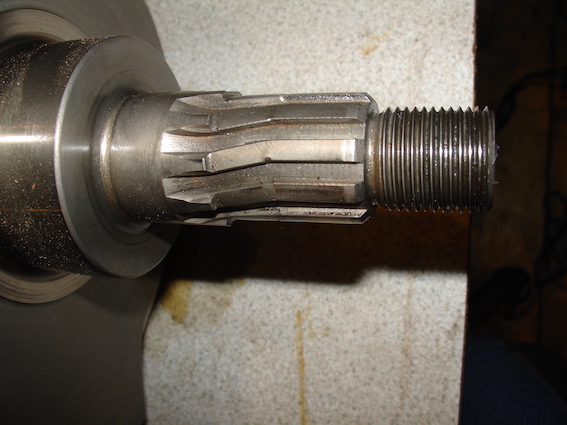
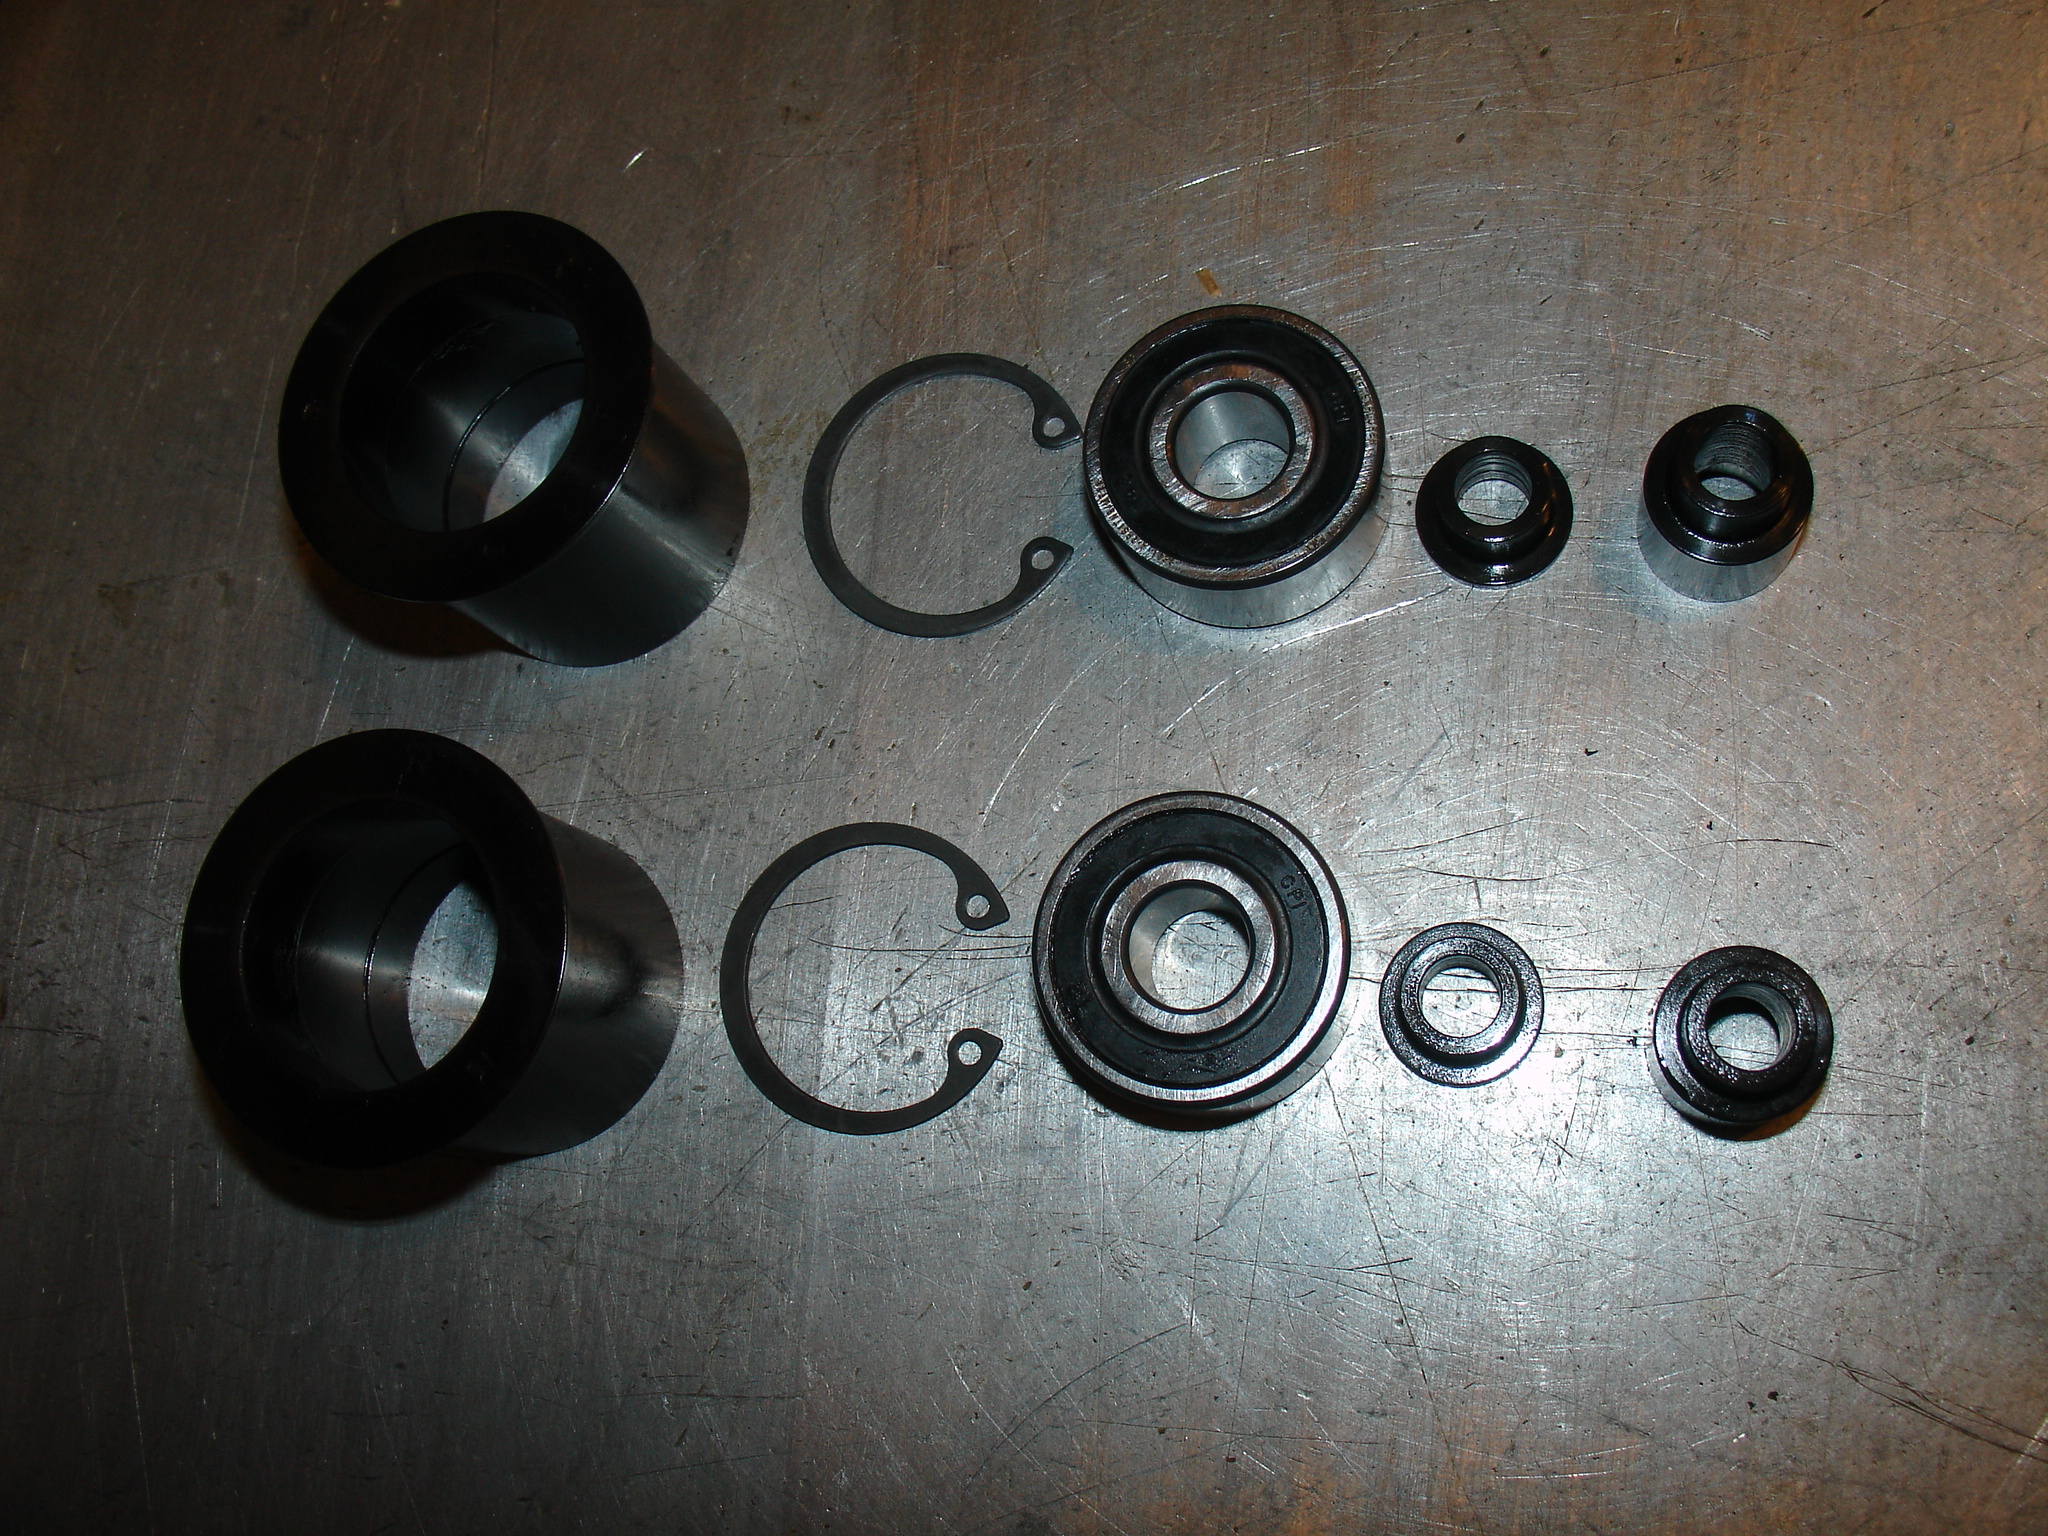
The picture above shows the bearing retainer sleeve in position. The sleeve holds the bearing firmly in place on the shaft - without such security there is a chance that the bearing will fret on the shaft eventually destroying it.

I prefer to fit the splined hub to the crankshaft in my workshops but if you feel that you have the skills to carry this out yourself then please get in touch to discuss the process. I must point out that I no longer supply an "off the shelf" fit - the hub you receive will be undersize and must be filed out to achieve a tight fit on the flanks of the splines.

The process of hand fitting can be seen here :-

Morgan 3 wheeler workshop

Please subscribe to my channel and go to playlists where you will find the videos categorised.


THE TROUBLE WITH CRANKSHAFTS!


Much research has brought me to the conclusion that using a tight fitting, splined driving joint is a very poor design choice. When a gauge or hub are tried on the shaft, if one spline is slightly too big or out of position then neither a gauge nor a hub will go on even though the rest of the shaft may be undersize - a nonsensical situation which can not possibly result in good sizing of the shaft. This will also frustrate the efforts of the motor fitter who may think that a hub is a tight fit even though 90% of it is loose. I also noted that some of the shafts had been hardened by the nitriding process but the large majority of them had not. All of which results in a shaft that may be undersize and is not of sufficient hardness to resist wear. The only way to ensure success turns out to be the return to my original technique of custom hand fitting of the unit..

I realise that this creates problems for overseas customers who would normally buy on line and fit DIY fashion at home. It would be good to find someone willing to do the hand fitting remotely but difficult to find the right man from here. I am, of course, happy to do the fitting here in my Lancaster workshops.

It is tempting to carry out the quick change modifications and leave the splined crankshaft fit undisturbed and therefore not fit the intermediate support bearing or the alloy steel splined hub. Such a modification will only offer the "gimmick" of the quick change but does not address the more important issues of later crankshaft failure. I do not recommend this "half measure" nor will I carry out such limited modifications in my workshops.

Please read on if you want to understand what is a very complex problem.

Further research has led me to believe that the original Centa hub is also fitted using questionable engineering practise. All of the hubs I have examined - and there have been many, are of soft material and an extremely poor fit. (See the picture below)


Morgan three wheeler


An original Centa rotor fitted to a splined crankshaft and back lit to show the minimal amount of contact
( there should be no light showing).
this came from a new 2021 machine pre delivery - zero miles on the clock!


I conclude that the soft material is made undersize where it touches and that it is pulled on to the shaft maybe with an hydraulic puller, deforming the metal to create a fit of sorts. This, of course means that once the fit is disturbed, it will fail because the tightness is lost due to low elasticity of the metal. Some of my early customers suffered this failure and it is why I developed the alloy steel hub in the first place. The other obvious failing is that this fit is not likely to locate the rotor accurately on the shaft resulting in vibration in machines where the rotor is not running true.

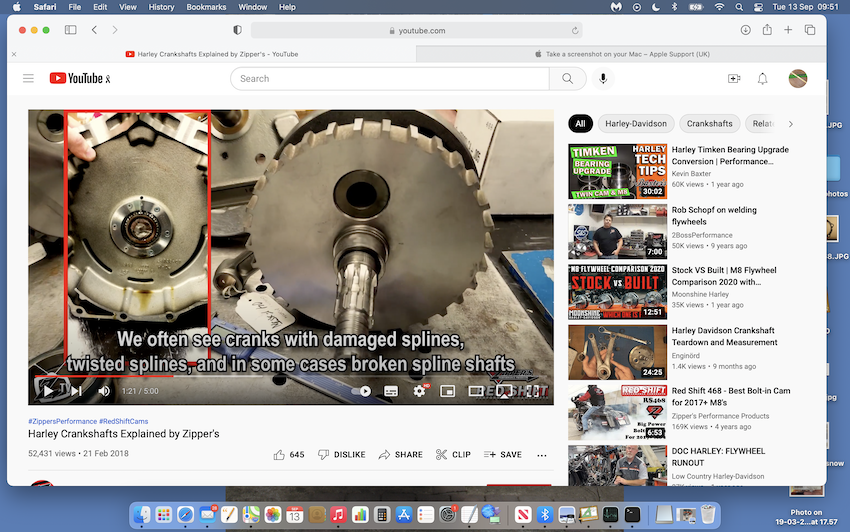
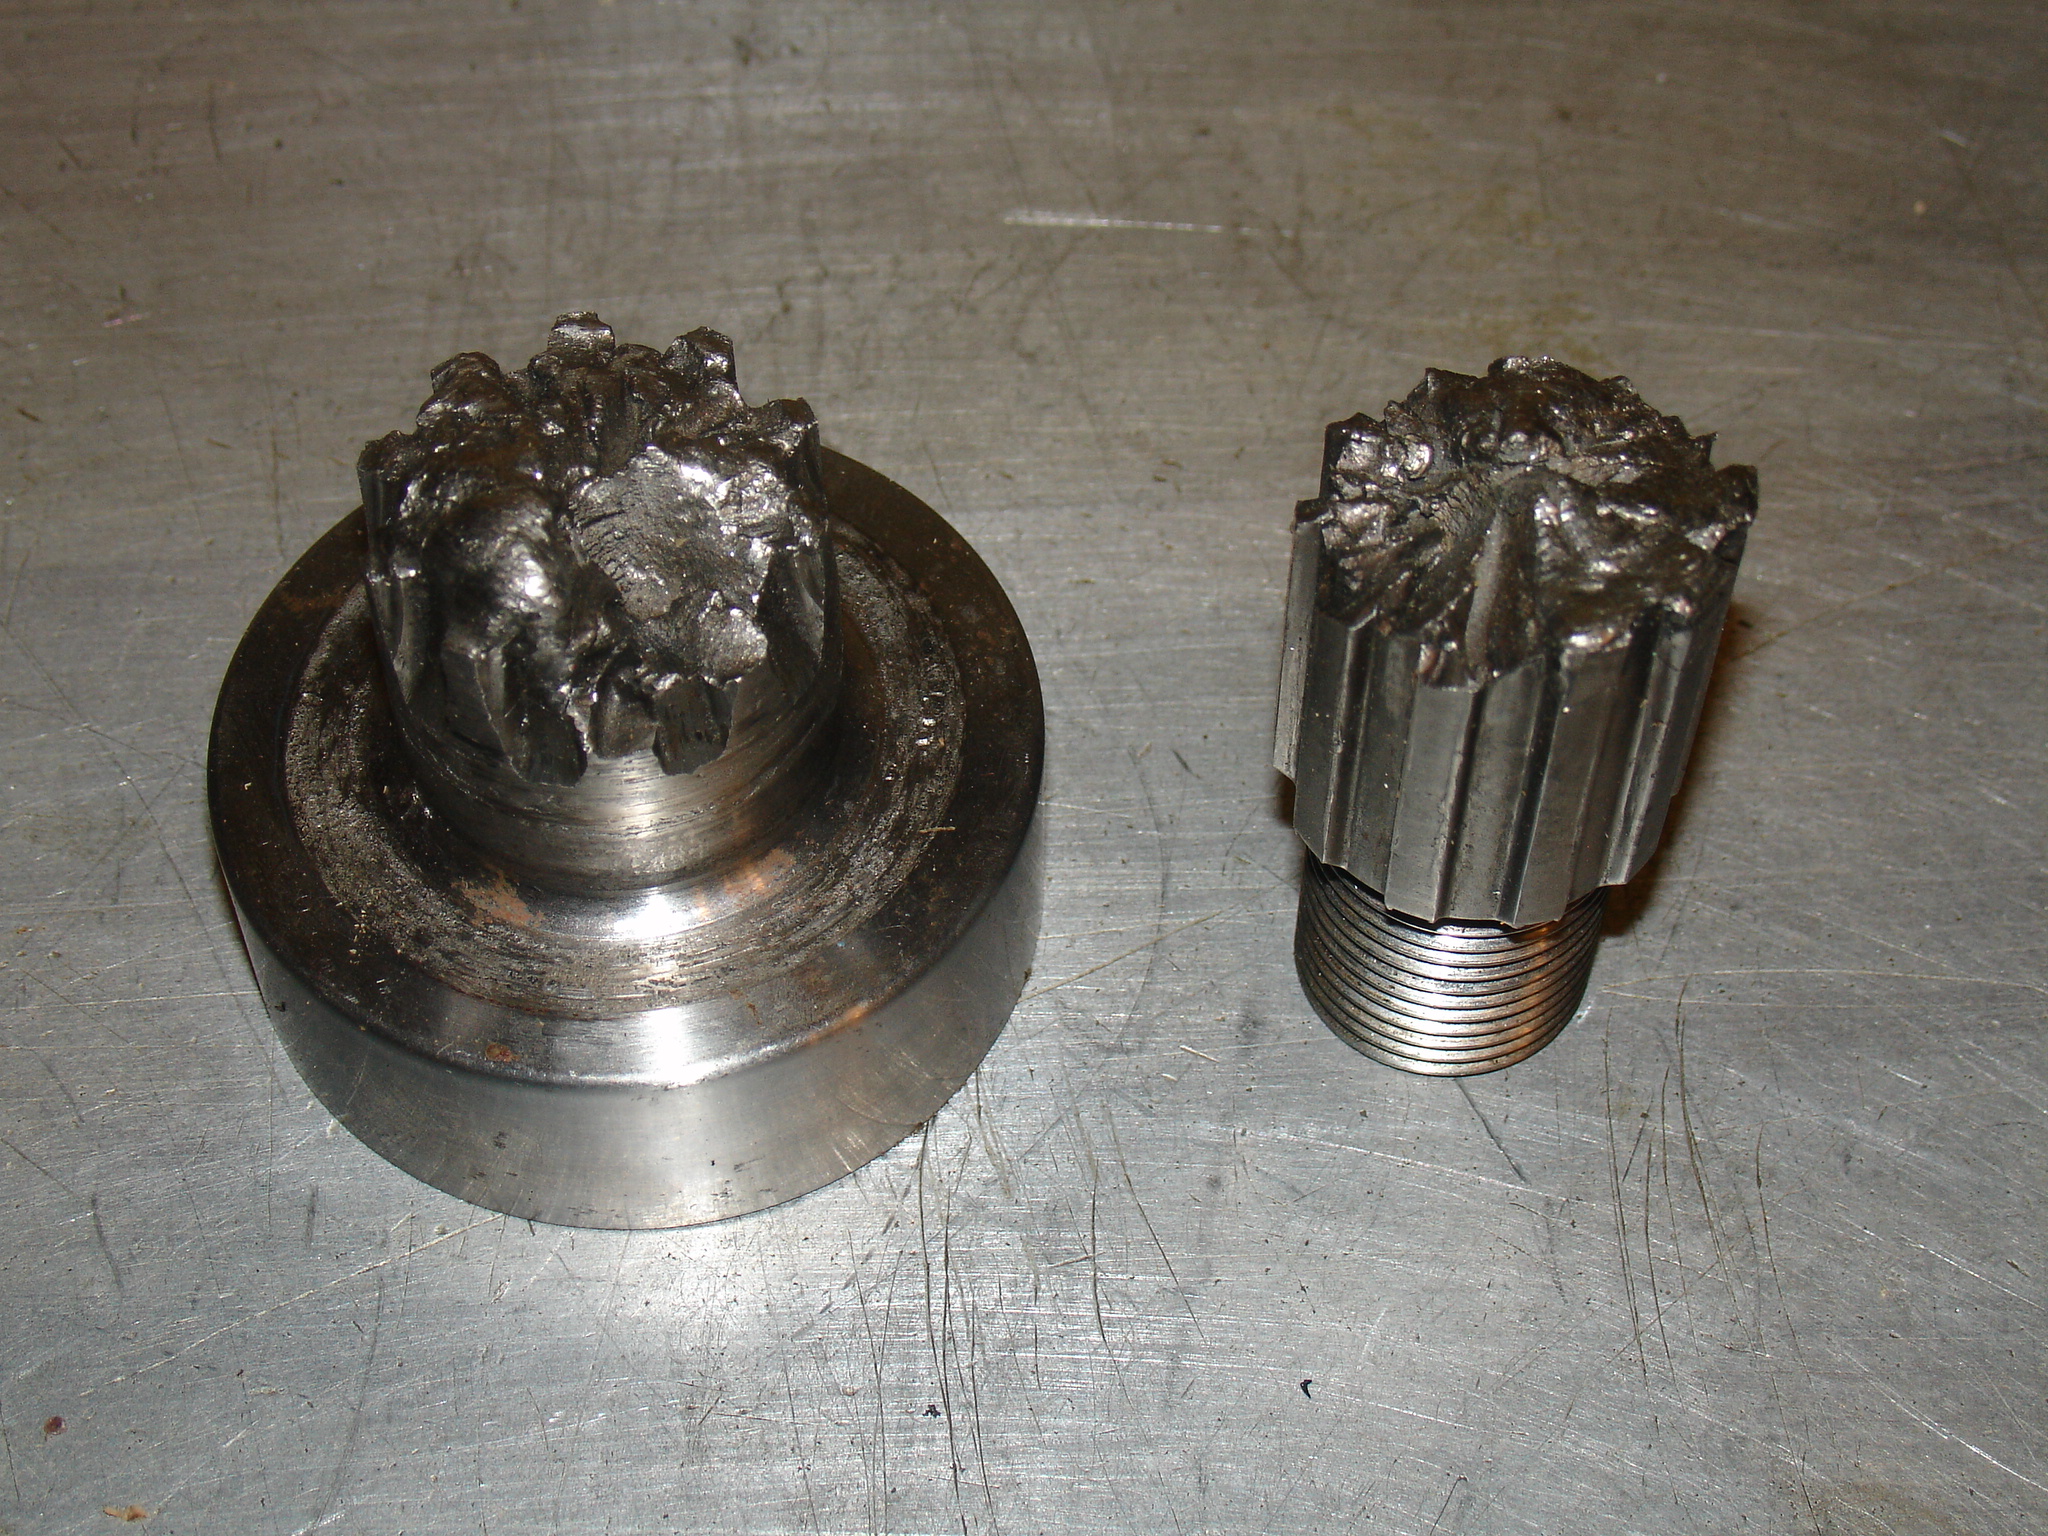
I have had to carry out quite a few repairs to worn, twisted and broken crankshafts and it seems that Harley Davidson engines with identical crankshafts suffer similar problems so I envisage more of this work in the future. Witness this screen shot below - Thanks to Zippers performance for permission to use this. https://www.zippersperformance.com


Morgan three wheeler


This seems to be a universal problem which may haunt us for some time to come


Worn shafts are recovered by using an undersized hub, hand fitted to the shaft splines - I carry three increments of undersize hub, on the shelf.

Twisted and broken shafts have to be repaired by grafting a new shaft in to the crank web.

Morgan three wheeler


Twisted cranks (above) are usually the result of having had the original Harley style compensator fitted for too long


Sometimes the stresses set up in the shaft at the end of the splines result in this!

For customers with serious crankshaft failure, like those pictured above, I produce a shaft with the drive side main bearing incorporated which gives the opportunity to use a large diameter flange for fixing to the web. I then shrink fit the shaft in the web and stitch bolt the flange. I use a round shaft, slightly bigger in diameter than the original spline major diameter, with a single feather key - just as strong as splines and easy, with conventional workshop grade measuring equipment, to achieve a good interference fit for both shaft and key - I fit the key on both side and top faces. All cheaper than having a new shaft fitted and as spares become more difficult to source this may be the best way to salvage an otherwise scrap engine. I keep all the required gaskets and seals on the shelf for the subsequent engine rebuild.


Morgan three wheeler


A crankshaft repaired after complete shearing of the drive shaft


RETURN TO SERVICE PAGE


The Bevel Box Mounting Upgrades


Bevel Box Mounting kit contents :-

1/ The rear lower mounting clamp.

2/ The front mounting clamp with the top plate fitted - you can see the rectangular handbrake/fuel pipe cut out.

3/ The top mounting with the jacking screw in place.

4/ The replacement bolts for the handbrake assembly.

The kit replaces the factory fitted NVH kit - if you do not have the NVH kit installed then you do not need my upgrade.


Have you got the NVH kit? look here :-

Morgan 3 wheeler workshop

Instructions for fitting the bevel box mounting kit can be seen here :-

Morgan 3 wheeler workshop

Please subscribe to my channel and go to playlists where you will find the videos categorised.


RETURN TO SERVICE PAGE


In Depth Servicing

Ideally carried out while fitting the bevel box mounting kit or the chain drive conversion, there are several points which can be addressed.

1/ The swinging arm bearings are protected from atmospheric contamination by the insertion of a plastic table leg foot (in my opinion a pathetic design) and to make things worse the nearside one was left out at assembly on earlier models because there is not enough room between the cap and the bevel box shaft. This results in destruction of the bearing in a very short time. The solution, on later models is to turn down the head of the plastic cap to allow deeper insertion and therefore not interfering with the shaft. This should be carried out as soon as possible on cars with no cap in place. At the same time the bearings must be inspected for damage replaced if necessary and GREASED! - something else which is neglected on original assembly.

2/. The most vulnerable part of the car from the point of view of corrosion is the swinging arm and most of the cars I examine have significant rust in this area. My solution is to strip the "corrosion resistant coating" and paint the thing properly using chip resistant tractor paint. I also like to inject linseed oil in to the tubes and then seal them from atmosphere with a marine mastic. Linseed oil is ideal as it does not set or cure but it oxidises which means any oxygen inside the tubes is gobbled up by the oil - no oxygen = no rust.

3/ I usually find that the prop shaft bearings are not greased on original assembly and all I get out when I purge them is air. The grease nipples are difficult to get a gun on and this means removal of the shaft in order to grease the bearings.

4/ The rear brake master cylinder is vulnerable to corrosion and many people are surprised to find that the rear brake has been jammed solid for some time when the MOT test shows up a problem. Inspection and possibly, replacement of the slave cylinder is an important service item. the cleaned or new cylinder can be protected by application of red rubber grease under the rubber boots - this helps to avoid future failures due to rusting up of the pistons.

5/ The rear wheel bearing installation is of poor design. There are two ball bearings and it is impossible to get the length of the spacer tube exactly the same length as the distance between the shoulders in the hub. The solution to this was to make the spacer tube a bit too long and fill the gap with loctite. the best improvement I can offer is to check and make the tube as close as possible to the correct length and replace the bearings with better quality ones. A complete hub redesign is required but I have not managed to do this yet. A clonk from the rear end when entering a corner is often the first sign of the loctite failing and a check can be made by raising the rear wheel clear of the ground and trying to move it left and right between the swinging arms - you will feel movement And hear a clonk. If you have this problem it should be addressed quickly or the bearings will fret and destroy the bores in the hub.

RETURN TO SERVICE PAGE


The Chain Drive Conversion

Let me say, at the outset, that there is nothing intrinsically wrong with toothed belt drives - they are almost as efficient as a chain and will outlast a chain. However, the swinging arm set up in the Morgan three wheeler is of somewhat old fashioned design and has limitations. A toothed belt requires perfect alignment of the two sprockets on which it runs and this is not delivered by the adjustable rear wheel spindle nor by the NVH kit mountings. A poorly adjusted belt will damage itself, the sprocket guide plates and is noisy. Should a belt fail then repair work includes removal of the swinging arm, an expensive procedure and not practical other than in a well equipped workshop. The belt itself is difficult to source and very expensive.

A modern, sealed chain, with some minor maintenance carried out will last for 20.00 miles plus and the matching sprockets will last for 40,000 miles. A chain can be purchased from and fitted, by any motorcycle workshop in the world, for around £100 and you will be back on the road in half an hour or so.

A well adjusted chain is much quieter than a poorly adjusted belt and as I have already pointed out a well adjusted belt is almost impossible to achieve in the Morgan three wheeler.


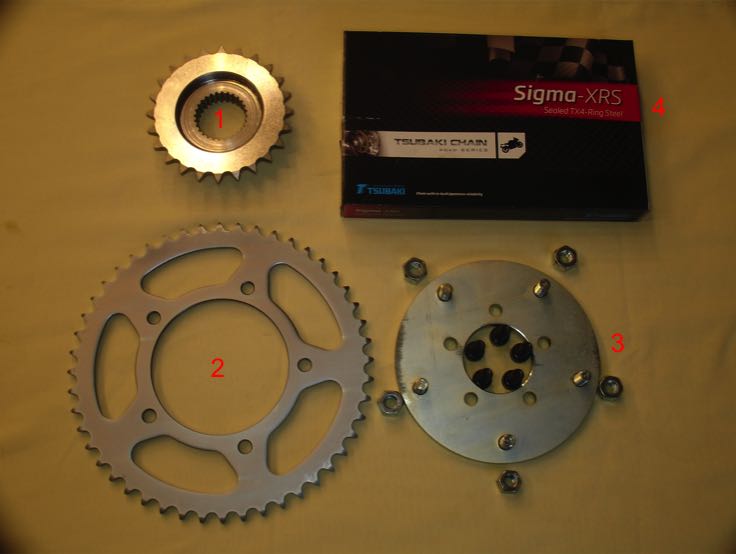
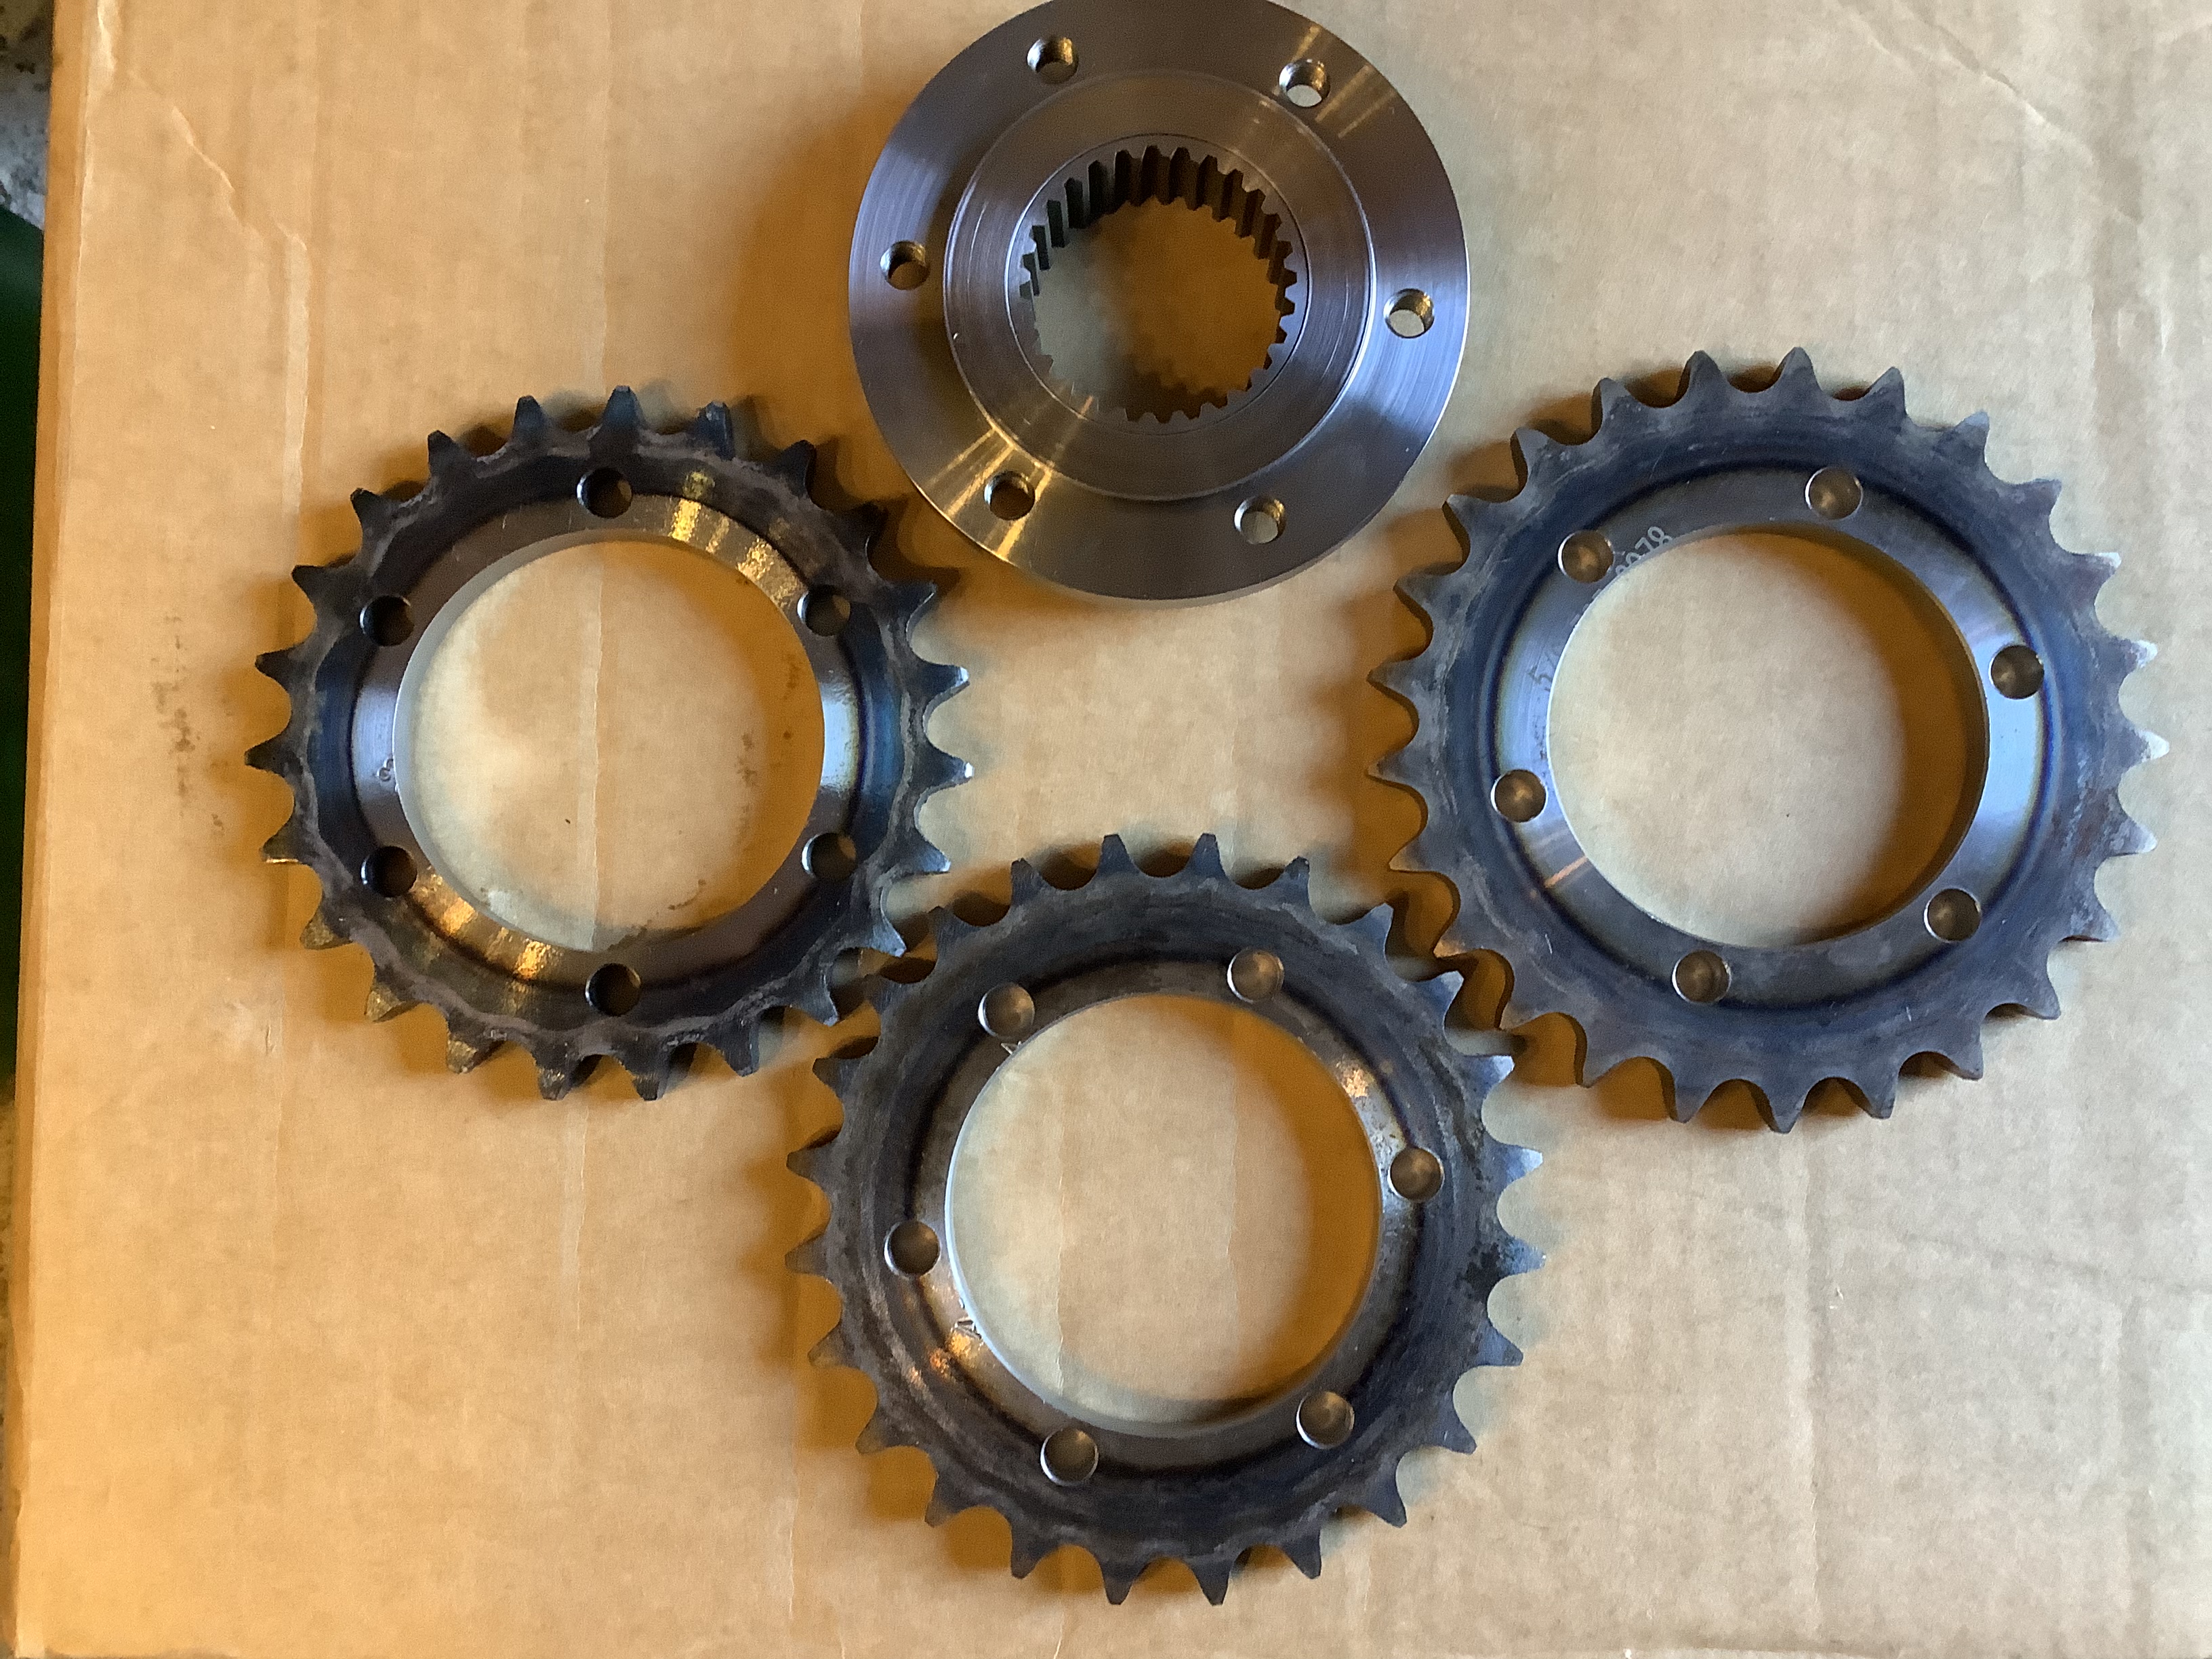
The chain drive kit contents :-

1/ The alloy steel final drive sprocket splined to fit the bevel box output shaft.

2/ The rear wheel sprocket.

3/ The rear wheel sprocket carrier assembly with all fixings.

4/ Tsubaki Xring sealed chain supplied with a rivet joining link.


The latest arrival


A two piece front sprocket which allows for 23 / 24 / 25 tooth sprockets all of which now have induction hardened teeth for longer life.
24 tooth gives the standard, factory ratio.
Changing sprockets is now cheaper and quicker but still requires removal of the bevel box.

RETURN TO SERVICE PAGE


The Heavy Duty Timing Belt Idler Pulleys


Timing Belt Idler Kit :-

The heavy duty pulleys run on double row angular contact bearings by SKF. the bearings are fitted against an internal shoulder with a circlip to retain them. The wider bearings mean that they are not interchangeable like the originals and therefore I mark them "F" and "R" - front and rear - the front cylinder on the S&S twin is the one on your right as you look at the timing chest.

Full fitting instructions for the timing belt and pulleys can be seen here :- :-

Morgan 3 wheeler workshop

RETURN TO SERVICE PAGE


Refurbished Cylinder Heads


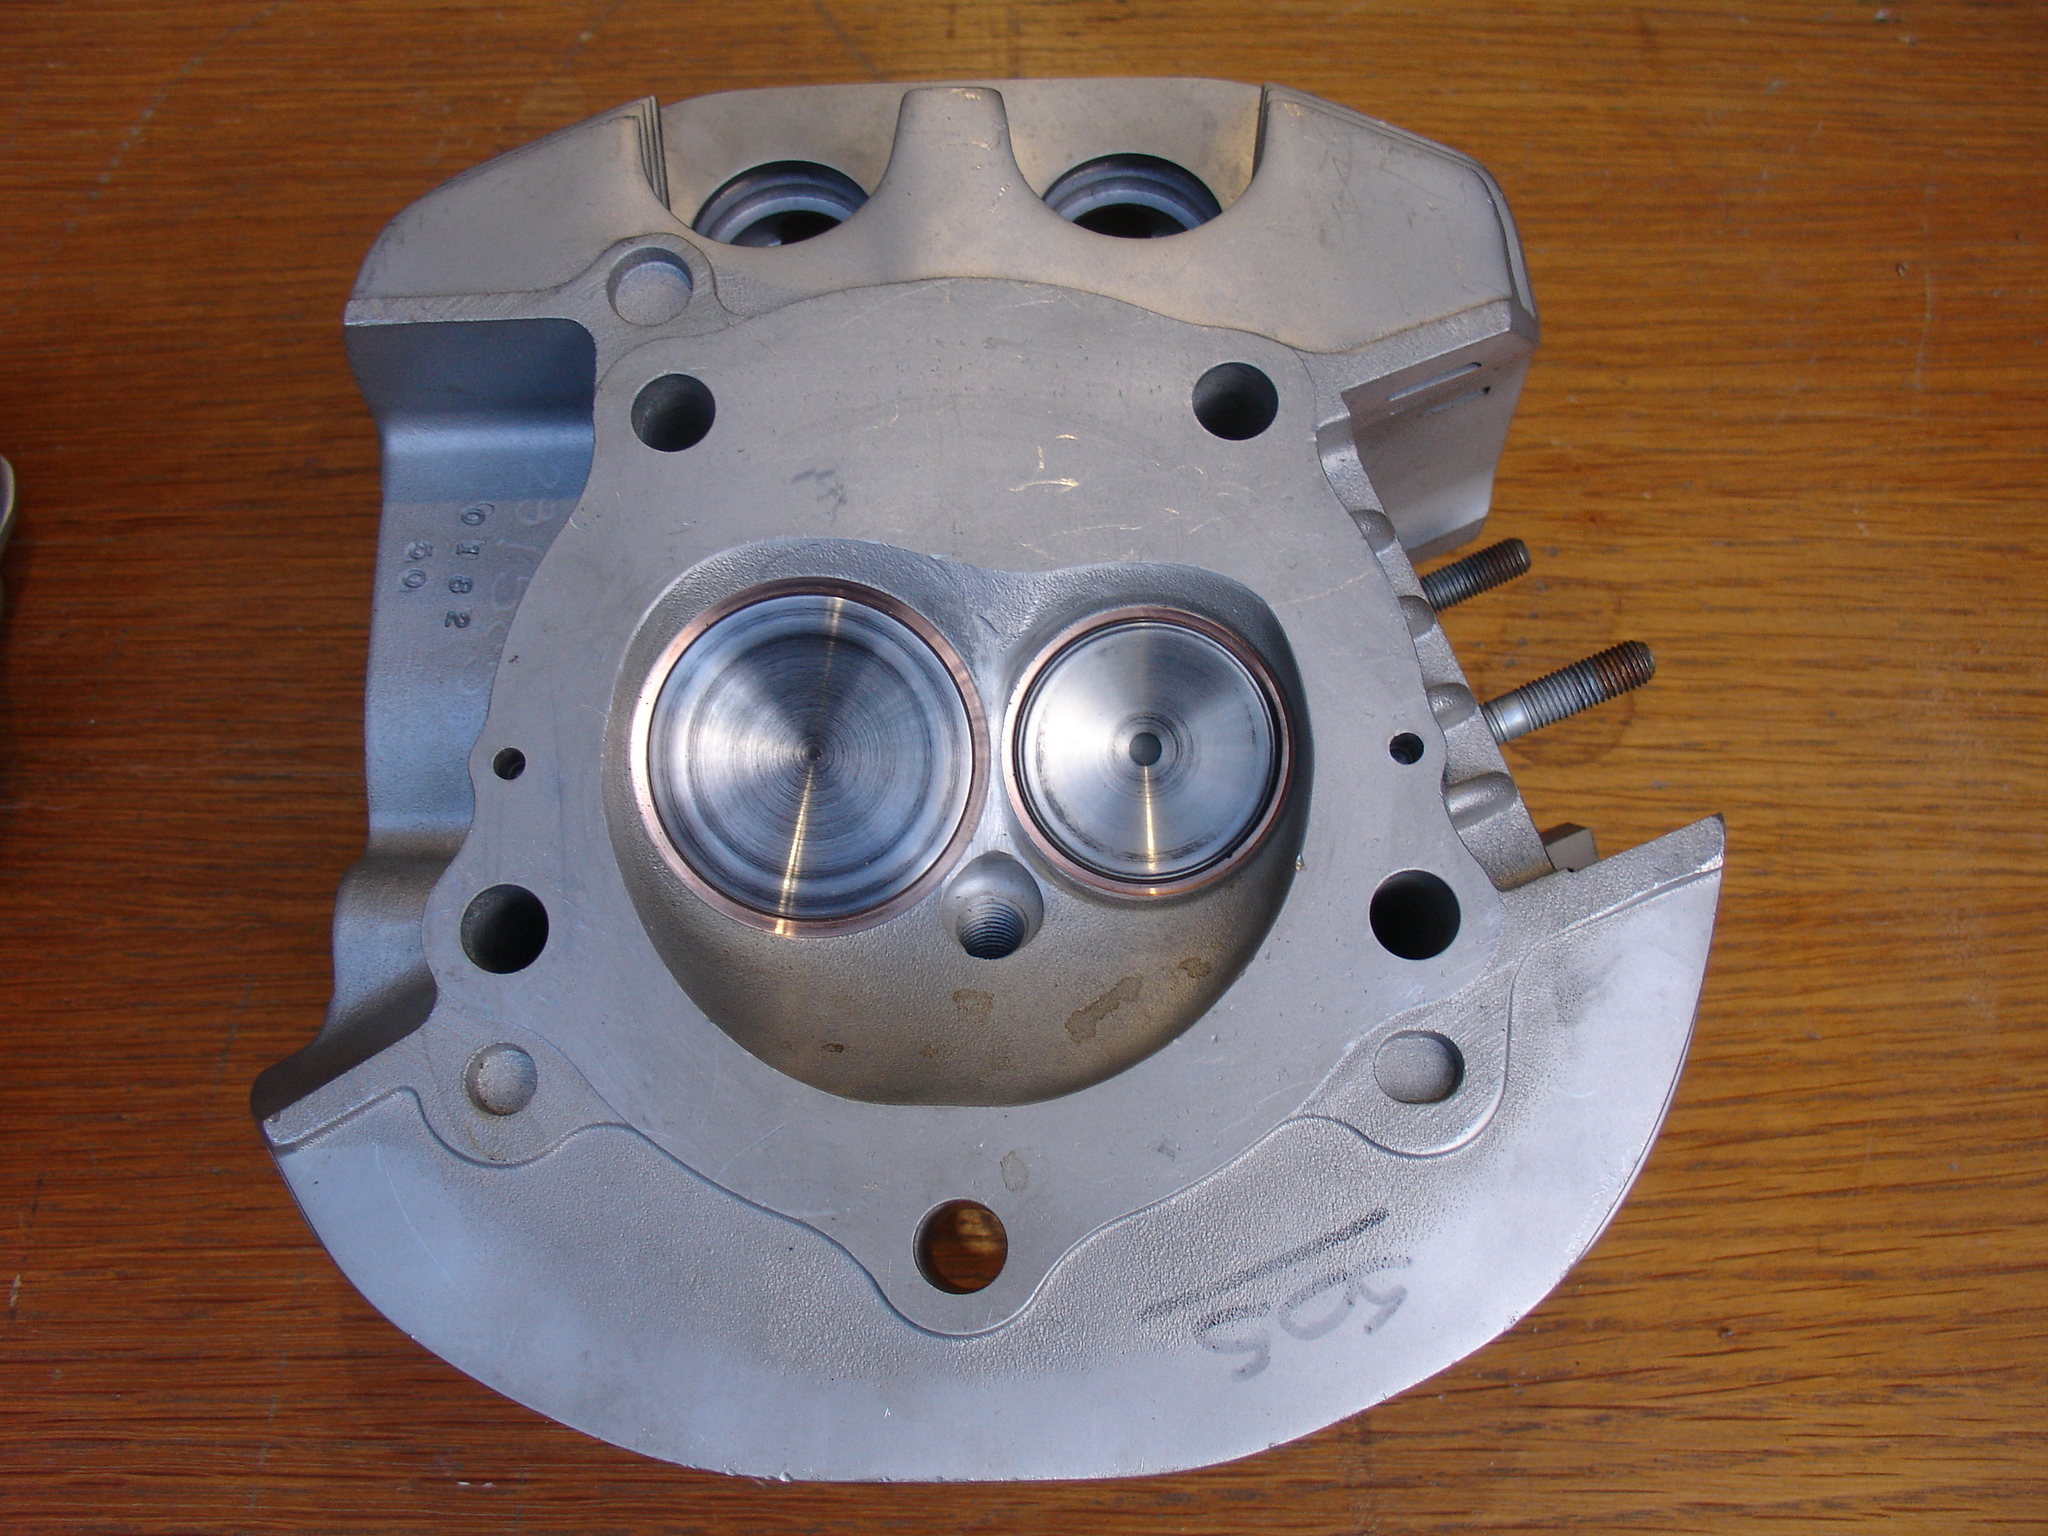
A refurbished head with valves in place. I currently use the original valves, springs and guides cleaned and inspected before refitting.


Cylinder head showing the new silicone bronze valve seats, silicone bronze has a closer coefficient of expansion to aluminium than the original sintered ferrous ones rendering the heads less likely to crack and the seats less likely to come loose. The heads are often cracked between the seats, my refurbished ones have had the cracked area machined out and welded.


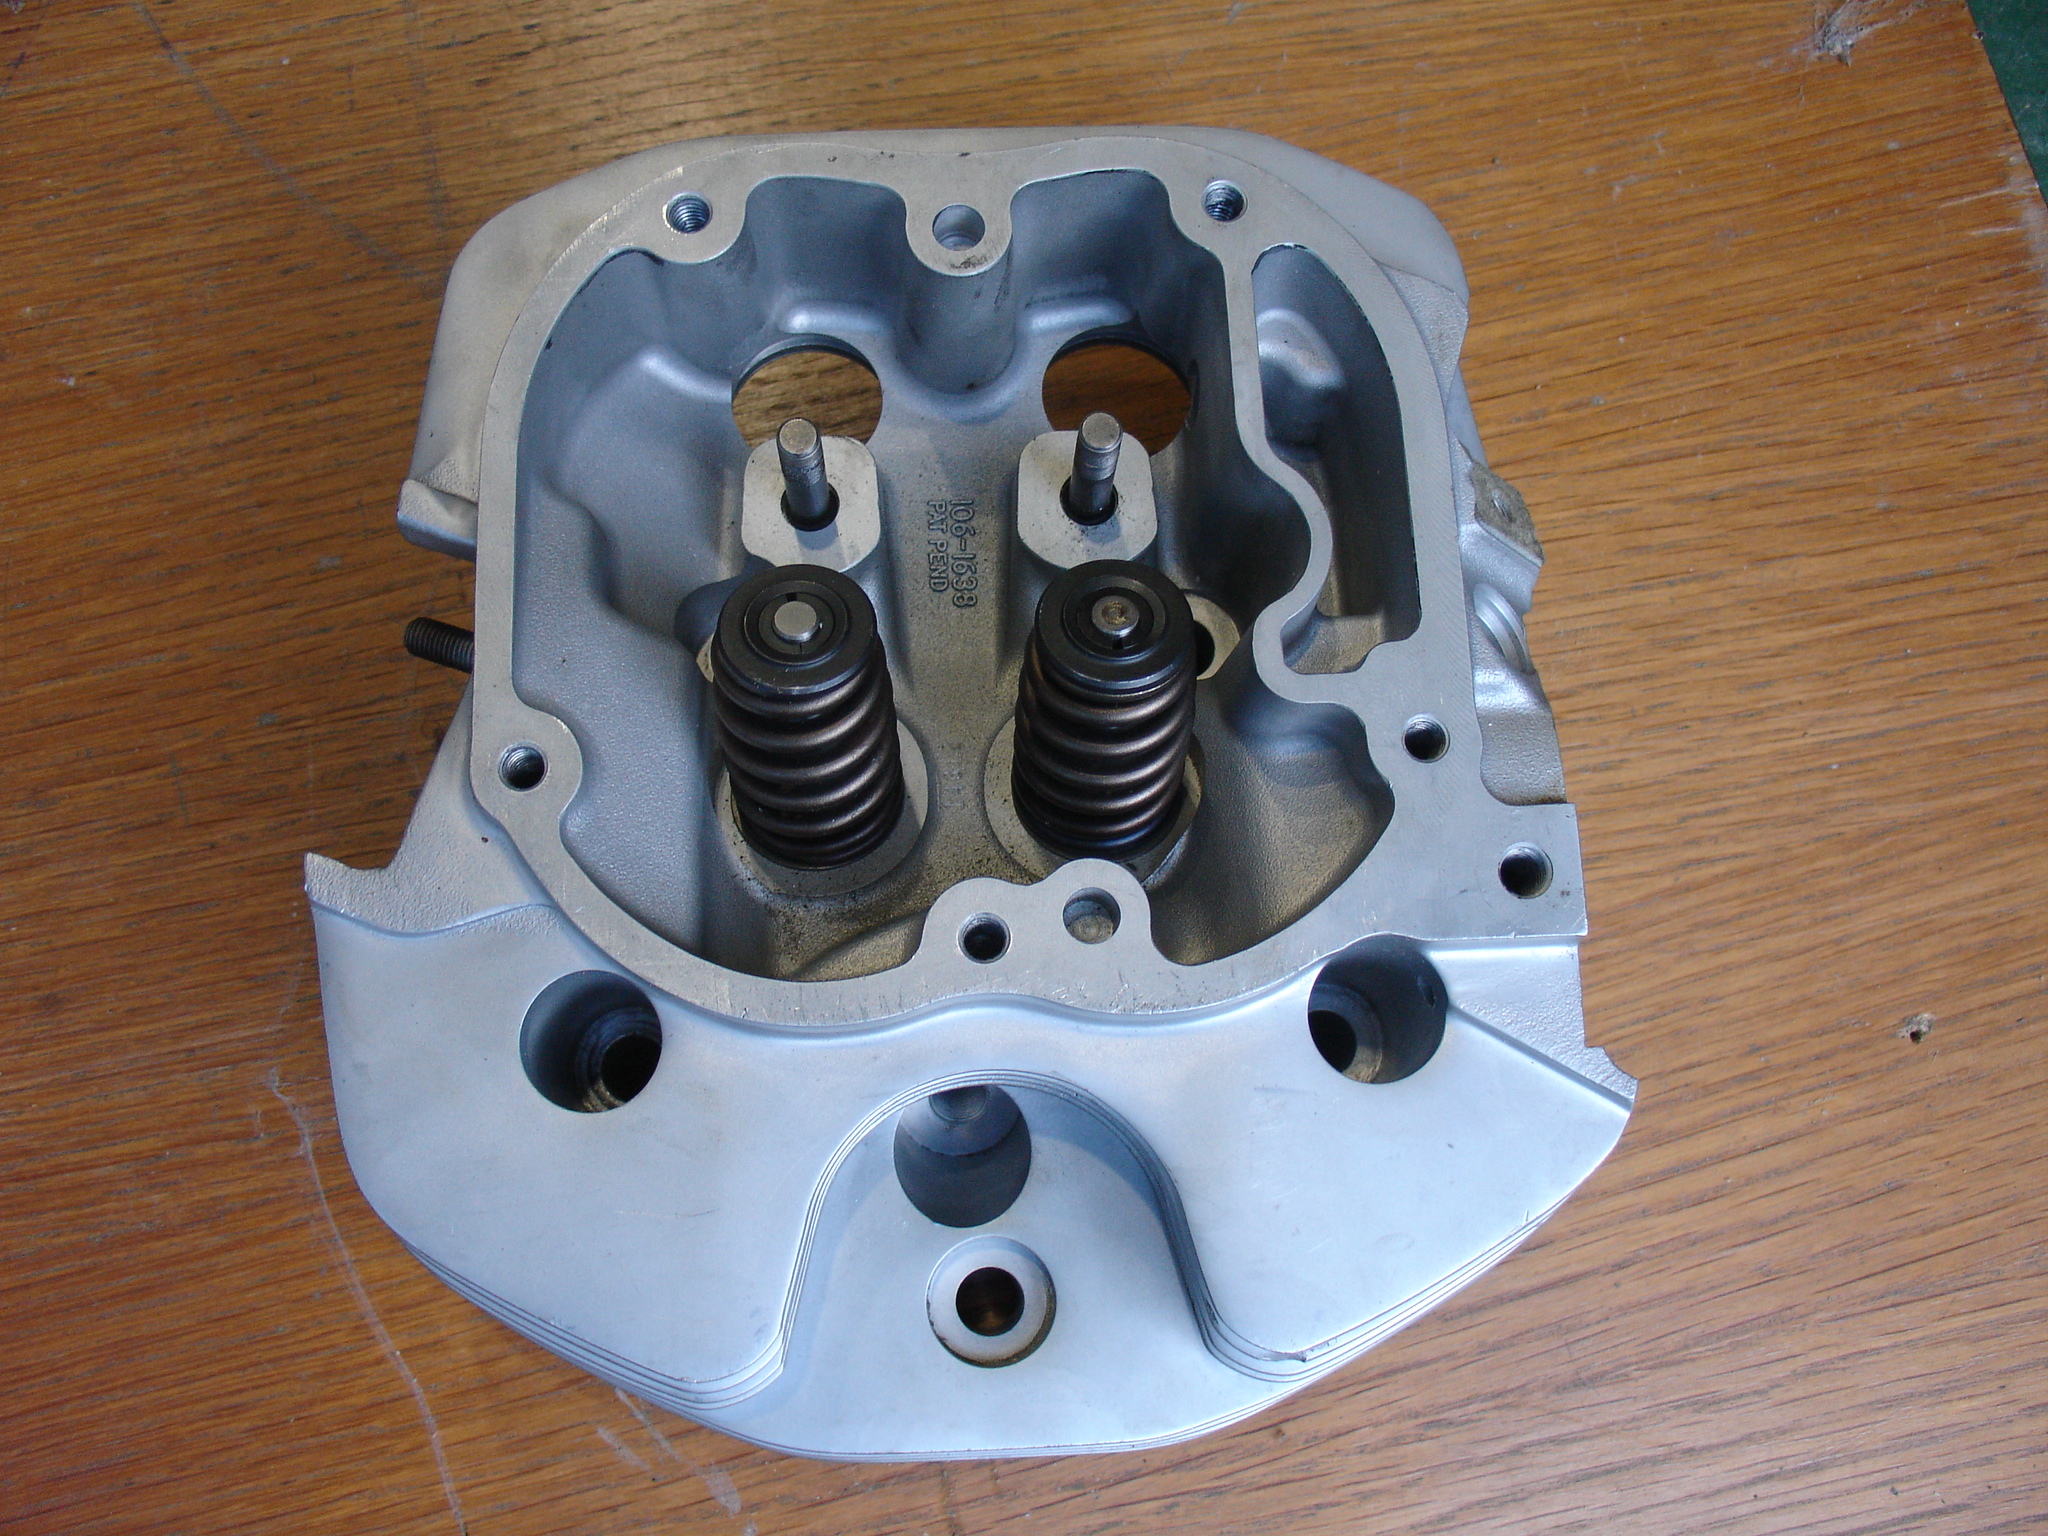
The heads are vapour blasted all over prior to inspection and again after the repair work. They are available as shown (not polished) or sprayed matt black with high temperature heat resistant paint


The heads are available singly or as pairs and can be fitted here in Lancaster by me or purchased, mail order, with gaskets for DIY installation.


Rebored cylinders and matching pistons


Rebored cylinders supplied with oversize pistons complete with rings and gudgeon pins (wrist pins).


The cylinders are available singly or as pairs and can be fitted here in Lancaster by me or purchased, mail order, with gaskets for DIY installation. I can also supply oversize pistons so that you can have your cylinders rebored locally - they come complete with gudgeon (wrist) pins and rings which will need to be gapped to suit your cylinder bore.
The pistons do not have the PTFE coating, like the originals, which seems to wear off very quickly but on the manufacturers recommendation, they have a wider skirt contact area.


RETURN TO SERVICE PAGE


contact


Phil and Claire Bleazey
At The Old Furness Street Stables
LANCASTER
LA1 5QZ

Tel:- 0044 (0)1524 849085


Last Updated November 2022


Morgan three wheeler drive train Morgan three wheeler compensator Morgan three wheeler drive quality Morgan three wheeler bevel box P.G.Bleazey drive train upgrade kit